Can DTS Monaco be used to update the software on the C4/C6 interface itself? No, it requires separate firmware update tools. DTS Monaco, while powerful for diagnostic tasks and car coding, isn’t designed for that specific hardware-level update. DTS-MONACO.EDU.VN is here to help you navigate this and other nuances of automotive diagnostics, ensuring you have the right tools and knowledge for every task. Explore our resources for seamless car coding, ECU programming, and comprehensive vehicle diagnostics, and master the latest in automotive technology with expert guidance.
Contents
- 1. Understanding DTS Monaco and Its Capabilities
- 1.1 What is DTS Monaco?
- 1.2 Key Features of DTS Monaco
- 1.3 Limitations of DTS Monaco
- 2. Updating the C4/C6 Interface Firmware
- 2.1 Why Update C4/C6 Interface Firmware?
- 2.2 Tools Required for Firmware Update
- 2.3 Step-by-Step Guide to Updating Firmware
- 2.4 Common Issues and Troubleshooting
- 3. Setting Up DTS Monaco for Car Coding
- 3.1 Installing DTS Monaco
- 3.2 Configuring DTS Monaco
- 3.3 Creating a Workspace
- 4. Basic Car Coding Procedures with DTS Monaco
- 4.1 Connecting to an ECU
- 4.2 Disabling the Firewall
- 4.3 Modifying Variant Coding
- 4.4 Making Changes Permanent
- 5. Advanced Diagnostic Functions
- 5.1 Reading Fault Codes
- 5.2 Clearing Fault Codes
- 5.3 Live Data Monitoring
- 6. Common Car Coding Projects
- 6.1 Enabling Hidden Features
- 6.2 Customizing Vehicle Settings
- 6.3 Retrofitting Options
- 7. Best Practices for Car Coding
- 7.1 Back Up Original Settings
- 7.2 Use a Stable Power Supply
- 7.3 Follow Instructions Carefully
- 7.4 Research and Understand the Changes
- 7.5 Test Changes Thoroughly
- 8. Resources for Learning DTS Monaco and Car Coding in the USA
- 8.1 Online Courses and Tutorials
- 8.2 Training Centers and Workshops
- 8.3 Online Forums and Communities
- 9. The Role of DTS-MONACO.EDU.VN
- 9.1 Providing Comprehensive Training
- 9.2 Offering Expert Support
- 9.3 Keeping Technicians Updated
- 10. Conclusion: Mastering Car Coding with the Right Tools and Knowledge
- FAQ: Frequently Asked Questions about DTS Monaco and Car Coding
- 1. Can DTS Monaco be used to update the software on the C4/C6 interface itself?
- 2. What is DTS Monaco used for?
- 3. Is DTS Monaco easy to learn for beginners?
- 4. What are SMR-D files in DTS Monaco?
- 5. How do I disable the firewall in DTS Monaco?
- 6. What is variant coding in DTS Monaco?
- 7. How do I make variant coding changes permanent?
- 8. What are some common car coding projects I can do with DTS Monaco?
- 9. What should I do before making any car coding changes?
- 10. Where can I find resources for learning DTS Monaco and car coding in the USA?
1. Understanding DTS Monaco and Its Capabilities
DTS Monaco is a powerful diagnostic and car coding software commonly used in the automotive industry. It allows technicians to perform advanced diagnostics, ECU programming, and variant coding on vehicles, particularly Mercedes-Benz. However, it’s essential to understand its limitations to avoid confusion and potential issues during vehicle maintenance.
1.1 What is DTS Monaco?
DTS Monaco is a diagnostic software used for ECU flashing, car coding, and advanced diagnostics. It provides a user-friendly interface for accessing and modifying various control units within a vehicle. According to Bosch Diagnostics, DTS Monaco is designed for engineers and technicians who need to perform in-depth vehicle analysis and customization.
1.2 Key Features of DTS Monaco
DTS Monaco offers a range of features that make it a valuable tool for automotive technicians:
- ECU Flashing: Reprogramming control units with updated software.
- Car Coding: Modifying vehicle settings and parameters.
- Advanced Diagnostics: Identifying and troubleshooting complex vehicle issues.
- Variant Coding: Customizing vehicle features to specific requirements.
- Data Logging: Recording and analyzing vehicle data for performance evaluation.
1.3 Limitations of DTS Monaco
Despite its extensive capabilities, DTS Monaco has certain limitations:
- Hardware Updates: DTS Monaco cannot be used to update the firmware on the C4/C6 interface itself. This requires specific firmware update tools provided by the interface manufacturer.
- Complexity: The software can be complex for beginners, requiring specialized knowledge and training.
- Risk of Damage: Incorrect usage can potentially damage vehicle ECUs. It’s essential to follow proper procedures and guidelines.
2. Updating the C4/C6 Interface Firmware
The C4/C6 interface is a hardware device used to connect diagnostic software like DTS Monaco to a vehicle’s electronic control units (ECUs). Updating the firmware on this interface is crucial for maintaining compatibility and optimal performance.
2.1 Why Update C4/C6 Interface Firmware?
Updating the firmware on your C4/C6 interface ensures:
- Compatibility: Support for the latest vehicle models and diagnostic protocols.
- Performance: Improved communication speed and stability.
- Bug Fixes: Resolution of known issues and errors.
- New Features: Access to new functionalities and enhancements.
2.2 Tools Required for Firmware Update
To update the firmware on the C4/C6 interface, you need specific tools:
- Firmware Update Software: Provided by the interface manufacturer (e.g., Xentry Diagnostics).
- USB Cable: For connecting the interface to your computer.
- Stable Power Supply: To prevent interruptions during the update process.
- Computer: Running a compatible operating system (Windows is typically recommended).
2.3 Step-by-Step Guide to Updating Firmware
Here’s a general guide to updating the firmware on a C4/C6 interface. Always refer to the manufacturer’s instructions for the most accurate and up-to-date procedure:
-
Download Firmware Update Software:
- Visit the official website of the C4/C6 interface manufacturer.
- Download the latest firmware update software for your specific interface model.
-
Install the Software:
- Run the downloaded installer and follow the on-screen instructions.
- Ensure all necessary drivers are installed correctly.
-
Connect the Interface:
- Connect the C4/C6 interface to your computer using a USB cable.
- Ensure the interface is powered on and recognized by your computer.
-
Launch the Firmware Update Tool:
- Open the firmware update software you installed.
- Follow the prompts to select your interface model and the correct firmware version.
-
Start the Update Process:
- Click the “Update” or “Flash” button to begin the firmware update process.
- Do not disconnect the interface or turn off your computer during the update.
-
Verify the Update:
- Once the update is complete, the software will display a confirmation message.
- Disconnect the interface and reconnect it to verify the new firmware version.
2.4 Common Issues and Troubleshooting
During the firmware update process, you may encounter some common issues:
-
Interface Not Recognized:
- Ensure the USB cable is properly connected.
- Reinstall the interface drivers.
- Try a different USB port.
-
Update Failed:
- Check for a stable power supply.
- Ensure the correct firmware version is selected.
- Restart the update process.
-
Software Compatibility Issues:
- Run the software in compatibility mode for an older operating system.
- Update your operating system to the latest version.
3. Setting Up DTS Monaco for Car Coding
Once you’ve ensured that your C4/C6 interface is up-to-date, you can proceed with setting up DTS Monaco for car coding. Here’s how to get started:
3.1 Installing DTS Monaco
To install DTS Monaco, follow these steps:
-
Obtain the Software:
- Purchase DTS Monaco from an authorized distributor or obtain a licensed copy.
-
Run the Installer:
- Run the DTS Monaco installer and follow the on-screen instructions.
- Ensure you have administrator privileges during the installation.
-
Install Necessary Drivers:
- Install the required drivers for your C4/C6 interface. These drivers usually come with the interface or can be downloaded from the manufacturer’s website.
-
Activate the License:
- Activate your DTS Monaco license using the provided license key or activation method.
3.2 Configuring DTS Monaco
After installation, you need to configure DTS Monaco to work with your vehicle and interface:
-
Select the Interface:
- In DTS Monaco, go to “Options” or “Settings” and select your C4/C6 interface as the communication interface.
-
Configure Communication Settings:
- Configure the communication settings, such as the COM port and baud rate, according to your interface specifications.
-
Import SMR-D Files:
- Import the necessary SMR-D files for your vehicle model. These files contain the diagnostic data and coding information for various ECUs.
3.3 Creating a Workspace
A workspace in DTS Monaco is a project that contains all the necessary files and settings for a specific vehicle. Here’s how to create one:
-
Open DTS Monaco:
- Launch DTS Monaco and click on “New Workspace.”
-
Select Project Folder:
- Choose a folder on your computer to store the workspace files.
-
Import SMR-D Files:
- Import the SMR-D files relevant to your vehicle model. These files define the ECUs and their coding parameters.
-
Configure Logical Links:
- Configure the logical links to match the ECUs in your vehicle. This step ensures that DTS Monaco can communicate with the correct control units.
4. Basic Car Coding Procedures with DTS Monaco
Car coding involves modifying the software settings of a vehicle’s ECUs to customize its features. Here are some basic coding procedures you can perform with DTS Monaco:
4.1 Connecting to an ECU
-
Open a Workspace:
- Open the workspace you created in DTS Monaco.
-
Select the ECU:
- In the workspace, select the ECU you want to code from the list of logical links.
-
Establish Connection:
- Right-click on the ECU and select “New Tab for Logical Link.” This opens a new tab dedicated to that ECU.
-
Start Extended Start:
- Go to “Variant Coding” tab and select “Extended Start,” then click “Transmit.” This prepares the ECU for coding.
4.2 Disabling the Firewall
Before coding, you need to disable the firewall to allow access to the ECU. The method varies depending on the vehicle model:
-
Older Vans (e.g., via BCMFA2 ECU):
- Open the BCMFA2 ECU in a new tab.
- Go to “Generic Jobs” and select “Security Access Level 37.”
- Click “Transmit.” If you see no red text, the firewall is disabled.
-
Newer Vans (e.g., via EZS167 ECU):
- Open the EZS167 ECU in a new tab.
- Go to “Generic Jobs” and select “Security Access Level 3B.”
- Click “Transmit.” Ensure there is no red text and “acknowledged” is displayed under “Response State.”
4.3 Modifying Variant Coding
-
Go to Variant Coding Tab:
- In the ECU tab, go to the “Variant Coding” tab.
-
Select the Domain:
- Underneath the ECU, you will see the “Domain” list. This is where the functions of the ECU can be accessed.
-
Find the Feature:
- Find the relevant feature in the “Fragment” column (e.g., “Balance Fader Menue”).
-
Change the Value:
- Double-click the value under “Meaning” (this is what you’ll change it to) and a dropdown menu will open up – select the new value you want.
- The original value is under “Original Meaning.”
-
Do Coding:
- Press the “Do Coding” button. If everything is correct, the bar next to “Do Coding” will go to 100%, and the new value will be presented under the “Meaning” column.
4.4 Making Changes Permanent
To make the new variant coding values permanent:
-
Synchronize to Non-Volatile Memory:
- In the “Diagnostic Services” search box, find “[31] Synchronize to Non-volatile Memory Start.”
- Click “Transmit” and ensure you get an “acknowledged” Response State.
-
Synchronize to Non-Volatile Memory Results:
- Click “[31] Synchronize to Non-volatile Memory Results” and then “Transmit.”
-
Perform a Hard Reset:
- Perform a hard reset of your ECU by turning off the van, opening the driver’s door, and waiting a few minutes.
-
Verify the Changes:
- Turn on the van (engine off), log into the relevant ECU, and check if the changes are now permanent.
5. Advanced Diagnostic Functions
DTS Monaco is not only for car coding but also for advanced diagnostic functions. Here are some examples:
5.1 Reading Fault Codes
-
Connect to the ECU:
- Connect to the ECU you want to diagnose.
-
Go to Diagnostic Services:
- Go to the “Diagnostic Services” tab.
-
Select Read DTC:
- Find and select the service to read Diagnostic Trouble Codes (DTCs).
- Click “Transmit” to read the fault codes stored in the ECU.
5.2 Clearing Fault Codes
-
Connect to the ECU:
- Connect to the ECU containing the fault codes.
-
Go to Diagnostic Services:
- Go to the “Diagnostic Services” tab.
-
Select Clear DTC:
- Find and select the service to clear DTCs.
- Click “Transmit” to clear the fault codes.
5.3 Live Data Monitoring
-
Connect to the ECU:
- Connect to the ECU you want to monitor.
-
Go to Diagnostic Services:
- Go to the “Diagnostic Services” tab.
-
Select Live Data Parameters:
- Find and select the service to read live data parameters.
- Choose the specific parameters you want to monitor (e.g., engine temperature, RPM).
- Click “Transmit” to start monitoring the live data.
6. Common Car Coding Projects
With DTS Monaco, you can undertake various car coding projects to customize your vehicle. Here are some common examples:
6.1 Enabling Hidden Features
Many vehicles have hidden features that can be enabled through coding:
- Cornering Lights: Activate cornering lights to improve visibility when turning.
- Ambient Lighting: Adjust the intensity and color of ambient lighting.
- Video in Motion: Enable video playback while the vehicle is in motion.
6.2 Customizing Vehicle Settings
You can customize various vehicle settings to your preferences:
- Seatbelt Warning: Disable or adjust the seatbelt warning chime.
- Auto Start-Stop: Permanently disable the auto start-stop system.
- Mirror Dip on Reverse: Enable the mirror to dip when reversing.
6.3 Retrofitting Options
DTS Monaco can be used to retrofit options that were not originally installed in the vehicle:
- Backup Camera: Enable the backup camera function after installing an aftermarket camera.
- Navigation System: Activate the navigation system if it was not initially enabled.
- Lane Keeping Assist: Retrofit and enable lane-keeping assist features.
7. Best Practices for Car Coding
To ensure safe and successful car coding, follow these best practices:
7.1 Back Up Original Settings
Before making any changes, always back up the original ECU settings. This allows you to revert to the original configuration if something goes wrong.
7.2 Use a Stable Power Supply
Ensure the vehicle has a stable power supply during coding to prevent interruptions that can damage the ECU.
7.3 Follow Instructions Carefully
Follow the coding instructions carefully and double-check all settings before applying changes.
7.4 Research and Understand the Changes
Research and understand the changes you are making to ensure they are compatible with your vehicle and desired outcome.
7.5 Test Changes Thoroughly
After coding, test the changes thoroughly to ensure they function as expected and do not cause any issues.
8. Resources for Learning DTS Monaco and Car Coding in the USA
To master DTS Monaco and car coding, here are some resources available in the USA:
8.1 Online Courses and Tutorials
- Udemy: Offers various courses on automotive diagnostics and coding, including DTS Monaco.
- YouTube: Channels like “ECU Coding” and “Car Diagnostics” provide free tutorials and guides.
- DTS-MONACO.EDU.VN: Provides comprehensive training and resources for DTS Monaco users.
8.2 Training Centers and Workshops
- UTI (Universal Technical Institute): Offers automotive technology programs that include diagnostics and coding.
- Lincoln Tech: Provides training in automotive service and diagnostics.
- Local Community Colleges: Many community colleges offer automotive technology courses.
8.3 Online Forums and Communities
- OBD Scanners Forum: A community for discussing OBD scanners, diagnostic software, and coding.
- BenzNinja: A forum dedicated to Mercedes-Benz coding and diagnostics.
- DTS-MONACO.EDU.VN Forum: A dedicated platform for DTS Monaco users to share knowledge and experiences.
9. The Role of DTS-MONACO.EDU.VN
DTS-MONACO.EDU.VN plays a crucial role in the automotive diagnostic and car coding landscape, especially for technicians in the USA.
9.1 Providing Comprehensive Training
DTS-MONACO.EDU.VN offers comprehensive training programs designed to equip technicians with the skills and knowledge needed to master DTS Monaco and car coding. These programs cover everything from basic concepts to advanced techniques.
9.2 Offering Expert Support
DTS-MONACO.EDU.VN provides expert support to help technicians troubleshoot issues and overcome challenges encountered during car coding. This support includes online forums, tutorials, and direct assistance from experienced professionals.
9.3 Keeping Technicians Updated
DTS-MONACO.EDU.VN keeps technicians updated with the latest information on DTS Monaco, car coding techniques, and vehicle diagnostics. This ensures that technicians are always equipped with the most current knowledge and best practices.
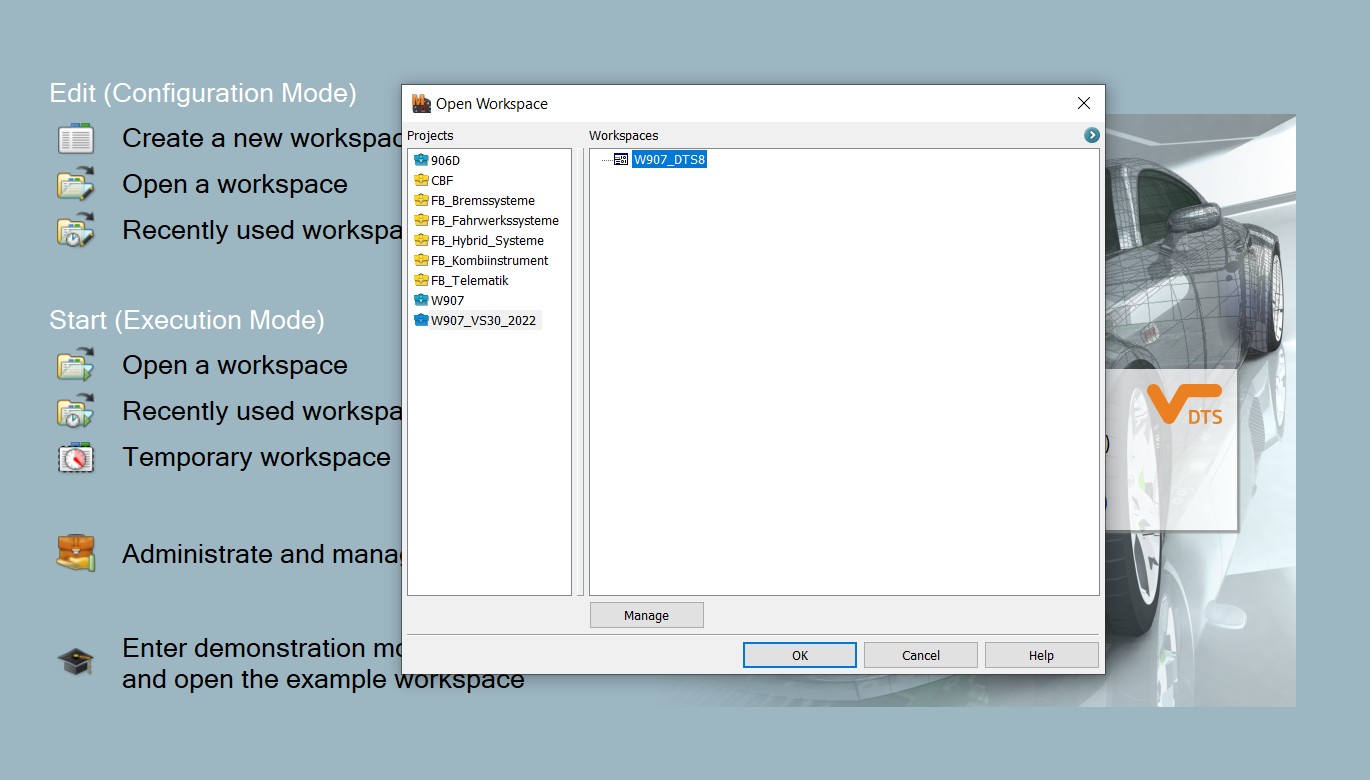 DTS Monaco Main Screen Showing Workspace
10. Conclusion: Mastering Car Coding with the Right Tools and Knowledge
While DTS Monaco is a powerful tool for car coding and advanced diagnostics, it’s essential to understand its limitations. Updating the C4/C6 interface firmware requires separate tools and procedures. By following the guidelines outlined in this article and utilizing resources like DTS-MONACO.EDU.VN, automotive technicians in the USA can master car coding and provide high-quality services to their clients. Remember to always prioritize safety, back up your data, and stay informed about the latest technologies and best practices in the automotive industry.
Are you ready to take your car coding skills to the next level? Visit DTS-MONACO.EDU.VN today to explore our comprehensive training programs, expert support, and the latest resources for mastering DTS Monaco and advanced vehicle diagnostics. Elevate your expertise and stay ahead in the rapidly evolving world of automotive technology! For personalized assistance, contact us at Whatsapp: +1 (641) 206-8880 or visit our location at 275 N Harrison St, Chandler, AZ 85225, United States. We’re here to help you succeed in the exciting field of car coding and ECU programming, focusing on diagnostic software, ECU flashing, and vehicle customization.
FAQ: Frequently Asked Questions about DTS Monaco and Car Coding
1. Can DTS Monaco be used to update the software on the C4/C6 interface itself?
No, DTS Monaco cannot be used to update the firmware on the C4/C6 interface itself. This requires specific firmware update tools provided by the interface manufacturer.
2. What is DTS Monaco used for?
DTS Monaco is used for ECU flashing, car coding, advanced diagnostics, variant coding, and data logging on vehicles, particularly Mercedes-Benz.
3. Is DTS Monaco easy to learn for beginners?
DTS Monaco can be complex for beginners, requiring specialized knowledge and training. It’s recommended to take a course or seek guidance from experienced professionals.
4. What are SMR-D files in DTS Monaco?
SMR-D files contain the diagnostic data and coding information for various ECUs. They are essential for configuring DTS Monaco to work with a specific vehicle model.
5. How do I disable the firewall in DTS Monaco?
The method varies depending on the vehicle model. For older vans, it’s done via the BCMFA2 ECU, while for newer vans, it’s done via the EZS167 ECU. Detailed steps are provided in Section 4.2 of this article.
6. What is variant coding in DTS Monaco?
Variant coding involves modifying the software settings of a vehicle’s ECUs to customize its features, such as enabling hidden features or customizing vehicle settings.
7. How do I make variant coding changes permanent?
To make variant coding changes permanent, you need to synchronize to non-volatile memory and perform a hard reset of the ECU. The detailed steps are provided in Section 4.4 of this article.
8. What are some common car coding projects I can do with DTS Monaco?
Common car coding projects include enabling hidden features, customizing vehicle settings, and retrofitting options.
9. What should I do before making any car coding changes?
Before making any changes, always back up the original ECU settings and use a stable power supply to prevent interruptions.
10. Where can I find resources for learning DTS Monaco and car coding in the USA?
Resources include online courses on platforms like Udemy, training centers like UTI and Lincoln Tech, and online forums like OBD Scanners Forum and DTS-MONACO.EDU.VN Forum. DTS-MONACO.EDU.VN also offers comprehensive training and expert support.