Replacing the AC pressure sensor is crucial for maintaining a functional car air conditioning system, and DTS-MONACO.EDU.VN is here to guide you through the process. We’ll provide a step-by-step guide on replacing your AC pressure sensor, covering the tools you’ll need, safety precautions, and how to ensure your AC system works efficiently afterwards. For those seeking advanced car coding and automotive diagnostics, explore DTS-MONACO.EDU.VN for in-depth knowledge, car AC repair, and AC system maintenance.
Contents
- 1. What is the AC Pressure Sensor and Why Replace It?
- 1.1 Function of the AC Pressure Sensor
- 1.2 Signs of a Failing AC Pressure Sensor
- 1.3 Reasons for Replacement
- 2. Essential Tools and Materials for AC Pressure Sensor Replacement
- 2.1 List of Necessary Tools
- 2.2 Required Materials
- 2.3 Where to Source Tools and Materials
- 3. Step-by-Step Guide to Replacing the AC Pressure Sensor
- 3.1 Safety Precautions
- 3.2 Step-by-Step Instructions
- Step 1: Recover the Refrigerant
- Step 2: Locate the AC Pressure Sensor
- Step 3: Disconnect the Electrical Connector
- Step 4: Remove the Old AC Pressure Sensor
- Step 5: Install the New AC Pressure Sensor
- Step 6: Reconnect the Electrical Connector
- Step 7: Evacuate the AC System
- Step 8: Recharge the AC System
- Step 9: Test the AC System
- 3.3 Visual Aids
- 4. Common Issues and Troubleshooting Tips
- 4.1 Common Problems Encountered During Replacement
- 4.2 Troubleshooting Steps
- 4.3 When to Seek Professional Help
- 5. The Role of Car Coding in AC System Maintenance
- 5.1 Understanding Car Coding
- 5.2 How Car Coding Affects the AC System
- 5.3 Tools and Software for Car Coding
- 5.4 Benefits of Car Coding for AC Maintenance
- 5.5 Risks and Precautions
- 6. Maintaining Your AC System After Replacing the Pressure Sensor
- 6.1 Regular Maintenance Tips
- 6.2 Recognizing Potential Issues Early
- 6.3 Professional AC Service
- 6.4 Benefits of Regular AC Maintenance
- 6.5 Staying Informed
- 7. Understanding AC System Components and Their Functions
- 7.1 Key Components of the AC System
- 7.2 How the AC System Works
- 7.3 Importance of Each Component
- 7.4 Troubleshooting Based on Component Function
- 8. Advanced Diagnostic Techniques for AC Systems
- 8.1 Using Advanced Diagnostic Tools
- 8.2 Interpreting Diagnostic Data
- 8.3 Performing Component Tests
- 8.4 Utilizing Car Coding for Diagnostics
- 9. The Future of AC Systems and Car Coding
- 9.1 Trends in AC System Technology
- 9.2 The Expanding Role of Car Coding
- 9.3 Preparing for the Future
1. What is the AC Pressure Sensor and Why Replace It?
The AC pressure sensor, also known as the AC pressure switch, is a vital component in your vehicle’s air conditioning system. The AC pressure sensor monitors the refrigerant pressure within the AC system, ensuring it operates within safe and efficient levels. This protects the compressor and other components from damage.
1.1 Function of the AC Pressure Sensor
The AC pressure sensor performs several critical functions:
- Monitoring Refrigerant Pressure: The primary role is to continuously monitor the pressure of the refrigerant flowing through the AC system.
- Protecting the Compressor: If the refrigerant pressure is too low or too high, the sensor sends a signal to the car’s computer to shut off the compressor. This prevents the compressor from running under conditions that could cause damage.
- Ensuring Efficient Operation: By maintaining optimal pressure levels, the AC pressure sensor helps ensure that the air conditioning system cools the vehicle effectively.
1.2 Signs of a Failing AC Pressure Sensor
Several symptoms can indicate that your AC pressure sensor is failing:
- AC System Not Cooling: One of the most common signs is that the air conditioning system blows warm air instead of cold air.
- Compressor Not Engaging: If the compressor doesn’t turn on, even when the AC is switched on, the pressure sensor might be the culprit.
- Erratic AC Performance: The AC may work intermittently, cooling sometimes and not at other times.
- Dashboard Warning Lights: In some vehicles, a faulty AC pressure sensor can trigger the check engine light or other warning lights on the dashboard.
1.3 Reasons for Replacement
The AC pressure sensor may need replacement due to:
- Age and Wear: Over time, the sensor can degrade due to constant use and exposure to varying temperatures and pressures.
- Physical Damage: The sensor can be damaged by impacts, corrosion, or other physical factors.
- Electrical Issues: Wiring or internal electrical components can fail, leading to inaccurate readings or complete sensor failure.
Replacing a faulty AC pressure sensor ensures the longevity and efficiency of your AC system. Regular maintenance and timely replacements can prevent more significant issues down the road. For reliable diagnostics and car coding solutions, consider exploring DTS-MONACO.EDU.VN.
2. Essential Tools and Materials for AC Pressure Sensor Replacement
Replacing an AC pressure sensor requires specific tools and materials to ensure the job is done safely and effectively. Having the right equipment on hand will streamline the process and help prevent potential issues.
2.1 List of Necessary Tools
- Wrench Set: A set of open-end or adjustable wrenches is essential for loosening and tightening the sensor and related components.
- Socket Set: A socket set with various sizes will help in removing and installing the sensor, especially if it’s in a hard-to-reach location.
- Screwdrivers: Both flathead and Phillips screwdrivers may be needed to remove any covers or brackets that are in the way.
- Refrigerant Recovery Machine: This machine is critical for safely removing the refrigerant from the AC system before you start working on the sensor.
- Vacuum Pump: After replacing the sensor, a vacuum pump is used to evacuate the system, removing any air and moisture.
- Manifold Gauge Set: This set is used to monitor the pressure in the AC system during evacuation and recharging.
- Multimeter: A multimeter is helpful for testing the electrical connections to ensure the sensor is functioning correctly.
- Protective Gloves: Always wear protective gloves to avoid contact with refrigerant and other chemicals.
- Safety Glasses: Safety glasses are crucial for protecting your eyes from debris and potential splashes.
- Work Light: A good work light will help you see clearly, especially in dimly lit engine compartments.
2.2 Required Materials
- New AC Pressure Sensor: Ensure you have the correct replacement sensor for your vehicle make and model.
- Refrigerant: You’ll need the correct type and amount of refrigerant to recharge the AC system after the sensor is replaced.
- O-Rings: New O-rings are essential for sealing the connections and preventing leaks.
- Refrigerant Oil: Adding a small amount of refrigerant oil can help lubricate the system and improve its performance.
- Leak Detector: A leak detector can help you identify any leaks after the system is recharged.
2.3 Where to Source Tools and Materials
These tools and materials can be sourced from various locations:
- Automotive Parts Stores: Local auto parts stores like AutoZone, Advance Auto Parts, and O’Reilly Auto Parts typically carry AC pressure sensors, refrigerants, and other necessary materials.
- Online Retailers: Online retailers such as Amazon and eBay offer a wide selection of tools and parts, often at competitive prices.
- Specialty Automotive Tool Suppliers: Companies like Snap-on and Mac Tools specialize in high-quality automotive tools.
- HVAC Supply Stores: HVAC supply stores may carry refrigerant recovery machines, vacuum pumps, and manifold gauge sets.
Having all the necessary tools and materials on hand before starting the replacement process will save time and ensure the job is done right. For more advanced diagnostics and car coding solutions, visit DTS-MONACO.EDU.VN.
3. Step-by-Step Guide to Replacing the AC Pressure Sensor
Replacing the AC pressure sensor involves several steps to ensure safety and proper function. This guide provides a detailed walkthrough of the entire process.
3.1 Safety Precautions
Before starting, it’s crucial to take necessary safety precautions:
- Wear Safety Gear: Always wear safety glasses and gloves to protect your eyes and skin from refrigerant and other chemicals.
- Work in a Well-Ventilated Area: Ensure you are working in an area with good ventilation to avoid inhaling refrigerant fumes.
- Disconnect the Battery: Disconnect the negative terminal of the battery to prevent electrical shorts.
- Handle Refrigerant Properly: Refrigerant should be handled by certified technicians. Improper handling can be harmful to the environment and illegal.
- Refer to the Vehicle’s Service Manual: Always consult your vehicle’s service manual for specific instructions and torque specifications.
3.2 Step-by-Step Instructions
Step 1: Recover the Refrigerant
- Connect the Recovery Machine: Connect the hoses of the refrigerant recovery machine to the high-pressure and low-pressure service ports on the AC system.
- Recover the Refrigerant: Follow the machine’s instructions to recover all the refrigerant from the system. This step is essential to prevent refrigerant from being released into the atmosphere.
 Connect the Recovery Machine
Step 2: Locate the AC Pressure Sensor
- Consult the Service Manual: Use your vehicle’s service manual to find the exact location of the AC pressure sensor. It is typically located on or near the receiver drier or accumulator.
- Visually Inspect: Look for a sensor with electrical connections attached to one of the AC lines or components.
Step 3: Disconnect the Electrical Connector
- Disconnect the Connector: Carefully disconnect the electrical connector from the AC pressure sensor. You may need to press a tab or clip to release it.
- Inspect the Connector: Check the connector and wiring for any signs of damage or corrosion. Clean or repair as necessary.
Step 4: Remove the Old AC Pressure Sensor
- Use a Wrench or Socket: Use the appropriate wrench or socket to loosen and remove the old AC pressure sensor. Be prepared for a small amount of refrigerant oil to leak out.
- Note the Orientation: Take note of the orientation of the sensor as you remove it to ensure the new one is installed correctly.
Step 5: Install the New AC Pressure Sensor
- Install New O-Rings: Replace the old O-rings on the new sensor with new ones. This will ensure a proper seal and prevent leaks.
- Apply Refrigerant Oil: Apply a small amount of refrigerant oil to the O-rings to help them seal properly.
- Tighten the Sensor: Carefully thread the new AC pressure sensor into place and tighten it to the manufacturer’s specified torque. Over-tightening can damage the sensor or the threads.
Step 6: Reconnect the Electrical Connector
- Reconnect the Connector: Reconnect the electrical connector to the new AC pressure sensor. Make sure it clicks into place and is securely fastened.
Step 7: Evacuate the AC System
- Connect the Vacuum Pump: Connect the vacuum pump to the service ports on the AC system.
- Evacuate the System: Run the vacuum pump for at least 30-60 minutes to remove any air and moisture from the system. This is crucial for optimal AC performance.
Step 8: Recharge the AC System
- Consult the Service Manual: Refer to your vehicle’s service manual for the correct type and amount of refrigerant needed.
- Recharge the System: Use the manifold gauge set to recharge the system with the specified amount of refrigerant.
- Monitor Pressure: Monitor the pressure readings on the gauge set to ensure the system is properly charged.
Step 9: Test the AC System
- Start the Engine: Start the engine and turn on the AC system.
- Check for Cold Air: Verify that the AC is blowing cold air.
- Monitor the Compressor: Ensure the compressor is cycling on and off properly.
- Check for Leaks: Use a leak detector to check for any refrigerant leaks around the new sensor and connections.
3.3 Visual Aids
- Photos: Include photos of each step, showing the tools and components involved.
- Videos: Link to helpful videos demonstrating the process.
Following these steps carefully will help you successfully replace the AC pressure sensor and restore your vehicle’s air conditioning system to proper working order. For more detailed guidance and advanced car coding solutions, visit DTS-MONACO.EDU.VN.
4. Common Issues and Troubleshooting Tips
Replacing an AC pressure sensor can sometimes present challenges. Here are some common issues and troubleshooting tips to help you resolve them.
4.1 Common Problems Encountered During Replacement
- Difficulty Accessing the Sensor: The AC pressure sensor can be located in a tight or hard-to-reach area.
- Solution: Use specialized tools such as swivel sockets or extensions to access the sensor. Consult your vehicle’s service manual for specific instructions.
- Stuck or Corroded Sensor: The sensor may be stuck due to corrosion or debris.
- Solution: Apply penetrating oil to the sensor threads and let it sit for a few minutes before attempting to remove it. Use a wrench that fits snugly to avoid stripping the sensor.
- Leaking After Replacement: Leaks can occur if the new sensor is not properly sealed.
- Solution: Ensure you have installed new O-rings and applied refrigerant oil to them. Tighten the sensor to the manufacturer’s specified torque. Use a leak detector to identify any leaks and re-tighten or replace the O-rings as needed.
- Incorrect Refrigerant Charge: Overcharging or undercharging the system can affect AC performance.
- Solution: Use a manifold gauge set to accurately measure the pressure in the system. Refer to your vehicle’s service manual for the correct refrigerant charge specifications.
- Electrical Connection Issues: Problems with the electrical connector can prevent the sensor from functioning correctly.
- Solution: Inspect the connector and wiring for damage or corrosion. Clean the contacts with electrical contact cleaner and ensure the connector is securely attached.
4.2 Troubleshooting Steps
- AC System Not Cooling:
- Check Refrigerant Level: Use a manifold gauge set to check the refrigerant pressure. If the pressure is too low, there may be a leak in the system.
- Verify Compressor Engagement: Ensure the compressor is engaging when the AC is turned on. If not, check the electrical connections to the compressor and the AC pressure sensor.
- Inspect the Condenser and Evaporator: Make sure the condenser and evaporator are not blocked by debris. Clean them if necessary.
- Compressor Not Engaging:
- Check the AC Pressure Sensor: Use a multimeter to check the continuity of the sensor. If the sensor is faulty, it may prevent the compressor from engaging.
- Inspect the Compressor Relay: Check the compressor relay in the fuse box. If the relay is faulty, replace it.
- Verify Power to the Compressor: Use a multimeter to check for power at the compressor when the AC is turned on. If there is no power, check the wiring and fuses.
- Erratic AC Performance:
- Check for Loose Connections: Inspect all electrical connections in the AC system, including the AC pressure sensor, compressor, and relays.
- Monitor Pressure Readings: Use a manifold gauge set to monitor the pressure readings while the AC is running. Fluctuating pressures can indicate a problem with the compressor or other components.
- Inspect the Expansion Valve: The expansion valve regulates the flow of refrigerant into the evaporator. If it is blocked or faulty, it can cause erratic AC performance.
4.3 When to Seek Professional Help
While many AC pressure sensor replacement tasks can be done by DIYers, some situations require professional help:
- Refrigerant Handling: If you are not certified to handle refrigerant, it is best to take your vehicle to a professional AC service technician.
- Complex Diagnostic Issues: If you are unable to diagnose the problem or if the troubleshooting steps do not resolve the issue, seek professional assistance.
- Specialized Equipment: Some tasks, such as evacuating and recharging the AC system, require specialized equipment that most DIYers do not have access to.
Addressing common issues and following these troubleshooting tips can help you successfully replace the AC pressure sensor and ensure your AC system is functioning properly. For advanced diagnostics, car coding, and professional training, consider visiting DTS-MONACO.EDU.VN.
5. The Role of Car Coding in AC System Maintenance
Car coding plays a significant role in modern vehicle maintenance, including the air conditioning system. Understanding how coding can impact your AC system can help you optimize its performance and diagnose issues more effectively.
5.1 Understanding Car Coding
Car coding involves modifying the software settings in a vehicle’s electronic control units (ECUs) to customize features, improve performance, or enable new functionalities. This process can affect various systems, including the AC.
5.2 How Car Coding Affects the AC System
- Customizing AC Settings:
- Car coding can allow you to adjust the AC system’s parameters, such as fan speed, temperature thresholds, and compressor operation.
- For example, you might be able to program the AC to start automatically when the engine is started or to adjust the fan speed based on the vehicle’s interior temperature.
- Enabling Hidden Features:
- Some vehicles have hidden features related to the AC system that can be unlocked through coding.
- This might include enabling a more aggressive cooling mode or activating a feature that optimizes AC performance for fuel efficiency.
- Diagnosing AC Issues:
- Car coding tools can be used to access diagnostic information from the AC system’s ECU.
- This can help you identify specific problems, such as faulty sensors, compressor issues, or refrigerant leaks.
- Recalibrating Sensors:
- If you replace a component in the AC system, such as the AC pressure sensor, coding might be necessary to recalibrate the new sensor.
- This ensures that the sensor is providing accurate readings to the ECU.
5.3 Tools and Software for Car Coding
To perform car coding on your AC system, you will need specific tools and software:
- OBD-II Scanner: An OBD-II scanner is essential for reading diagnostic trouble codes (DTCs) and accessing basic ECU information.
- Coding Software: Software such as VCDS (VAG-COM Diagnostic System), BimmerCode, and AlfaOBD are popular for coding various vehicle makes and models.
- Interface Cable: An interface cable is needed to connect your computer to the vehicle’s OBD-II port.
- Laptop: A laptop with the appropriate software installed is required to perform the coding procedures.
5.4 Benefits of Car Coding for AC Maintenance
- Improved AC Performance: Coding can help you optimize the AC system for maximum cooling efficiency.
- Enhanced Diagnostics: Coding tools provide detailed diagnostic information, making it easier to identify and resolve issues.
- Customized Features: Coding allows you to personalize the AC system to your preferences.
- Cost Savings: By diagnosing and resolving issues yourself, you can save money on expensive repairs.
5.5 Risks and Precautions
While car coding can be beneficial, it also carries risks:
- Incorrect Coding: Incorrect coding can cause serious problems with your vehicle’s systems.
- Warranty Issues: Modifying the ECU settings may void your vehicle’s warranty.
- Software Compatibility: Ensure that the coding software is compatible with your vehicle’s make and model.
To minimize these risks, it is essential to:
- Research Thoroughly: Understand the coding procedures before you begin.
- Back Up Your Settings: Always back up your original ECU settings before making any changes.
- Follow Instructions Carefully: Follow the coding software’s instructions precisely.
- Seek Expert Advice: If you are unsure about any aspect of the coding process, seek advice from a qualified technician.
Car coding can be a powerful tool for maintaining and optimizing your AC system. For comprehensive car coding solutions and training, visit DTS-MONACO.EDU.VN.
6. Maintaining Your AC System After Replacing the Pressure Sensor
After replacing the AC pressure sensor, proper maintenance is essential to ensure your AC system operates efficiently and reliably. Regular check-ups and preventive measures can extend the life of your AC components and prevent future issues.
6.1 Regular Maintenance Tips
- Check Refrigerant Levels Annually:
- Low refrigerant levels can cause the AC system to perform poorly and can damage the compressor.
- Use a manifold gauge set to check the refrigerant pressure and add refrigerant as needed.
- Inspect the Condenser and Evaporator:
- The condenser and evaporator can become clogged with debris, reducing their efficiency.
- Regularly inspect these components and clean them with a soft brush and mild detergent.
- Check Belts and Hoses:
- Inspect the belts and hoses connected to the AC compressor for cracks, wear, or leaks.
- Replace any damaged belts or hoses to prevent system failure.
- Clean the Cabin Air Filter:
- A dirty cabin air filter can restrict airflow and reduce the AC system’s cooling capacity.
- Replace the cabin air filter every 12,000 to 15,000 miles, or more frequently if you drive in dusty conditions.
- Run the AC Regularly:
- Even during the cooler months, run the AC system for a few minutes each week to keep the components lubricated and prevent refrigerant leaks.
6.2 Recognizing Potential Issues Early
Early detection of potential issues can prevent costly repairs. Pay attention to the following signs:
- Unusual Noises: Listen for any unusual noises coming from the AC compressor or other components.
- Weak Airflow: Check for weak airflow from the vents, which can indicate a clogged cabin air filter or other issues.
- Inconsistent Cooling: Monitor the AC system’s cooling performance and check for any inconsistencies.
- Foul Odors: Be aware of any foul odors coming from the vents, which can indicate mold or mildew growth in the evaporator.
6.3 Professional AC Service
In addition to regular maintenance, consider having your AC system professionally serviced every few years. A professional AC service can include:
- Refrigerant Recharge: Evacuate and recharge the system with fresh refrigerant to ensure optimal performance.
- Leak Detection: Use specialized equipment to detect and repair any refrigerant leaks.
- Component Inspection: Thoroughly inspect all AC components, including the compressor, condenser, evaporator, and hoses.
- Performance Testing: Test the AC system’s performance to ensure it meets the manufacturer’s specifications.
6.4 Benefits of Regular AC Maintenance
- Improved Cooling Performance: Regular maintenance can help ensure your AC system provides consistent and efficient cooling.
- Extended Component Life: Proper maintenance can extend the life of the AC compressor, condenser, and other components.
- Reduced Repair Costs: Early detection and repair of potential issues can prevent costly repairs down the road.
- Enhanced Fuel Efficiency: An efficient AC system can help improve your vehicle’s fuel efficiency.
- Improved Air Quality: Regularly replacing the cabin air filter can improve the air quality inside your vehicle.
6.5 Staying Informed
Stay informed about the latest AC maintenance tips and technologies by:
- Consulting Your Vehicle’s Service Manual: Refer to your vehicle’s service manual for specific maintenance recommendations.
- Reading Automotive Publications: Read automotive publications and online resources to stay up-to-date on the latest AC maintenance tips.
- Seeking Expert Advice: Consult with a qualified AC service technician for personalized maintenance recommendations.
By following these maintenance tips and staying informed, you can keep your AC system operating efficiently and reliably for years to come. For advanced car coding solutions and training, visit DTS-MONACO.EDU.VN.
7. Understanding AC System Components and Their Functions
To effectively maintain and repair your vehicle’s air conditioning system, it’s essential to understand the functions of its main components. Each part plays a crucial role in cooling the cabin and ensuring efficient operation.
7.1 Key Components of the AC System
- Compressor:
- Function: The compressor is the heart of the AC system. It pressurizes the refrigerant, converting it from a low-pressure gas to a high-pressure gas.
- Location: Typically located at the front of the engine, driven by a belt connected to the crankshaft.
- Condenser:
- Function: The condenser dissipates heat from the high-pressure refrigerant gas, converting it into a high-pressure liquid.
- Location: Usually positioned at the front of the vehicle, in front of the radiator, to receive airflow.
- Receiver Drier or Accumulator:
- Function: This component filters and removes moisture from the refrigerant. In some systems, it also stores excess refrigerant.
- Location: Typically located in the engine compartment, between the condenser and the expansion valve.
- Expansion Valve or Orifice Tube:
- Function: The expansion valve regulates the flow of high-pressure liquid refrigerant into the evaporator, causing it to expand and cool rapidly.
- Location: Usually located near the evaporator core, inside the passenger compartment.
- Evaporator:
- Function: The evaporator absorbs heat from the air passing through it, cooling the cabin. The refrigerant turns into a low-pressure gas in this process.
- Location: Located inside the passenger compartment, often behind the dashboard.
- Refrigerant Lines:
- Function: These lines transport the refrigerant between the various components of the AC system.
- Location: Run throughout the engine compartment and passenger compartment, connecting all the components.
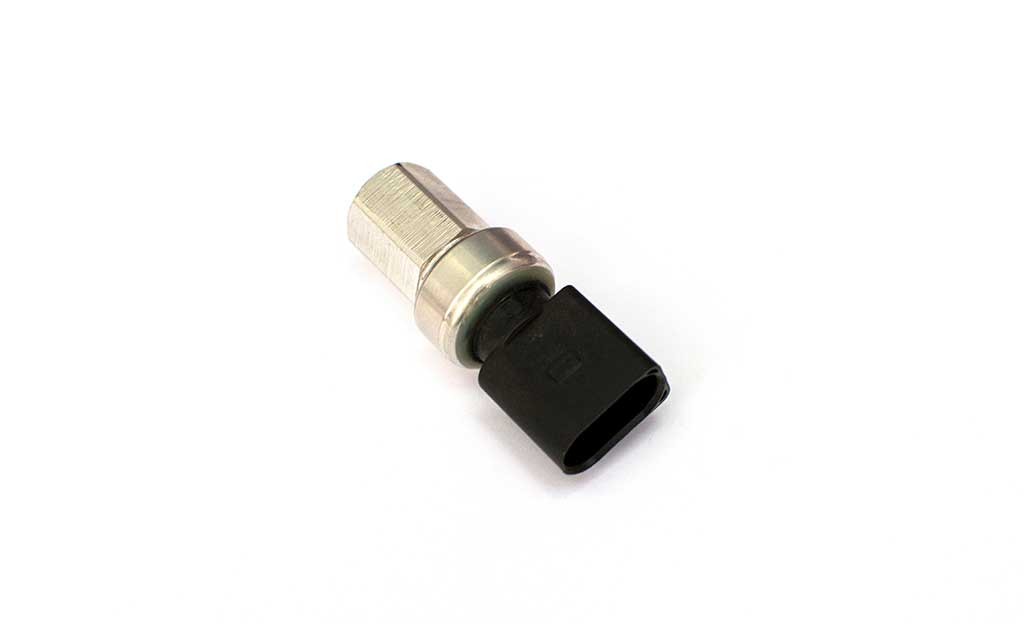
- AC Pressure Sensor:
- Function: Monitors the pressure of the refrigerant within the system. It protects the compressor by signaling the ECU to shut it off if the pressure is too high or too low.
- Location: Typically located on or near the receiver drier or accumulator.
- Blower Motor:
- Function: This motor forces air through the evaporator and into the cabin.
- Location: Located inside the passenger compartment, near the evaporator.
7.2 How the AC System Works
- Compression: The compressor compresses the refrigerant gas, increasing its pressure and temperature.
- Condensation: The high-pressure, high-temperature refrigerant gas flows to the condenser, where it releases heat and turns into a high-pressure liquid.
- Filtration and Drying: The high-pressure liquid refrigerant flows through the receiver drier or accumulator, where it is filtered and dried.
- Expansion: The high-pressure liquid refrigerant flows through the expansion valve, which reduces its pressure and temperature.
- Evaporation: The low-pressure, low-temperature refrigerant flows into the evaporator, where it absorbs heat from the air passing through it, cooling the cabin.
- Cycle Repeats: The low-pressure refrigerant gas returns to the compressor, and the cycle repeats.
7.3 Importance of Each Component
- Compressor: Without a functioning compressor, the refrigerant cannot be circulated, and the AC system will not cool.
- Condenser: A clogged or damaged condenser will reduce the system’s ability to dissipate heat, resulting in poor cooling performance.
- Receiver Drier or Accumulator: A saturated receiver drier or accumulator will not effectively remove moisture, which can damage the compressor and other components.
- Expansion Valve or Orifice Tube: A faulty expansion valve will not regulate the refrigerant flow properly, leading to either overcooling or undercooling.
- Evaporator: A dirty or damaged evaporator will reduce the system’s ability to absorb heat, resulting in poor cooling performance.
- Refrigerant Lines: Leaks in the refrigerant lines will cause the system to lose refrigerant, resulting in poor cooling performance.
- AC Pressure Sensor: A malfunctioning sensor can cause the compressor to shut off, preventing the system from cooling.
- Blower Motor: A faulty blower motor will not circulate air through the evaporator, preventing the system from cooling the cabin.
7.4 Troubleshooting Based on Component Function
- No Cooling: Check the compressor, refrigerant level, and expansion valve.
- Poor Cooling: Check the condenser, evaporator, and cabin air filter.
- Compressor Not Engaging: Check the AC pressure sensor, compressor relay, and electrical connections.
- Leaks: Check the refrigerant lines, compressor, and condenser for leaks.
- Unusual Noises: Check the compressor, blower motor, and belts for wear or damage.
Understanding the function of each AC system component can help you diagnose and repair issues more effectively, ensuring your AC system operates at its best. For advanced diagnostics, car coding, and professional training, consider visiting DTS-MONACO.EDU.VN.
8. Advanced Diagnostic Techniques for AC Systems
Diagnosing issues in modern AC systems often requires advanced techniques and tools. These methods can help pinpoint problems that are not easily identified through basic inspections.
8.1 Using Advanced Diagnostic Tools
- Manifold Gauge Set with Digital Readout:
- Function: Provides precise pressure readings for both the high and low sides of the AC system.
- Benefits: Digital readouts offer more accurate measurements compared to analog gauges, making it easier to identify subtle pressure variations.
- Refrigerant Leak Detector (Electronic):
- Function: Detects refrigerant leaks using electronic sensors that are highly sensitive to refrigerant gases.
- Benefits: More accurate than traditional methods (e.g., soap bubbles) and can detect leaks in hard-to-reach areas.
- Thermal Imaging Camera:
- Function: Visualizes temperature differences across AC components, helping to identify blockages or restrictions in refrigerant flow.
- Benefits: Quickly identifies issues such as clogged condensers or evaporators without disassembling the system.
- OBD-II Scanner with AC System Diagnostics:
- Function: Reads diagnostic trouble codes (DTCs) related to the AC system, providing insights into sensor malfunctions, electrical issues, and other problems.
- Benefits: Provides a starting point for diagnosing complex issues and can help identify the root cause of AC system failures.
- Multimeter with Temperature Probe:
- Function: Measures electrical parameters (voltage, current, resistance) and temperature, allowing for thorough testing of AC components.
- Benefits: Helps identify faulty sensors, wiring issues, and compressor problems.
8.2 Interpreting Diagnostic Data
- Analyzing Pressure Readings:
- Normal Readings: High-side pressure should be within the manufacturer’s specified range, typically 150-250 PSI, depending on ambient temperature. Low-side pressure should be around 30-45 PSI.
- High High-Side Pressure: Indicates a clogged condenser, overcharged system, or restricted airflow.
- Low High-Side Pressure: Indicates a low refrigerant charge, faulty compressor, or restricted expansion valve.
- High Low-Side Pressure: Indicates a faulty compressor, overcharged system, or restricted expansion valve.
- Low Low-Side Pressure: Indicates a low refrigerant charge, faulty expansion valve, or frozen evaporator.
- Reading Diagnostic Trouble Codes (DTCs):
- Common Codes: Examples include B1416 (compressor clutch circuit malfunction), B1417 (evaporator temperature sensor circuit malfunction), and B1418 (refrigerant pressure sensor circuit malfunction).
- Interpreting Codes: Consult the vehicle’s service manual to understand the meaning of each code and follow the recommended troubleshooting steps.
- Evaluating Temperature Readings:
- Evaporator Temperature: Should be around 32-45°F for optimal cooling.
- Condenser Temperature: Should be significantly higher than ambient temperature, indicating effective heat dissipation.
- Temperature Differences: Large temperature differences across components can indicate blockages or restrictions.
8.3 Performing Component Tests
- Compressor Clutch Test:
- Procedure: Use a multimeter to check for voltage at the compressor clutch connector when the AC is turned on. If there is no voltage, check the wiring, relay, and AC pressure sensor.
- Interpretation: If there is voltage but the clutch is not engaging, the clutch may be faulty and need replacement.
- Pressure Sensor Test:
- Procedure: Use a multimeter to check the sensor’s voltage output at different refrigerant pressures. Compare the readings to the manufacturer’s specifications.
- Interpretation: Inaccurate readings indicate a faulty sensor that needs replacement.
- Expansion Valve Test:
- Procedure: Monitor the temperature drop across the expansion valve using a thermal imaging camera or temperature probe.
- Interpretation: A small or non-existent temperature drop indicates a faulty expansion valve.
- Blower Motor Test:
- Procedure: Check the blower motor’s operation at different speed settings. Use a multimeter to measure the voltage at the blower motor connector.
- Interpretation: If the blower motor is not operating at all speeds or if there is no voltage, check the wiring, resistor, and blower motor.
8.4 Utilizing Car Coding for Diagnostics
- Accessing Advanced Diagnostic Data: Car coding tools can access detailed diagnostic information from the AC system’s ECU, providing insights into sensor readings, system pressures, and component status.
- Performing System Calibrations: Coding can be used to recalibrate sensors after replacement, ensuring accurate readings and optimal system performance.
- Enabling Diagnostic Modes: Some vehicles have diagnostic modes that can be activated through coding, providing additional troubleshooting information.
By using these advanced diagnostic techniques and tools, you can accurately diagnose and resolve complex AC system issues, ensuring optimal performance and reliability. For comprehensive car coding solutions and training, visit DTS-MONACO.EDU.VN.
9. The Future of AC Systems and Car Coding
The future of automotive AC systems is closely linked to advancements in technology and the increasing role of car coding. As vehicles become more sophisticated, AC systems will evolve to be more efficient, intelligent, and integrated with other vehicle systems.
9.1 Trends in AC System Technology
- Electric Compressors:
- Advantage: Electric compressors offer greater efficiency and can operate independently of the engine, improving fuel economy.
- Future Impact: As electric and hybrid vehicles become more prevalent, electric compressors will become standard in AC systems.
- Variable Displacement Compressors:
- Advantage: These compressors adjust their output based on cooling demand, reducing energy consumption and improving efficiency.
- Future Impact: Variable displacement compressors will become more sophisticated, using advanced algorithms to optimize cooling performance and energy usage.
- Smart AC Systems:
- Advantage: Smart AC systems use sensors and algorithms to monitor cabin temperature, humidity, and air quality, automatically adjusting settings for optimal comfort.
- Future Impact: Smart AC systems will become more integrated with other vehicle systems, such as navigation and climate control, to provide personalized comfort settings based on driver preferences and environmental conditions.
- Eco-Friendly Refrigerants:
- Advantage: New refrigerants with lower global warming potential (GWP) are being developed to reduce the environmental impact of AC systems.
- Future Impact: Regulations will continue to drive the adoption of eco-friendly refrigerants, such as R-1234yf and CO2, in automotive AC systems.
- Improved Heat Exchangers:
- Advantage: Advanced heat exchanger designs, such as microchannel condensers and evaporators, offer improved heat transfer and reduced size and weight.
- Future Impact: These heat exchangers will become more common, improving the efficiency and performance of AC systems.
9.2 The Expanding Role of Car Coding
- Advanced Customization:
- Future Impact: Car coding will allow drivers to customize AC system settings, such as fan speed, temperature preferences, and automatic start/stop behavior.
- Example: Drivers could program the AC to automatically turn on when the vehicle is started on hot days or to adjust the fan speed based on the number of passengers in the vehicle.
- Enhanced Diagnostics:
- Future Impact: Car coding tools will provide access to more detailed diagnostic data from AC systems, making it easier to identify and resolve complex issues.
- Example: Technicians could use coding to access real-time sensor readings, system pressures, and component status, helping them pinpoint the root cause of AC system failures.
- System Integration:
- Future Impact: Car coding will play a key role in integrating AC systems with other vehicle systems, such as navigation, climate control, and infotainment.
- Example: The AC system could automatically adjust its settings based on the vehicle’s location, weather conditions, and driver preferences.
- Remote Monitoring and Control:
- Future Impact: Car coding will enable remote monitoring and control of AC systems through smartphone apps and other devices.
- Example: Drivers could pre-cool their vehicle before entering it on a hot day or remotely adjust the AC settings for passengers.
- Predictive Maintenance:
- Future Impact: Car coding will be used to analyze data from AC systems and predict potential issues before they occur, enabling proactive maintenance.
- Example: The system could alert the driver to a potential compressor failure or refrigerant leak based on sensor readings and historical data.
9.3 Preparing for the Future
- Stay Informed: Keep up-to-date on the latest advancements in AC system technology and car coding.
- Invest in Training: Take courses and workshops to learn about new diagnostic techniques and coding procedures.
- Upgrade Tools: Invest in advanced diagnostic tools and coding equipment to stay ahead of the curve.
- Network with Professionals: Connect with other technicians and experts in the field to share knowledge and best practices.
- Embrace Change: Be open to new technologies and approaches, and be willing to adapt to the evolving landscape of automotive AC systems.
The future of AC systems is bright, with advancements in technology and the increasing