Is your vehicle sluggish, or are you experiencing a sudden loss of power? A failing turbocharger actuator might be the culprit. DTS-MONACO.EDU.VN helps you identify the signs of a failing turbocharger actuator so you can address the issue promptly. Understanding these symptoms and proactively addressing the problem can save you from costly repairs down the road. We will cover diagnostic tools like the DTS Monaco software, performance issues, and car coding aspects.
Contents
- 1. What is a Turbocharger Actuator and Why Does It Fail?
- 1.1. Function of the Turbocharger Actuator
- 1.2. Reasons for Actuator Failure
- 2. What Are the Common Symptoms of a Failing Turbocharger Actuator?
- 2.1. Reduced Engine Performance
- 2.2. Limp Mode Activation
- 2.3. Unusual Noises
- 2.4. Check Engine Light Illumination
- 2.5. Diagnostic Trouble Codes (DTCs)
- 2.6. Overboost or Underboost Conditions
- 2.7. Erratic Boost Pressure
- 2.8. Smoke from Exhaust
- 3. How to Diagnose a Failing Turbocharger Actuator?
- 3.1. Visual Inspection
- 3.2. Using Diagnostic Tools
- 3.3. Testing the Actuator
- 3.4. Utilizing DTS-Monaco Software
- 3.5. Step-by-Step Diagnostic Procedure
- 4. How to Replace a Failing Turbocharger Actuator?
- 4.1. Gathering Necessary Tools and Materials
- 4.2. Safety Precautions
- 4.3. Step-by-Step Replacement Guide
- 4.4. Post-Replacement Checks and Calibrations
- 4.5. Car Coding and Adaptations
- 5. What Are the Benefits of Using DTS-Monaco for Turbocharger Actuator Diagnostics and Car Coding?
- 5.1. Advanced Diagnostic Capabilities
- 5.2. Precise Actuator Calibration
- 5.3. Car Coding and Adaptations
- 5.4. User-Friendly Interface
- 5.5. Time and Cost Savings
- 5.6. Training and Support from DTS-MONACO.EDU.VN
- 6. What Are the Long-Term Effects of Ignoring a Failing Turbocharger Actuator?
- 6.1. Turbocharger Damage
- 6.2. Engine Damage
- 6.3. Reduced Fuel Efficiency
- 6.4. Limp Mode Activation
- 6.5. Increased Repair Costs
- 7. How Can Preventative Maintenance Prolong the Life of a Turbocharger Actuator?
- 7.1. Regular Oil Changes
- 7.2. Inspecting Air Filters
- 7.3. Checking for Leaks
- 7.4. Monitoring Boost Pressure
- 7.5. Cleaning the Turbocharger
- 7.6. Actuator Lubrication
- 7.7. Regular Diagnostic Checks
- 8. Understanding Turbocharger Actuator Types: REA vs. SREA
- 8.1. Rotary Electronic Actuator (REA)
- 8.2. Simple Rotary Electronic Actuator (SREA)
- 8.3. Identifying REA and SREA Connectors
- 8.4. Interchangeability
- 8.5. When to Use Each Type
- 9. Common Mistakes to Avoid When Working with Turbocharger Actuators
- 9.1. Mishandling the Actuator
- 9.2. Ignoring Diagnostic Trouble Codes (DTCs)
- 9.3. Neglecting Visual Inspections
- 9.4. Improper Calibration
- 9.5. Neglecting Post-Replacement Checks
- 9.6. Using Incorrect Parts
- 9.7. Overlooking Wiring Issues
- 10. Frequently Asked Questions (FAQs) About Turbocharger Actuators
- 10.1. What is the primary function of a turbocharger actuator?
- 10.2. How do I know if my turbocharger actuator is failing?
- 10.3. Can I drive with a failing turbocharger actuator?
- 10.4. What is DTS-Monaco software, and how can it help with turbocharger actuator diagnostics?
- 10.5. Are REA and SREA actuators interchangeable?
- 10.6. How often should I perform preventative maintenance on my turbocharger actuator?
- 10.7. What are the long-term effects of ignoring a failing turbocharger actuator?
- 10.8. Can I replace a turbocharger actuator myself?
- 10.9. How do I calibrate a new turbocharger actuator after replacement?
- 10.10. Where can I get training on using DTS-Monaco software for turbocharger diagnostics?
- Take Action Now
- Contact DTS-MONACO.EDU.VN Today
1. What is a Turbocharger Actuator and Why Does It Fail?
A turbocharger actuator is a crucial component that controls the boost pressure generated by the turbocharger. Its primary function is to regulate the amount of exhaust gas that flows into the turbocharger, thereby controlling the speed of the turbine and the amount of compressed air delivered to the engine. Over time, actuators can fail due to various factors, leading to performance issues and potential engine damage.
1.1. Function of the Turbocharger Actuator
The turbocharger actuator’s main job is to manage the turbocharger’s performance by adjusting the vanes or wastegate. This adjustment optimizes engine power and efficiency. A properly functioning actuator ensures the engine receives the right amount of boost at different speeds and loads.
1.2. Reasons for Actuator Failure
Several factors can contribute to the failure of a turbocharger actuator, including:
- Wear and Tear: Continuous operation under high temperatures and pressures can cause mechanical components to wear out over time.
- Carbon Buildup: Accumulation of carbon deposits can hinder the movement of the actuator mechanism.
- Electrical Issues: Faulty wiring, connectors, or internal electronic components can disrupt the actuator’s operation.
- Corrosion: Exposure to moisture and road salts can lead to corrosion, affecting the actuator’s functionality.
- Overboost: Excessive boost pressure can strain the actuator, leading to premature failure. According to a study by Bosch, overboost conditions account for approximately 20% of turbocharger actuator failures.
- Actuator sticking: The actuator gets stuck due to sludging or carbon buildup; When this happens, it will pull a higher current through the motor than it is designed to take, therefore, causes the motor to burnout or the plastic worm gears to fail.
Understanding these factors is crucial for diagnosing and preventing turbocharger actuator failures.
2. What Are the Common Symptoms of a Failing Turbocharger Actuator?
Identifying the signs of a failing turbocharger actuator early can prevent further damage. Here are some common symptoms to watch out for:
2.1. Reduced Engine Performance
One of the primary indicators of a failing turbocharger actuator is a noticeable decrease in engine power. This can manifest as:
- Sluggish Acceleration: The vehicle takes longer to accelerate than usual.
- Poor Throttle Response: The engine doesn’t respond quickly to changes in throttle input.
- Loss of Power on Inclines: The vehicle struggles to maintain speed when going uphill.
2.2. Limp Mode Activation
Limp mode, or reduced power mode, is a safety feature in modern vehicles that limits engine power to prevent further damage when a problem is detected. A failing turbocharger actuator can trigger limp mode, resulting in significantly reduced performance. According to the National Institute for Automotive Service Excellence (ASE), limp mode is often a direct consequence of critical engine component failures.
2.3. Unusual Noises
Strange noises emanating from the engine bay can indicate a failing turbocharger actuator. These noises may include:
- Whining or Whistling: A high-pitched sound that increases with engine RPM.
- Rattling: A loose or damaged actuator mechanism can produce a rattling sound.
- Hissing: A leak in the turbocharger system can create a hissing sound.
2.4. Check Engine Light Illumination
The check engine light is a universal indicator of potential issues within the vehicle’s systems. A failing turbocharger actuator can trigger the check engine light, accompanied by specific diagnostic trouble codes (DTCs).
2.5. Diagnostic Trouble Codes (DTCs)
When the check engine light comes on, a diagnostic scan can reveal specific DTCs related to the turbocharger actuator. Common codes include:
- P0045: Turbocharger Boost Control Solenoid Circuit Open
- P0046: Turbocharger Boost Control Solenoid Circuit Range/Performance
- P0047: Turbocharger Boost Control Solenoid Circuit Low
- P0048: Turbocharger Boost Control Solenoid Circuit High
These codes provide valuable information for diagnosing the specific problem with the actuator. Modern diagnostic software can assist in interpreting these codes and guiding the repair process.
2.6. Overboost or Underboost Conditions
A malfunctioning turbocharger actuator can cause the turbocharger to produce too much (overboost) or too little (underboost) pressure. Overboost can damage the engine, while underboost results in reduced power and efficiency.
2.7. Erratic Boost Pressure
Inconsistent boost pressure, where the boost fluctuates unexpectedly, can also signal an actuator problem. This can lead to an unstable engine performance and a jerky driving experience.
2.8. Smoke from Exhaust
Excessive black or blue smoke from the exhaust pipe can indicate a turbocharger issue, potentially related to a failing actuator. Black smoke suggests incomplete combustion due to overfueling, while blue smoke indicates oil burning in the engine.
Here is a table summarizing the symptoms of a failing turbocharger actuator:
| Symptom | Description |
|---|---|
| Reduced Engine Performance | Sluggish acceleration, poor throttle response, loss of power on inclines |
| Limp Mode Activation | Vehicle enters reduced power mode to prevent further damage |
| Unusual Noises | Whining, whistling, rattling, or hissing sounds from the engine bay |
| Check Engine Light | Illumination of the check engine light on the dashboard |
| DTCs | Diagnostic trouble codes related to the turbocharger actuator (e.g., P0045, P0046, P0047, P0048) |
| Overboost/Underboost | Turbocharger produces too much or too little boost pressure |
| Erratic Boost Pressure | Inconsistent and fluctuating boost pressure |
| Smoke from Exhaust | Excessive black or blue smoke from the exhaust pipe |
Recognizing these symptoms is the first step in diagnosing a turbocharger actuator problem. Early detection and repair can prevent further damage and maintain your vehicle’s performance.
3. How to Diagnose a Failing Turbocharger Actuator?
Diagnosing a failing turbocharger actuator involves a combination of visual inspections, diagnostic tools, and performance tests. A systematic approach can help pinpoint the problem accurately.
3.1. Visual Inspection
Begin with a thorough visual inspection of the turbocharger and actuator. Check for:
- Physical Damage: Look for cracks, dents, or other signs of damage on the actuator housing.
- Loose Connections: Ensure all electrical connectors are securely attached and free from corrosion.
- Linkage Movement: Observe the movement of the actuator linkage. It should move smoothly without any binding or resistance.
- Wiring Condition: Check the wiring for fraying, cuts, or other damage.
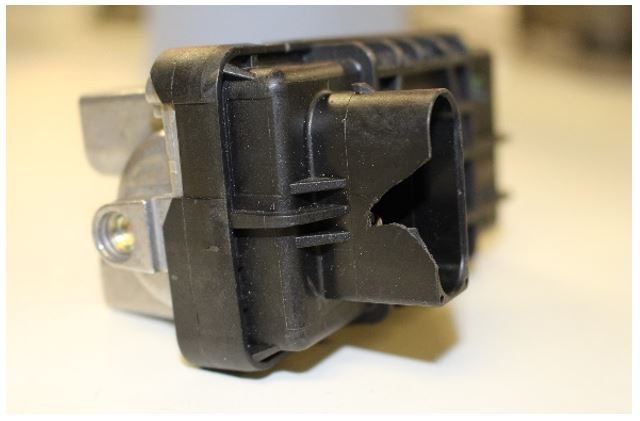 Checking turbocharger actuator wiring for damage and corrosion
3.2. Using Diagnostic Tools
Diagnostic tools play a crucial role in identifying turbocharger actuator problems. These tools can read DTCs, monitor sensor data, and perform actuator tests.
- OBD-II Scanner: An OBD-II scanner can read and clear DTCs related to the turbocharger system. This helps identify the specific fault codes associated with the actuator.
- Advanced Diagnostic Software: Software like DTS-Monaco provides advanced diagnostic capabilities, including real-time data monitoring, actuator testing, and car coding functionalities. According to a report by the Society of Automotive Engineers (SAE), advanced diagnostic software can reduce diagnostic time by up to 40%.
3.3. Testing the Actuator
Several tests can be performed to assess the functionality of the turbocharger actuator.
- Voltage Test: Use a multimeter to check the voltage supply to the actuator. Ensure the voltage is within the specified range.
- Continuity Test: Check the continuity of the wiring harness to identify any open circuits or shorts.
- Actuator Movement Test: With the engine running, observe the movement of the actuator linkage. It should move in response to changes in engine load.
- Boost Pressure Test: Use a boost gauge to monitor the boost pressure produced by the turbocharger. Compare the actual boost pressure to the specified values.
3.4. Utilizing DTS-Monaco Software
DTS-Monaco is a powerful diagnostic and car coding software used by automotive technicians to diagnose and troubleshoot complex vehicle systems. It offers advanced functionalities for testing and calibrating turbocharger actuators.
- Actuator Calibration: DTS-Monaco allows you to calibrate the turbocharger actuator to ensure it operates within the correct parameters.
- Real-Time Data Monitoring: The software provides real-time data on actuator position, voltage, and current, allowing you to monitor its performance under different conditions.
- Fault Code Analysis: DTS-Monaco offers detailed fault code analysis, providing insights into the root cause of the problem.
3.5. Step-by-Step Diagnostic Procedure
- Read DTCs: Use an OBD-II scanner or DTS-Monaco to read and record any diagnostic trouble codes.
- Visual Inspection: Perform a thorough visual inspection of the turbocharger and actuator.
- Voltage Test: Check the voltage supply to the actuator using a multimeter.
- Continuity Test: Verify the continuity of the wiring harness.
- Actuator Movement Test: Observe the movement of the actuator linkage with the engine running.
- Boost Pressure Test: Monitor the boost pressure using a boost gauge.
- DTS-Monaco Analysis: Use DTS-Monaco to perform actuator calibration, real-time data monitoring, and fault code analysis.
By following this systematic diagnostic procedure, you can accurately identify the cause of the turbocharger actuator failure and implement the appropriate repair.
4. How to Replace a Failing Turbocharger Actuator?
Replacing a failing turbocharger actuator requires careful attention to detail and adherence to proper procedures. Here is a step-by-step guide to help you through the process.
4.1. Gathering Necessary Tools and Materials
Before starting the replacement, gather all the necessary tools and materials, including:
- New turbocharger actuator
- Socket set
- Wrench set
- Screwdrivers
- Multimeter
- OBD-II scanner
- DTS-Monaco software (optional)
- Safety glasses
- Gloves
4.2. Safety Precautions
- Disconnect the Battery: Before working on any electrical components, disconnect the negative terminal of the battery to prevent electrical shocks.
- Wear Safety Gear: Always wear safety glasses and gloves to protect yourself from potential hazards.
- Work in a Well-Ventilated Area: Ensure the work area is well-ventilated to avoid inhaling harmful fumes.
- Allow Engine to Cool: Make sure the engine is cool before starting the replacement to avoid burns.
4.3. Step-by-Step Replacement Guide
- Locate the Turbocharger Actuator: Identify the location of the turbocharger actuator in the engine bay. Refer to the vehicle’s service manual for specific instructions.
- Disconnect Electrical Connectors: Carefully disconnect the electrical connectors from the actuator. Use a small screwdriver to release any locking tabs.
 Disconnecting the electrical connector from the turbocharger actuator
- Remove Mounting Bolts: Use a socket or wrench to remove the mounting bolts securing the actuator to the turbocharger.
- Detach Actuator Linkage: Disconnect the actuator linkage from the turbocharger vane mechanism. Be careful not to damage the linkage or vane mechanism.
- Install the New Actuator: Attach the new actuator to the turbocharger, aligning the mounting holes.
- Secure Mounting Bolts: Tighten the mounting bolts to the specified torque.
- Connect Actuator Linkage: Reconnect the actuator linkage to the turbocharger vane mechanism.
- Reconnect Electrical Connectors: Plug in the electrical connectors to the actuator, ensuring they are securely attached.
- Verify Actuator Movement: Manually move the actuator linkage to ensure it moves freely without any binding.
- Reconnect Battery: Reconnect the negative terminal of the battery.
- Start the Engine: Start the engine and let it idle for a few minutes.
- Check for Leaks: Inspect the turbocharger and actuator for any leaks or unusual noises.
- Scan for DTCs: Use an OBD-II scanner to check for any diagnostic trouble codes. Clear any codes that may be present.
- Test Drive: Take the vehicle for a test drive to ensure the turbocharger is functioning properly.
4.4. Post-Replacement Checks and Calibrations
After replacing the turbocharger actuator, it is essential to perform post-replacement checks and calibrations to ensure optimal performance.
- Boost Pressure Monitoring: Use a boost gauge to monitor the boost pressure produced by the turbocharger. Ensure the boost pressure is within the specified range.
- Actuator Calibration with DTS-Monaco: Use DTS-Monaco software to calibrate the new actuator. This ensures the actuator operates within the correct parameters and optimizes engine performance.
4.5. Car Coding and Adaptations
In some cases, car coding and adaptations may be necessary after replacing the turbocharger actuator. This involves using diagnostic software to program the vehicle’s ECU to recognize the new actuator.
- ECU Programming: Use DTS-Monaco or other compatible software to program the ECU with the correct settings for the new actuator.
- Adaptation Procedures: Follow the adaptation procedures outlined in the vehicle’s service manual to ensure the actuator is properly integrated into the engine management system.
By following this comprehensive replacement guide and performing the necessary post-replacement checks and calibrations, you can ensure the successful replacement of a failing turbocharger actuator.
5. What Are the Benefits of Using DTS-Monaco for Turbocharger Actuator Diagnostics and Car Coding?
DTS-Monaco is a powerful diagnostic and car coding software that offers numerous benefits for diagnosing turbocharger actuator problems and performing car coding procedures.
5.1. Advanced Diagnostic Capabilities
DTS-Monaco provides advanced diagnostic capabilities that go beyond basic OBD-II scanning. It allows you to:
- Read and Clear DTCs: Quickly read and clear diagnostic trouble codes related to the turbocharger system.
- Real-Time Data Monitoring: Monitor real-time data on actuator position, voltage, current, and other parameters.
- Actuator Testing: Perform actuator tests to verify its functionality and response.
- Fault Code Analysis: Analyze fault codes in detail to identify the root cause of the problem.
5.2. Precise Actuator Calibration
DTS-Monaco allows you to calibrate the turbocharger actuator to ensure it operates within the correct parameters. This is crucial for optimizing engine performance and preventing future problems.
- Calibration Procedures: Follow guided calibration procedures to adjust the actuator settings to the specified values.
- Parameter Adjustments: Fine-tune actuator parameters such as voltage, current, and position to achieve optimal performance.
5.3. Car Coding and Adaptations
DTS-Monaco enables you to perform car coding and adaptations, which are necessary for integrating the new actuator into the vehicle’s engine management system.
- ECU Programming: Program the vehicle’s ECU with the correct settings for the new actuator.
- Adaptation Procedures: Follow adaptation procedures to ensure the actuator is properly recognized and controlled by the ECU.
5.4. User-Friendly Interface
DTS-Monaco features a user-friendly interface that makes it easy to navigate and use its various functions.
- Intuitive Design: The software is designed to be intuitive and easy to use, even for technicians with limited experience.
- Guided Procedures: DTS-Monaco provides guided procedures and step-by-step instructions to help you perform diagnostic and coding tasks accurately.
5.5. Time and Cost Savings
By providing advanced diagnostic and coding capabilities, DTS-Monaco can save you time and money on turbocharger actuator repairs.
- Faster Diagnostics: The software’s advanced features enable you to diagnose problems quickly and accurately.
- Reduced Repair Costs: By identifying and addressing problems early, you can prevent more costly repairs down the road.
- Increased Efficiency: DTS-Monaco streamlines the diagnostic and coding process, increasing your efficiency and productivity.
5.6. Training and Support from DTS-MONACO.EDU.VN
DTS-MONACO.EDU.VN offers comprehensive training and support for using DTS-Monaco software. Our training programs are designed to help you:
- Master DTS-Monaco: Learn how to use all the features and functions of DTS-Monaco software.
- Improve Diagnostic Skills: Enhance your diagnostic skills and troubleshoot complex vehicle systems.
- Perform Car Coding: Learn how to perform car coding and adaptations safely and effectively.
- Stay Up-to-Date: Stay up-to-date with the latest software updates and diagnostic techniques.
Address: 275 N Harrison St, Chandler, AZ 85225, United States. Whatsapp: +1 (641) 206-8880. Website: DTS-MONACO.EDU.VN.
By investing in DTS-Monaco software and training from DTS-MONACO.EDU.VN, you can enhance your diagnostic capabilities, improve your repair efficiency, and provide better service to your customers.
6. What Are the Long-Term Effects of Ignoring a Failing Turbocharger Actuator?
Ignoring a failing turbocharger actuator can lead to severe engine damage and costly repairs. Understanding the long-term effects can help you appreciate the importance of timely diagnosis and repair.
6.1. Turbocharger Damage
A malfunctioning actuator can cause the turbocharger to operate inefficiently, leading to premature wear and damage.
- Overheating: Excessive boost pressure can cause the turbocharger to overheat, damaging the turbine and compressor wheels.
- Bearing Failure: Inadequate lubrication due to overheating can lead to bearing failure, resulting in turbocharger failure.
- Turbine Blade Damage: Debris or excessive speed can damage the turbine blades, reducing the turbocharger’s efficiency.
6.2. Engine Damage
A failing turbocharger actuator can have detrimental effects on the engine.
- Knocking or Detonation: Overboost conditions can cause knocking or detonation, which can damage pistons, connecting rods, and cylinder heads.
- Cylinder Head Damage: Excessive heat can warp or crack the cylinder head, leading to coolant leaks and compression loss.
- Piston Damage: Overboost can cause pistons to crack or melt, resulting in severe engine damage.
6.3. Reduced Fuel Efficiency
An inefficient turbocharger can reduce fuel efficiency, costing you more money at the pump.
- Incomplete Combustion: A malfunctioning turbocharger can lead to incomplete combustion, reducing fuel economy.
- Increased Emissions: Inefficient combustion can increase emissions, leading to environmental concerns and potential fines.
6.4. Limp Mode Activation
Repeated activation of limp mode can cause further damage to the engine and transmission.
- Transmission Damage: Limp mode can cause the transmission to shift erratically, leading to premature wear and damage.
- Engine Strain: Operating the engine in limp mode can put additional strain on other components, increasing the risk of failure.
6.5. Increased Repair Costs
Ignoring a failing turbocharger actuator can lead to more extensive and costly repairs in the future.
- Turbocharger Replacement: A damaged turbocharger may need to be replaced, which can be an expensive repair.
- Engine Overhaul: Severe engine damage may require a complete engine overhaul, which can cost thousands of dollars.
- Vehicle Downtime: Extensive repairs can result in significant vehicle downtime, impacting your daily life or business operations.
Here is a table summarizing the long-term effects of ignoring a failing turbocharger actuator:
| Effect | Description |
|---|---|
| Turbocharger Damage | Overheating, bearing failure, turbine blade damage |
| Engine Damage | Knocking or detonation, cylinder head damage, piston damage |
| Reduced Fuel Efficiency | Incomplete combustion, increased emissions |
| Limp Mode Activation | Transmission damage, engine strain |
| Increased Repair Costs | Turbocharger replacement, engine overhaul, vehicle downtime |
By understanding these long-term effects, you can appreciate the importance of addressing a failing turbocharger actuator promptly. Timely diagnosis and repair can prevent severe engine damage and save you from costly repairs down the road.
7. How Can Preventative Maintenance Prolong the Life of a Turbocharger Actuator?
Preventative maintenance is essential for prolonging the life of a turbocharger actuator and ensuring optimal performance. Regular maintenance can help identify and address potential problems before they lead to significant damage.
7.1. Regular Oil Changes
Regular oil changes are crucial for maintaining the health of the turbocharger and actuator.
- Clean Oil: Clean oil helps lubricate the turbocharger bearings, reducing friction and wear.
- Proper Viscosity: Using the correct oil viscosity ensures adequate lubrication under high temperatures and pressures.
- Oil Filter Replacement: Replacing the oil filter regularly prevents contaminants from circulating through the turbocharger.
7.2. Inspecting Air Filters
A clean air filter is essential for preventing debris from entering the turbocharger.
- Air Filter Replacement: Replace the air filter regularly to ensure proper airflow and prevent contaminants from damaging the turbocharger.
- Filter Condition: Inspect the air filter for dirt, debris, and damage. Replace the filter if it is dirty or damaged.
7.3. Checking for Leaks
Regularly inspect the turbocharger and actuator for leaks.
- Oil Leaks: Check for oil leaks around the turbocharger and actuator. Address any leaks promptly to prevent oil starvation and damage.
- Exhaust Leaks: Inspect the exhaust system for leaks. Exhaust leaks can reduce turbocharger efficiency and cause overheating.
7.4. Monitoring Boost Pressure
Monitor the boost pressure regularly to ensure the turbocharger is operating within the specified range.
- Boost Gauge: Use a boost gauge to monitor the boost pressure.
- Pressure Range: Compare the actual boost pressure to the specified values. Investigate any deviations from the normal range.
7.5. Cleaning the Turbocharger
Regularly cleaning the turbocharger can help remove carbon deposits and prevent actuator problems.
- Turbo Cleaner: Use a turbo cleaner to remove carbon deposits from the turbocharger vanes and actuator mechanism.
- Cleaning Procedure: Follow the manufacturer’s instructions for cleaning the turbocharger.
7.6. Actuator Lubrication
Lubricating the actuator linkage can help prevent binding and ensure smooth operation.
- Lubricant Type: Use a high-quality lubricant that is designed for high-temperature applications.
- Application: Apply the lubricant to the actuator linkage and pivot points.
7.7. Regular Diagnostic Checks
Perform regular diagnostic checks using an OBD-II scanner or DTS-Monaco to identify potential problems early.
- DTC Scanning: Scan for diagnostic trouble codes related to the turbocharger system.
- Data Monitoring: Monitor real-time data on actuator position, voltage, and current.
- Actuator Testing: Perform actuator tests to verify its functionality.
Here is a table summarizing preventative maintenance tips for prolonging the life of a turbocharger actuator:
| Maintenance Task | Description |
|---|---|
| Regular Oil Changes | Use clean oil of the correct viscosity, and replace the oil filter regularly. |
| Inspecting Air Filters | Replace the air filter regularly and check for dirt, debris, and damage. |
| Checking for Leaks | Inspect the turbocharger and actuator for oil and exhaust leaks. |
| Monitoring Boost Pressure | Use a boost gauge to monitor the boost pressure and compare it to the specified values. |
| Cleaning the Turbocharger | Use a turbo cleaner to remove carbon deposits from the turbocharger vanes and actuator mechanism. |
| Actuator Lubrication | Lubricate the actuator linkage with a high-quality lubricant designed for high-temperature applications. |
| Regular Diagnostic Checks | Perform regular diagnostic checks using an OBD-II scanner or DTS-Monaco to identify potential problems early. |
By following these preventative maintenance tips, you can prolong the life of your turbocharger actuator and ensure optimal engine performance.
8. Understanding Turbocharger Actuator Types: REA vs. SREA
Turbocharger actuators come in various types, each designed to meet specific engine requirements. Two common types are Rotary Electronic Actuators (REA) and Simple Rotary Electronic Actuators (SREA). Understanding the differences between these types can help you diagnose and repair turbocharger problems more effectively.
8.1. Rotary Electronic Actuator (REA)
Rotary Electronic Actuators (REA) are more complex and provide precise control over the turbocharger vanes.
- Advanced Control: REAs offer advanced control over the turbocharger vanes, allowing for precise adjustments based on engine load and speed.
- Feedback Mechanism: REAs incorporate a feedback mechanism that provides real-time information on the actuator’s position, enabling the ECU to make accurate adjustments.
- Complex Design: REAs have a more complex design compared to SREAs, with additional electronic components and sensors.
8.2. Simple Rotary Electronic Actuator (SREA)
Simple Rotary Electronic Actuators (SREA) are simpler in design and offer basic control over the turbocharger vanes.
- Basic Control: SREAs provide basic control over the turbocharger vanes, adjusting the vane position based on engine load.
- No Feedback Mechanism: SREAs do not have a feedback mechanism, relying on pre-programmed settings to control the actuator.
- Simple Design: SREAs have a simpler design compared to REAs, with fewer electronic components and sensors.
8.3. Identifying REA and SREA Connectors
REA and SREA connectors can be identified by their different orientations. The connector orientation can vary depending on the vehicle manufacturer and model.
 Identifying REA and SREA connectors by orientation
8.4. Interchangeability
REA and SREA actuators are not interchangeable. Each type is designed for specific applications and has unique calibration settings.
- Calibration Settings: REA and SREA actuators have different calibration settings that are programmed into the ECU.
- Performance Differences: Using the wrong type of actuator can result in poor engine performance and potential damage.
8.5. When to Use Each Type
- REA: Use REAs in applications that require precise control over the turbocharger vanes, such as high-performance engines.
- SREA: Use SREAs in applications that require basic control over the turbocharger vanes, such as standard engines.
Here is a table summarizing the differences between REA and SREA actuators:
| Feature | REA | SREA |
|---|---|---|
| Control | Advanced control over turbocharger vanes | Basic control over turbocharger vanes |
| Feedback Mechanism | Incorporates a feedback mechanism | No feedback mechanism |
| Design | Complex design with additional electronic components and sensors | Simple design with fewer electronic components and sensors |
| Interchangeability | Not interchangeable with SREA | Not interchangeable with REA |
| Applications | High-performance engines that require precise control over the turbocharger vanes | Standard engines that require basic control over the turbocharger vanes |
Understanding the differences between REA and SREA actuators can help you diagnose and repair turbocharger problems more effectively. Always use the correct type of actuator for the specific application to ensure optimal performance and prevent damage.
9. Common Mistakes to Avoid When Working with Turbocharger Actuators
Working with turbocharger actuators requires precision and attention to detail. Avoiding common mistakes can help you prevent damage and ensure a successful repair.
9.1. Mishandling the Actuator
Mishandling the actuator can damage its delicate components.
- Dropping the Actuator: Avoid dropping the actuator, as this can damage its internal components.
- Applying Excessive Force: Do not apply excessive force when handling the actuator, as this can bend or break its components.
9.2. Ignoring Diagnostic Trouble Codes (DTCs)
Ignoring DTCs can lead to misdiagnosis and improper repairs.
- Reading DTCs: Always read DTCs before starting any repairs.
- Analyzing DTCs: Analyze the DTCs to understand the root cause of the problem.
- Clearing DTCs: Clear the DTCs after completing the repairs to ensure the problem is resolved.
9.3. Neglecting Visual Inspections
Neglecting visual inspections can cause you to overlook obvious problems.
- Physical Damage: Check for cracks, dents, and other signs of physical damage.
- Loose Connections: Ensure all electrical connectors are securely attached.
- Wiring Condition: Inspect the wiring for fraying, cuts, and other damage.
9.4. Improper Calibration
Improper calibration can result in poor engine performance and potential damage.
- Calibration Procedures: Follow the correct calibration procedures for the specific actuator.
- Parameter Settings: Set the calibration parameters to the specified values.
- Software Updates: Ensure your diagnostic software is up-to-date with the latest calibration settings.
9.5. Neglecting Post-Replacement Checks
Neglecting post-replacement checks can cause you to miss potential problems.
- Boost Pressure Monitoring: Monitor the boost pressure to ensure it is within the specified range.
- Actuator Movement: Verify the actuator linkage moves freely without any binding.
- DTC Scanning: Scan for DTCs to ensure there are no new codes.
9.6. Using Incorrect Parts
Using incorrect parts can result in poor performance and potential damage.
- Part Numbers: Verify the part numbers match the original actuator.
- Actuator Types: Ensure you are using the correct type of actuator (REA or SREA) for the specific application.
- Calibration Settings: Ensure the calibration settings are correct for the specific engine.
9.7. Overlooking Wiring Issues
Overlooking wiring issues can cause intermittent problems and misdiagnosis.
- Continuity Testing: Perform continuity testing to check for open circuits and shorts.
- Voltage Testing: Check the voltage supply to the actuator.
- Connector Condition: Inspect the connectors for corrosion and damage.
Here is a table summarizing common mistakes to avoid when working with turbocharger actuators:
| Mistake | Description |
|---|---|
| Mishandling the Actuator | Dropping the actuator or applying excessive force |
| Ignoring Diagnostic Codes | Failing to read, analyze, or clear DTCs |
| Neglecting Visual Inspections | Overlooking physical damage, loose connections, or wiring issues |
| Improper Calibration | Failing to follow correct calibration procedures or setting incorrect parameter values |
| Neglecting Post-Replacement Checks | Failing to monitor boost pressure, verify actuator movement, or scan for DTCs |
| Using Incorrect Parts | Using parts with incorrect part numbers, actuator types, or calibration settings |
| Overlooking Wiring Issues | Failing to perform continuity testing, check voltage supply, or inspect connectors |
By avoiding these common mistakes, you can improve your diagnostic and repair accuracy, prevent damage, and ensure a successful outcome.
10. Frequently Asked Questions (FAQs) About Turbocharger Actuators
Here are some frequently asked questions about turbocharger actuators to help you better understand this critical component.
10.1. What is the primary function of a turbocharger actuator?
The primary function of a turbocharger actuator is to control the boost pressure generated by the turbocharger by adjusting the vanes or wastegate. This adjustment optimizes engine power and efficiency.
10.2. How do I know if my turbocharger actuator is failing?
Common symptoms of a failing turbocharger actuator include reduced engine performance, limp mode activation, unusual noises, check engine light illumination, diagnostic trouble codes, overboost or underboost conditions, erratic boost pressure, and smoke from the exhaust.
10.3. Can I drive with a failing turbocharger actuator?
Driving with a failing turbocharger actuator is not recommended. It can lead to severe engine damage and costly repairs. It’s best to diagnose and repair the problem as soon as possible.
10.4. What is DTS-Monaco software, and how can it help with turbocharger actuator diagnostics?
DTS-Monaco is a powerful diagnostic and car coding software that offers advanced capabilities for testing and calibrating turbocharger actuators. It allows you to read DTCs, monitor real-time data, perform actuator tests, calibrate the actuator, and program the ECU.
10.5. Are REA and SREA actuators interchangeable?
No, REA and SREA actuators are not interchangeable. Each type is designed for specific applications and has unique calibration settings.
10.6. How often should I perform preventative maintenance on my turbocharger actuator?
You should perform preventative maintenance on your turbocharger actuator regularly, including regular oil changes, inspecting air filters, checking for leaks, monitoring boost pressure, cleaning the turbocharger, lubricating the actuator, and performing regular diagnostic checks.
10.7. What are the long-term effects of ignoring a failing turbocharger actuator?
Ignoring a failing turbocharger actuator can lead to turbocharger damage, engine damage, reduced fuel efficiency, limp mode activation, and increased repair costs.
10.8. Can I replace a turbocharger actuator myself?
Replacing a turbocharger actuator yourself is possible if you have the necessary tools, knowledge, and experience. However, it is recommended to have the replacement done by a qualified technician to ensure it is done correctly.
10.9. How do I calibrate a new turbocharger actuator after replacement?
Calibrating a new turbocharger actuator typically requires using diagnostic software such as DTS-Monaco to program the ECU with the correct settings for the new actuator.
10.10. Where can I get training on using DTS-Monaco software for turbocharger diagnostics?
DTS-MONACO.EDU.VN offers comprehensive training and support for using DTS-Monaco software. Our training programs are designed to help you master DTS-Monaco, improve your diagnostic skills, perform car coding, and stay up-to-date with the latest techniques. Address: 275 N Harrison St, Chandler, AZ 85225, United States. Whatsapp: +1 (641) 206-8880. Website: DTS-MONACO.EDU.VN.
Take Action Now
Don’t let a failing turbocharger actuator compromise your vehicle’s performance and longevity. Recognizing the signs early and taking prompt action can save you from costly repairs.
Contact DTS-MONACO.EDU.VN Today
Ready to take your turbocharger diagnostics and car coding skills to the next level? Contact DTS-MONACO.EDU.VN today to learn more about our DTS-Monaco software and training programs. Our expert team is here to help you:
- Master DTS-Monaco software
- Improve your diagnostic skills
- Perform car coding with confidence
- Stay up-to-date with the latest techniques
Visit our website at DTS-MONACO.EDU.VN or contact us via