Replacing an EVAP purge valve is a manageable task for most DIY mechanics, especially when guided by the right resources. DTS-MONACO.EDU.VN is here to provide a detailed, step-by-step guide on how to replace your vapor canister purge valve, ensuring optimal vehicle performance and emissions control. By following this guide, you’ll gain valuable insights into automotive repair, enhance your skills, and save money on costly mechanic fees, all while contributing to a cleaner environment with proper emission controls and improved fuel efficiency.
Contents
- 1. What is an EVAP Purge Valve and Why Replace It?
- 1.1. Defining the EVAP Purge Valve
- 1.2. Functions of the EVAP Purge Valve
- 1.3. Reasons to Replace the EVAP Purge Valve
- 1.4. Consequences of a Faulty EVAP Purge Valve
- 2. Identifying When to Replace Your EVAP Purge Valve
- 2.1. Common Symptoms of a Bad EVAP Purge Valve
- 2.2. Diagnostic Codes Associated with the EVAP Purge Valve
- 2.3. Using an OBD-II Scanner for Diagnosis
- 2.4. Physical Inspection of the EVAP Purge Valve
- 3. Tools and Materials Needed for Replacement
- 3.1. Essential Tools for the Job
- 3.2. Replacement Parts and Materials
- 3.3. Where to Purchase Replacement Parts
- 3.4. Ensuring You Have the Correct Part
- 4. Step-by-Step Guide to Replacing the EVAP Purge Valve
- 4.1. Safety Precautions
- 4.2. Step 1: Locating the EVAP Purge Valve
- 4.3. Step 2: Disconnecting Electrical Connections
- 4.4. Step 3: Disconnecting Vacuum Hoses
- 4.5. Step 4: Removing the Old EVAP Purge Valve
- 4.6. Step 5: Installing the New EVAP Purge Valve
- 4.7. Step 6: Testing the New EVAP Purge Valve
- 5. Common Issues and Troubleshooting
- 5.1. Check Engine Light Still On
- 5.2. Vacuum Leaks After Replacement
- 5.3. Engine Runs Rough After Replacement
- 5.4. Testing the EVAP Purge Valve with a Multimeter
- 6. Benefits of Replacing Your EVAP Purge Valve
- 6.1. Improved Fuel Economy
- 6.2. Reduced Emissions
- 6.3. Smoother Engine Performance
- 6.4. Prevents Costly Repairs
- 6.5. Environmental Responsibility
- 7. Maintaining Your Vehicle’s EVAP System
- 7.1. Regular Inspections
- 7.2. Replacing the Gas Cap
- 7.3. Avoiding Overfilling the Fuel Tank
- 7.4. Proper Fuel Storage
- 7.5. Professional Servicing
- 8. Advanced Diagnostics with DTS-Monaco
- 8.1. Introduction to DTS-Monaco
- 8.2. Using DTS-Monaco for EVAP System Diagnostics
- 8.3. Benefits of Using DTS-Monaco
- 8.4. Where to Learn More About DTS-Monaco
- 9. Real-World Examples and Case Studies
- 9.1. Case Study 1: Rough Idling and Check Engine Light
- 9.2. Case Study 2: Failed Emissions Test
- 9.3. Case Study 3: Poor Fuel Economy
- 10. Frequently Asked Questions (FAQ)
- 10.1. What is the purpose of the EVAP purge valve?
- 10.2. How often should I replace the EVAP purge valve?
- 10.3. Can I drive with a bad EVAP purge valve?
- 10.4. How much does it cost to replace the EVAP purge valve?
- 10.5. Can I replace the EVAP purge valve myself?
- 10.6. What are the symptoms of a bad EVAP purge valve?
- 10.7. How can I test the EVAP purge valve?
- 10.8. What is an OBD-II scanner?
- 10.9. Where is the EVAP purge valve located?
- 10.10. What happens if I ignore a bad EVAP purge valve?
1. What is an EVAP Purge Valve and Why Replace It?
The EVAP (Evaporative Emission Control) purge valve is a crucial component in your vehicle’s emission control system.
1.1. Defining the EVAP Purge Valve
The EVAP purge valve, also known as a canister purge solenoid, is a vital part of your vehicle’s Evaporative Emission Control (EVAP) system. Its primary function is to prevent fuel vapors from escaping into the atmosphere, helping to reduce pollution and improve air quality. It does this by storing these vapors in a charcoal canister until the engine is running, at which point the valve opens and allows the vapors to be burned along with the regular fuel mixture. According to the Environmental Protection Agency (EPA), a well-functioning EVAP system significantly reduces harmful emissions from vehicles.
1.2. Functions of the EVAP Purge Valve
The EVAP purge valve regulates the flow of fuel vapors from the charcoal canister to the engine’s intake manifold. This process ensures that these vapors are burned during combustion, preventing them from being released into the atmosphere. When the engine is off, the valve remains closed to trap the vapors. During operation, the engine control unit (ECU) controls the valve, opening it at appropriate times to purge the vapors.
1.3. Reasons to Replace the EVAP Purge Valve
There are several reasons why you might need to replace your EVAP purge valve. Common issues include:
- Malfunctioning Valve: The valve may become stuck open or closed due to wear and tear, preventing proper vapor flow.
- Vacuum Leaks: Cracks or damage to the valve can cause vacuum leaks, leading to poor engine performance.
- Electrical Issues: The solenoid that controls the valve can fail, rendering the valve inoperable.
- Contamination: Debris and contaminants can clog the valve, affecting its performance.
1.4. Consequences of a Faulty EVAP Purge Valve
A malfunctioning EVAP purge valve can lead to several problems, including:
- Check Engine Light: The most common symptom is the illumination of the check engine light, often accompanied by error codes such as P0441, P0446, or other EVAP-related codes.
- Poor Fuel Economy: An improperly functioning valve can disrupt the air-fuel mixture, leading to reduced fuel efficiency.
- Rough Idling: The engine may idle roughly or stall, especially when the valve is stuck open.
- Difficulty Starting: In some cases, a faulty valve can make it hard to start the engine.
- Failed Emissions Test: A malfunctioning EVAP system can cause your vehicle to fail an emissions test, which is a legal requirement in many areas.
2. Identifying When to Replace Your EVAP Purge Valve
Recognizing the signs of a failing EVAP purge valve is crucial for timely replacement.
2.1. Common Symptoms of a Bad EVAP Purge Valve
- Check Engine Light: The most obvious sign is the check engine light. Diagnostic codes like P0441 (EVAP Purge Flow Incorrect) or P0446 (EVAP Vent Control Circuit Malfunction) often accompany this.
- Rough Idling: If the valve is stuck open, it can cause a vacuum leak, leading to rough idling.
- Poor Fuel Economy: A malfunctioning valve can disrupt the air-fuel mixture, reducing fuel efficiency.
- Difficulty Starting: The engine may struggle to start, especially if the valve is stuck open.
- Stalling: The engine may stall, particularly at low speeds or when idling.
- Fuel Odor: You might notice a fuel odor around the vehicle, indicating leaking vapors.
2.2. Diagnostic Codes Associated with the EVAP Purge Valve
Several diagnostic trouble codes (DTCs) are associated with EVAP purge valve issues. Common codes include:
- P0440: Evaporative Emission Control System Malfunction.
- P0441: Evaporative Emission Control System Incorrect Purge Flow.
- P0442: Evaporative Emission Control System Leak Detected (Small Leak).
- P0446: Evaporative Emission Control System Vent Control Circuit Malfunction.
- P0455: Evaporative Emission Control System Leak Detected (Gross Leak).
Using an OBD-II scanner can help you retrieve these codes and pinpoint the problem.
2.3. Using an OBD-II Scanner for Diagnosis
An OBD-II scanner is an invaluable tool for diagnosing EVAP system issues. Here’s how to use it:
- Connect the Scanner: Plug the scanner into the OBD-II port, usually located under the dashboard on the driver’s side.
- Turn on the Ignition: Turn the ignition key to the “on” position without starting the engine.
- Read the Codes: Follow the scanner’s instructions to read any stored diagnostic trouble codes (DTCs).
- Interpret the Codes: Look up the codes to understand what they mean. Codes related to the EVAP system will indicate potential issues with the purge valve.
- Clear the Codes (Optional): After noting the codes, you can clear them to see if they reappear, helping to confirm the problem.
2.4. Physical Inspection of the EVAP Purge Valve
A visual inspection can often reveal problems with the EVAP purge valve. Look for:
- Cracks or Damage: Check for any visible cracks, breaks, or other damage to the valve body.
- Loose Connections: Ensure that all electrical and vacuum connections are secure and properly connected.
- Corrosion: Look for signs of corrosion on the electrical terminals or vacuum fittings.
- Hose Condition: Inspect the vacuum hoses connected to the valve for cracks, leaks, or deterioration.
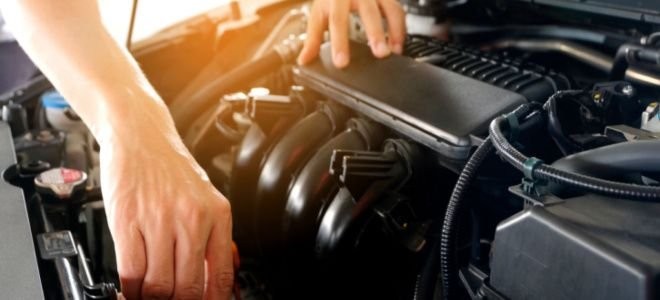 Close-up of an engine with a focus on the EVAP purge valve
3. Tools and Materials Needed for Replacement
Before you start, gather all the necessary tools and materials.
3.1. Essential Tools for the Job
- Socket Set: A set of metric sockets and ratchets is essential for removing and installing the valve.
- Wrench Set: Wrenches may be needed for certain fittings or brackets.
- Screwdrivers: Both flathead and Phillips screwdrivers can be useful for various tasks.
- Pliers: Pliers are helpful for removing hoses and connectors.
- OBD-II Scanner: To read and clear diagnostic trouble codes.
- Multimeter: For testing electrical connections.
- Vacuum Tester: To test the valve’s operation.
- Safety Glasses: To protect your eyes.
- Gloves: To protect your hands.
3.2. Replacement Parts and Materials
- New EVAP Purge Valve: Ensure you purchase the correct replacement valve for your vehicle’s make and model.
- Vacuum Hoses: Replace any cracked or deteriorated vacuum hoses.
- Hose Clamps: New hose clamps to secure the vacuum hoses.
- Electrical Contact Cleaner: To clean electrical connections.
- Penetrating Oil: To loosen stubborn bolts or fittings.
3.3. Where to Purchase Replacement Parts
You can purchase replacement EVAP purge valves and other parts from various sources, including:
- Auto Parts Stores: Local auto parts stores like AutoZone, O’Reilly Auto Parts, and Advance Auto Parts.
- Online Retailers: Online retailers such as Amazon and eBay offer a wide selection of parts.
- Dealerships: Your vehicle’s dealership can provide OEM (Original Equipment Manufacturer) parts, ensuring a perfect fit.
- Online Auto Parts Suppliers: Websites like RockAuto specialize in auto parts and often offer competitive prices.
3.4. Ensuring You Have the Correct Part
Before purchasing, verify that the replacement valve is compatible with your vehicle. Use the following methods:
- Check the Vehicle’s VIN: Use your vehicle’s Vehicle Identification Number (VIN) to look up the correct part.
- Consult the Parts Catalog: Check the auto parts store’s catalog or website for the correct part number.
- Compare with the Old Part: Visually compare the old valve with the new one to ensure they are identical.
- Read Reviews: Check online reviews to see if other users with the same vehicle have had success with the part.
4. Step-by-Step Guide to Replacing the EVAP Purge Valve
Follow these steps to replace your EVAP purge valve effectively.
4.1. Safety Precautions
Before starting any automotive repair, it’s important to take necessary safety precautions. According to the National Institute for Automotive Service Excellence (ASE), following safety guidelines can prevent injuries and ensure a successful repair.
- Disconnect the Battery: Disconnect the negative battery terminal to prevent electrical shocks.
- Wear Safety Glasses: Protect your eyes from debris and chemicals.
- Wear Gloves: Protect your hands from dirt, grease, and chemicals.
- Work in a Well-Ventilated Area: Ensure proper ventilation to avoid inhaling harmful fumes.
- Use Jack Stands: If you need to lift the vehicle, use jack stands for support.
- Keep a Fire Extinguisher Nearby: In case of a fire.
4.2. Step 1: Locating the EVAP Purge Valve
The location of the EVAP purge valve varies depending on the vehicle’s make and model. It is typically found in the engine compartment, often near the intake manifold or the charcoal canister.
- Consult the Service Manual: Refer to your vehicle’s service manual for the exact location.
- Look for Vacuum Hoses: Trace the vacuum hoses from the intake manifold or charcoal canister to locate the valve.
- Check Online Resources: Search online forums or websites specific to your vehicle model for guidance.
4.3. Step 2: Disconnecting Electrical Connections
Once you’ve located the EVAP purge valve, disconnect the electrical connector.
- Locate the Connector: Find the electrical connector attached to the valve.
- Release the Lock: Press the locking tab on the connector to release it.
- Pull the Connector: Gently pull the connector away from the valve.
- Inspect the Connector: Check the connector for corrosion or damage. Clean it with electrical contact cleaner if necessary.
4.4. Step 3: Disconnecting Vacuum Hoses
Next, disconnect the vacuum hoses attached to the EVAP purge valve.
- Identify the Hoses: Note the position of each hose to ensure correct reinstallation.
- Loosen the Clamps: If the hoses are secured with clamps, use pliers to loosen them.
- Remove the Hoses: Gently twist and pull the hoses off the valve.
- Inspect the Hoses: Check the hoses for cracks, leaks, or deterioration. Replace them if necessary.
4.5. Step 4: Removing the Old EVAP Purge Valve
With the electrical and vacuum connections disconnected, you can now remove the old EVAP purge valve.
- Remove Mounting Hardware: Use a socket or wrench to remove any bolts or screws securing the valve to the engine or bracket.
- Remove the Valve: Gently pull the valve away from its mounting location.
- Inspect the Mounting Area: Check the mounting area for any debris or damage. Clean it if necessary.
4.6. Step 5: Installing the New EVAP Purge Valve
Install the new EVAP purge valve in the reverse order of removal.
- Position the Valve: Place the new valve in its mounting location.
- Secure the Valve: Install and tighten any bolts or screws to secure the valve.
- Connect Vacuum Hoses: Reconnect the vacuum hoses to the correct ports on the valve. Ensure they are securely attached and the clamps are tightened.
- Connect Electrical Connector: Reconnect the electrical connector to the valve, ensuring it locks into place.
4.7. Step 6: Testing the New EVAP Purge Valve
After installing the new EVAP purge valve, test its operation to ensure it is working correctly.
- Reconnect the Battery: Reconnect the negative battery terminal.
- Start the Engine: Start the engine and let it idle.
- Check for Leaks: Listen for any vacuum leaks around the valve and hoses.
- Use an OBD-II Scanner: Use an OBD-II scanner to check for any new diagnostic trouble codes.
- Monitor Engine Performance: Observe the engine’s performance for any signs of rough idling, stalling, or poor fuel economy.
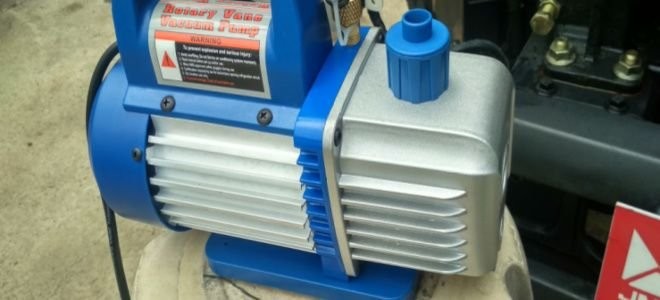 Mechanic using a diagnostic tool to check a car engine
5. Common Issues and Troubleshooting
Even with careful installation, you might encounter some issues.
5.1. Check Engine Light Still On
If the check engine light remains on after replacing the EVAP purge valve, it could be due to several reasons:
- Old Codes: The old diagnostic trouble codes may still be stored in the computer. Use an OBD-II scanner to clear the codes.
- Other EVAP Issues: There may be other problems in the EVAP system, such as a faulty gas cap or a leak in the charcoal canister.
- Incorrect Installation: Double-check that the valve is installed correctly and all connections are secure.
- Faulty New Valve: In rare cases, the new valve may be faulty. Consider testing it with a vacuum tester or multimeter.
5.2. Vacuum Leaks After Replacement
Vacuum leaks can cause rough idling and poor engine performance. Check for leaks by:
- Listening: Listen for a hissing sound around the valve and hoses.
- Visual Inspection: Check for cracked or disconnected hoses.
- Using Smoke Test: A smoke test can help locate small leaks.
5.3. Engine Runs Rough After Replacement
If the engine runs rough after replacing the EVAP purge valve, it could be due to:
- Incorrect Hose Connections: Ensure that the vacuum hoses are connected to the correct ports on the valve.
- Valve Stuck Open: The valve may be stuck open, causing a constant vacuum leak.
- Electrical Issues: Check the electrical connector and wiring for any problems.
5.4. Testing the EVAP Purge Valve with a Multimeter
A multimeter can be used to test the electrical functionality of the EVAP purge valve.
- Set the Multimeter: Set the multimeter to measure resistance (Ohms).
- Disconnect the Valve: Disconnect the electrical connector from the valve.
- Measure Resistance: Place the multimeter probes on the valve’s terminals.
- Check the Reading: Compare the reading to the manufacturer’s specifications. A reading outside the specified range indicates a faulty valve.
6. Benefits of Replacing Your EVAP Purge Valve
Replacing a faulty EVAP purge valve offers several benefits.
6.1. Improved Fuel Economy
A properly functioning EVAP purge valve ensures that fuel vapors are burned efficiently, improving your vehicle’s fuel economy.
6.2. Reduced Emissions
By preventing fuel vapors from escaping into the atmosphere, the EVAP purge valve helps reduce harmful emissions and improve air quality.
6.3. Smoother Engine Performance
A properly functioning valve ensures that the engine receives the correct air-fuel mixture, resulting in smoother idling and improved overall performance.
6.4. Prevents Costly Repairs
Addressing EVAP system issues promptly can prevent damage to other components, such as the catalytic converter, which can be expensive to replace.
6.5. Environmental Responsibility
Replacing a faulty EVAP purge valve is an environmentally responsible action that helps reduce pollution and protect the environment.
7. Maintaining Your Vehicle’s EVAP System
Proper maintenance can extend the life of your EVAP system and prevent future issues.
7.1. Regular Inspections
Regularly inspect the EVAP system components, including the purge valve, hoses, and canister, for any signs of damage or wear.
7.2. Replacing the Gas Cap
A loose or damaged gas cap can cause EVAP system leaks. Replace the gas cap if it is cracked or does not seal properly.
7.3. Avoiding Overfilling the Fuel Tank
Overfilling the fuel tank can saturate the charcoal canister with liquid fuel, damaging it and affecting its performance.
7.4. Proper Fuel Storage
Store fuel properly to prevent contamination and ensure that it does not damage the EVAP system.
7.5. Professional Servicing
Consider having your vehicle’s EVAP system professionally serviced periodically to ensure it is functioning correctly.
8. Advanced Diagnostics with DTS-Monaco
For advanced diagnostics and troubleshooting, consider using professional diagnostic tools like DTS-Monaco.
8.1. Introduction to DTS-Monaco
DTS-Monaco is a powerful diagnostic and programming software used by automotive technicians to diagnose and repair complex vehicle issues. According to Bosch Diagnostics, DTS-Monaco offers advanced features for reading and clearing diagnostic trouble codes, performing module programming, and conducting detailed system analysis.
8.2. Using DTS-Monaco for EVAP System Diagnostics
DTS-Monaco can be used to diagnose EVAP system issues by:
- Reading Detailed DTCs: Accessing detailed diagnostic trouble codes that provide specific information about the EVAP system.
- Performing System Tests: Conducting comprehensive system tests to evaluate the performance of individual components.
- Monitoring Sensor Data: Monitoring real-time sensor data to identify any abnormalities in the EVAP system.
- Module Programming: Programming or reprogramming the engine control unit (ECU) to address software-related issues.
8.3. Benefits of Using DTS-Monaco
- Advanced Diagnostics: Provides more detailed and accurate diagnostic information compared to standard OBD-II scanners.
- Comprehensive Testing: Allows for comprehensive system testing to identify even the most elusive EVAP system issues.
- Efficient Repairs: Helps technicians quickly and efficiently diagnose and repair EVAP system problems, reducing downtime and costs.
8.4. Where to Learn More About DTS-Monaco
To learn more about DTS-Monaco and how it can help you diagnose and repair vehicle issues, visit DTS-MONACO.EDU.VN. We offer comprehensive training and resources to help you master this powerful diagnostic tool.
9. Real-World Examples and Case Studies
Understanding real-world examples can help you better grasp the importance of replacing the EVAP purge valve.
9.1. Case Study 1: Rough Idling and Check Engine Light
A vehicle owner experienced rough idling and a check engine light. An OBD-II scan revealed a P0441 code. After inspecting the EVAP system, the purge valve was found to be stuck open. Replacing the valve resolved the rough idling and cleared the check engine light.
9.2. Case Study 2: Failed Emissions Test
A vehicle failed an emissions test due to high hydrocarbon emissions. Further diagnosis revealed a faulty EVAP purge valve that was not properly controlling fuel vapors. Replacing the valve brought the emissions within acceptable limits, allowing the vehicle to pass the test.
9.3. Case Study 3: Poor Fuel Economy
A vehicle owner noticed a significant decrease in fuel economy. After ruling out other potential causes, the EVAP system was inspected, and the purge valve was found to be leaking. Replacing the valve improved the fuel economy by approximately 15%.
10. Frequently Asked Questions (FAQ)
Here are some frequently asked questions about EVAP purge valves.
10.1. What is the purpose of the EVAP purge valve?
The EVAP purge valve controls the flow of fuel vapors from the charcoal canister to the engine’s intake manifold, preventing them from escaping into the atmosphere.
10.2. How often should I replace the EVAP purge valve?
The EVAP purge valve should be replaced when it fails or shows signs of malfunction, such as a check engine light, rough idling, or poor fuel economy.
10.3. Can I drive with a bad EVAP purge valve?
While you can technically drive with a bad EVAP purge valve, it is not recommended. It can lead to poor engine performance, reduced fuel economy, and potential damage to other components.
10.4. How much does it cost to replace the EVAP purge valve?
The cost to replace the EVAP purge valve typically ranges from $80 to $200, including parts and labor.
10.5. Can I replace the EVAP purge valve myself?
Yes, replacing the EVAP purge valve is a relatively simple task that can be done by DIY mechanics with the right tools and knowledge.
10.6. What are the symptoms of a bad EVAP purge valve?
Symptoms of a bad EVAP purge valve include a check engine light, rough idling, poor fuel economy, difficulty starting, and stalling.
10.7. How can I test the EVAP purge valve?
You can test the EVAP purge valve with a vacuum tester or multimeter to check its functionality.
10.8. What is an OBD-II scanner?
An OBD-II scanner is a diagnostic tool used to read and clear diagnostic trouble codes from a vehicle’s computer.
10.9. Where is the EVAP purge valve located?
The location of the EVAP purge valve varies depending on the vehicle’s make and model, but it is typically found in the engine compartment near the intake manifold or charcoal canister.
10.10. What happens if I ignore a bad EVAP purge valve?
Ignoring a bad EVAP purge valve can lead to poor engine performance, reduced fuel economy, failed emissions tests, and potential damage to other components.
Replacing your EVAP purge valve is a straightforward process that can significantly improve your vehicle’s performance and reduce emissions. With the right tools and knowledge, you can tackle this task yourself, saving money and gaining valuable experience. For advanced diagnostics and training, visit DTS-MONACO.EDU.VN to learn more about our comprehensive resources.
Are you ready to take control of your vehicle’s maintenance and ensure optimal performance? Contact us at DTS-MONACO.EDU.VN today to explore our training programs and diagnostic tools. Our expert guidance will help you master EVAP system diagnostics and repairs, keeping your vehicle running smoothly and efficiently. Don’t wait – unlock your potential and drive with confidence by connecting with us now. Visit our website or contact us directly to get started. Address: 275 N Harrison St, Chandler, AZ 85225, United States. Whatsapp: +1 (641) 206-8880.