Replacing a camshaft position sensor (CMP) is a task many car enthusiasts and professional technicians face. This guide, brought to you by DTS-MONACO.EDU.VN, provides a detailed, step-by-step approach to replacing your CMP sensor, ensuring your engine runs smoothly. Understand the function of your car’s components better with our expert insights. We’ll also touch on advanced car coding techniques and diagnostic software, including DTS-Monaco, perfect for enhancing your automotive repair skills.
Contents
- 1. What is the Camshaft Position Sensor (CMP) and What Does It Do?
- 1.1. Key Functions of the CMP Sensor
- 1.2. CMP Sensor Location
- 2. What are the Symptoms of a Failing Camshaft Position Sensor?
- 2.1. Common Symptoms
- 2.2. Diagnostic Trouble Codes (DTCs)
- 2.3. Intermittent Symptoms
- 3. What Causes a Camshaft Position Sensor to Fail?
- 3.1. Common Causes of Failure
- 3.2. Preventing Failures
- 4. Tools and Materials Needed to Replace a Camshaft Position Sensor
- 4.1. Essential Tools and Materials
- 4.2. Optional Tools and Materials
- 5. Step-by-Step Guide: How to Replace the Camshaft Position Sensor
- 5.1. Step 1: Disconnect the Negative Battery Cable
- 5.2. Step 2: Locate the Camshaft Position Sensor
- 5.3. Step 3: Disconnect the Electrical Connector
- 5.4. Step 4: Remove the Old Camshaft Position Sensor
- 5.5. Step 5: Install the New Camshaft Position Sensor
- 5.6. Step 6: Reconnect the Negative Battery Cable
- 5.7. Step 7: Clear Diagnostic Trouble Codes (DTCs)
- 5.8. Step 8: Start the Engine and Test
- 6. Common Mistakes to Avoid When Replacing a Camshaft Position Sensor
- 6.1. Common Mistakes
- 6.2. Tips for Avoiding Mistakes
- 7. Understanding Diagnostic Trouble Codes (DTCs) Related to the CMP Sensor
- 7.1. Common DTCs for CMP Sensor Issues
- 7.2. Using DTCs for Diagnosis
- 8. The Role of Car Coding and Diagnostic Software in Modern Automotive Repair
- 8.1. Understanding Car Coding
- 8.2. Introduction to DTS-Monaco
- 8.3. How DTS-Monaco Enhances CMP Sensor Replacement
- 8.4. Benefits of Learning Car Coding and Using DTS-Monaco
- 9. Advanced Car Coding Techniques with DTS-Monaco
- 9.1. ECU Flashing
- 9.2. Variant Coding
- 9.3. Parameter Adjustments
- 9.4. Diagnostic Testing
- 10. Finding Training and Resources for DTS-Monaco and Car Coding in the USA
- 10.1. Online Courses
- 10.2. Hands-On Training Programs
- 10.3. Manufacturer Training
- 10.4. Online Communities and Forums
- 10.5. Resources from DTS-MONACO.EDU.VN
- 11. Cost of Camshaft Position Sensor Replacement
- 11.1. Cost Factors
- 11.2. DIY vs. Professional Replacement
- 11.3. Saving Money on CMP Sensor Replacement
- 12. Maintaining Your Vehicle After Replacing the Camshaft Position Sensor
- 12.1. Regular Maintenance
- 12.2. Monitoring Engine Performance
- 12.3. Addressing Issues Promptly
- 12.4. Continued Learning with DTS-MONACO.EDU.VN
- FAQ: Camshaft Position Sensor (CMP) Replacement
- 1. What is the primary function of the Camshaft Position Sensor (CMP)?
- 2. What are the most common symptoms of a failing CMP sensor?
- 3. What tools do I need to replace a camshaft position sensor?
- 4. Is it necessary to disconnect the battery before replacing the CMP sensor?
- 5. How do I locate the CMP sensor in my vehicle?
- 6. What should I do after replacing the CMP sensor?
- 7. What is car coding, and why is it important?
- 8. How can DTS-Monaco software assist with CMP sensor replacement?
- 9. Where can I find training and resources for using DTS-Monaco in the USA?
- 10. What is the typical cost range for replacing a camshaft position sensor?
1. What is the Camshaft Position Sensor (CMP) and What Does It Do?
The camshaft position sensor (CMP) is a crucial component in your vehicle’s engine management system. The CMP monitors the position and rotational speed of the camshaft, sending this critical data to the engine control unit (ECU). This information is essential for the ECU to accurately control fuel injection and ignition timing, ensuring optimal engine performance and efficiency. According to a study by the Society of Automotive Engineers (SAE), precise camshaft timing can improve fuel economy by up to 15%.
1.1. Key Functions of the CMP Sensor
- Timing Control: The CMP provides real-time data, allowing the ECU to synchronize the fuel injectors and ignition coils with the position of the pistons.
- Engine Performance: Accurate CMP readings ensure the engine runs smoothly, preventing misfires and rough idling.
- Fuel Efficiency: By optimizing fuel injection, the CMP helps maintain good fuel economy.
- Diagnostic Information: The CMP sensor’s data helps the ECU detect and diagnose engine problems, often triggering the check engine light.
1.2. CMP Sensor Location
The camshaft sensor is typically located near the top of the engine. Specifically, it can be found in the cylinder head, the cylinder block, or in the timing cover. Its placement allows it to effectively monitor the camshaft’s position.
2. What are the Symptoms of a Failing Camshaft Position Sensor?
Recognizing the symptoms of a failing camshaft position sensor is crucial for timely replacement and preventing further engine damage. Here are some common signs that your CMP sensor might be failing:
2.1. Common Symptoms
- Engine Misfires: A faulty CMP sensor can cause the engine to misfire, resulting in a rough and uneven engine performance.
- Rough Idling: The engine may idle roughly, vibrating or stalling, especially when the car is stationary.
- Poor Fuel Economy: Inefficient fuel injection due to a bad CMP sensor can lead to a noticeable decrease in fuel economy.
- Check Engine Light: The check engine light will often illuminate, accompanied by diagnostic trouble codes (DTCs) such as P0340, indicating a camshaft position sensor issue.
- Stalling: The engine may stall unexpectedly, particularly at low speeds or when idling.
- Starting Problems: Difficulty starting the engine, or the engine failing to start at all, can be a symptom of a faulty CMP sensor.
- Reduced Engine Power: The engine may exhibit a noticeable loss of power and acceleration.
2.2. Diagnostic Trouble Codes (DTCs)
When the check engine light comes on, it’s essential to use an OBD-II scanner to retrieve the diagnostic trouble codes. Common codes associated with a faulty CMP sensor include:
| Code | Description |
|---|---|
| P0340 | Camshaft Position Sensor A Circuit Malfunction |
| P0341 | Camshaft Position Sensor A Circuit Range/Performance |
| P0342 | Camshaft Position Sensor A Circuit Low Input |
| P0343 | Camshaft Position Sensor A Circuit High Input |
| P0344 | Camshaft Position Sensor A Circuit Intermittent |
2.3. Intermittent Symptoms
In some cases, the symptoms of a failing CMP sensor may be intermittent. The engine might run fine at times and then exhibit problems at other times. This can make diagnosis more challenging, but it’s still important to investigate the possibility of a faulty CMP sensor.
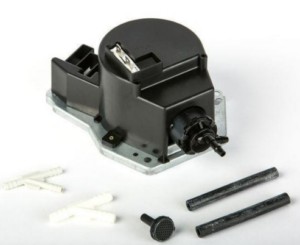 Camshaft Position Sensor
The image displays a camshaft position sensor, crucial for monitoring the camshaft’s position in an engine and ensuring optimal timing for fuel injection and ignition.
3. What Causes a Camshaft Position Sensor to Fail?
Understanding the reasons behind CMP sensor failures can help you prevent future issues. Here are some common causes:
3.1. Common Causes of Failure
- Moisture and Dirt Contamination: Moisture and dirt can penetrate the sensor, altering its resistance and leading to inaccurate readings.
- Extreme Heat: High temperatures, especially from an overheating engine, can melt or damage the sensor.
- Loose or Broken Connectors: The electrical connector can become loose or the retaining clip can break, leading to poor connections and sensor malfunction.
- Damaged Wiring Harness: The wires connected to the sensor can become damaged due to wear and tear, causing signal disruptions.
- Physical Damage: Impacts or other physical damage can crack or break the sensor.
- Oil Leaks: Oil leaks near the sensor can contaminate it, leading to inaccurate readings or complete failure.
- Age and Wear: Over time, the sensor can degrade due to normal wear and tear, leading to failure.
3.2. Preventing Failures
- Regular Maintenance: Keep the engine bay clean and free of debris to prevent contamination.
- Check Connectors: Regularly inspect the sensor’s electrical connector to ensure it is securely attached and free from corrosion.
- Address Oil Leaks: Repair any oil leaks promptly to prevent oil from contaminating the sensor.
- Monitor Engine Temperature: Ensure the engine is not overheating, as excessive heat can damage the sensor.
4. Tools and Materials Needed to Replace a Camshaft Position Sensor
Before starting the replacement process, gather all the necessary tools and materials. Having everything on hand will make the job smoother and more efficient.
4.1. Essential Tools and Materials
- New Camshaft Position Sensor: Purchase a high-quality replacement sensor that is compatible with your vehicle’s make and model.
- Socket Set: A set of metric sockets will be needed to remove the sensor’s mounting bolts.
- Wrench Set: Wrenches may be required for certain sensor locations.
- Screwdrivers: Both flathead and Phillips screwdrivers can be useful for removing connectors and fasteners.
- OBD-II Scanner: An OBD-II scanner is necessary to read and clear diagnostic trouble codes (DTCs).
- Multimeter: A multimeter can be used to test the sensor’s electrical connections.
- Torque Wrench: A torque wrench is essential for tightening the sensor’s mounting bolts to the correct specification.
- Penetrating Oil: Penetrating oil can help loosen any corroded bolts or connectors.
- Clean Rags: Clean rags are needed to wipe away dirt and oil.
- Safety Glasses: Always wear safety glasses to protect your eyes.
- Gloves: Wear gloves to protect your hands from dirt and chemicals.
- Vehicle Repair Manual: A repair manual specific to your vehicle can provide valuable information and diagrams.
4.2. Optional Tools and Materials
- Jack and Jack Stands: If the sensor is located in a hard-to-reach area, you may need to lift the vehicle.
- Wheel Chocks: Use wheel chocks to secure the vehicle if you are lifting it.
- Inspection Mirror: An inspection mirror can help you see hard-to-reach areas.
- Flashlight or Work Light: A flashlight or work light can provide better visibility in the engine bay.
5. Step-by-Step Guide: How to Replace the Camshaft Position Sensor
Replacing a camshaft position sensor is a straightforward process that can be completed with basic tools and a bit of mechanical knowledge. Follow these steps to ensure a successful replacement:
5.1. Step 1: Disconnect the Negative Battery Cable
- Safety First: Before starting any work on your vehicle’s electrical system, disconnect the negative battery cable. This prevents accidental short circuits and potential injury.
- Location: Locate the negative terminal on your car battery.
- Disconnect: Use a wrench to loosen the nut on the negative terminal and carefully remove the cable.
- Secure: Tuck the cable away from the battery terminal to prevent accidental contact.
5.2. Step 2: Locate the Camshaft Position Sensor
- Consult Repair Manual: Refer to your vehicle’s repair manual for the exact location of the camshaft position sensor. It is typically located on the cylinder head, engine block, or timing cover.
- Visual Inspection: Look for a sensor with a wiring connector attached to it. It is usually mounted near the top of the engine.
- Remove Engine Cover: If necessary, remove the engine cover to gain better access to the sensor.
5.3. Step 3: Disconnect the Electrical Connector
- Identify the Connector: Locate the electrical connector attached to the camshaft position sensor.
- Release the Connector: Most connectors have a retaining clip or tab that needs to be pressed or pulled to release the connector. Be gentle to avoid breaking the plastic.
- Disconnect: Carefully disconnect the connector from the sensor.
- Inspect: Check the connector for any signs of corrosion or damage. Clean or repair as necessary.
5.4. Step 4: Remove the Old Camshaft Position Sensor
- Remove Fasteners: Use a socket or wrench to remove the bolts or screws holding the sensor in place. Keep these fasteners safe, as they may be needed for the new sensor.
- Loosen Sensor: If the sensor is stuck, gently wiggle it or use penetrating oil to help loosen it.
- Remove Sensor: Carefully pull the sensor out of the engine.
- Inspect the Hole: Check the hole for any debris or damage. Clean as necessary.
5.5. Step 5: Install the New Camshaft Position Sensor
- Install New O-Ring: If the new sensor comes with an O-ring, install it in the correct position.
- Lubricate O-Ring: Apply a small amount of clean engine oil to the O-ring to help it seat properly.
- Position Sensor: Align the new sensor with the mounting hole and carefully push it into place.
- Secure Sensor: Install the bolts or screws and tighten them to the manufacturer’s specified torque. Use a torque wrench to avoid over-tightening.
- Reconnect Electrical Connector: Reconnect the electrical connector to the sensor, ensuring it clicks into place.
5.6. Step 6: Reconnect the Negative Battery Cable
- Reconnect: Reattach the negative battery cable to the negative terminal.
- Tighten: Tighten the nut on the terminal securely.
- Verify: Ensure the cable is properly connected and there is no corrosion on the terminals.
5.7. Step 7: Clear Diagnostic Trouble Codes (DTCs)
- Connect OBD-II Scanner: Plug the OBD-II scanner into the diagnostic port of your vehicle.
- Turn On Ignition: Turn the ignition to the “on” position without starting the engine.
- Read Codes: Use the scanner to read the diagnostic trouble codes (DTCs).
- Clear Codes: Select the option to clear the codes.
- Verify Clearance: Confirm that the codes have been cleared.
5.8. Step 8: Start the Engine and Test
- Start Engine: Start the engine and let it idle for a few minutes.
- Monitor Performance: Listen for any unusual noises or rough idling.
- Check Engine Light: Ensure the check engine light does not come back on.
- Scan for New Codes: Use the OBD-II scanner to check for any new or pending codes.
- Test Drive: Take the vehicle for a test drive to ensure it is running smoothly.
This image illustrates disconnecting the electrical connector from the camshaft position sensor. Careful disconnection is essential to avoid damaging the plastic connector.
The image depicts the process of removing the camshaft sensor from the engine. This step requires careful extraction to prevent damage to the surrounding components.
6. Common Mistakes to Avoid When Replacing a Camshaft Position Sensor
To ensure a successful CMP sensor replacement, be aware of these common mistakes:
6.1. Common Mistakes
- Forgetting to Disconnect the Battery: Always disconnect the negative battery cable to prevent electrical shorts and potential injury.
- Incorrect Sensor Location: Double-check the sensor location in your vehicle’s repair manual to avoid replacing the wrong part.
- Breaking the Electrical Connector: Be gentle when disconnecting the electrical connector to avoid breaking the plastic clips.
- Over-Tightening Fasteners: Use a torque wrench to tighten the mounting bolts to the correct specification. Over-tightening can damage the sensor or engine components.
- Forgetting the O-Ring: Always install a new O-ring if one is provided with the new sensor to ensure a proper seal.
- Skipping Code Clearing: Clear the diagnostic trouble codes (DTCs) after replacing the sensor to ensure the check engine light goes off and the system resets.
- Using Low-Quality Parts: Always use a high-quality replacement sensor from a reputable brand to ensure proper performance and longevity.
6.2. Tips for Avoiding Mistakes
- Read the Instructions: Carefully read the instructions that come with the new sensor.
- Take Your Time: Don’t rush the process. Take your time and be methodical.
- Double-Check Your Work: Before starting the engine, double-check all connections and fasteners.
- Consult a Professional: If you are unsure about any step, consult a professional mechanic.
7. Understanding Diagnostic Trouble Codes (DTCs) Related to the CMP Sensor
Diagnostic Trouble Codes (DTCs) are codes that are stored in your car’s computer when a sensor or system is not functioning correctly. Understanding the DTCs related to the CMP sensor can help you diagnose the problem accurately.
7.1. Common DTCs for CMP Sensor Issues
- P0340: Camshaft Position Sensor A Circuit Malfunction
- Description: This code indicates that there is a problem with the camshaft position sensor A circuit.
- Possible Causes: Faulty CMP sensor, wiring issues, connector problems, or a defective ECU.
- P0341: Camshaft Position Sensor A Circuit Range/Performance
- Description: This code indicates that the signal from the CMP sensor is out of the expected range or not performing correctly.
- Possible Causes: Misalignment of the sensor, a faulty sensor, or issues with the camshaft timing.
- P0342: Camshaft Position Sensor A Circuit Low Input
- Description: This code indicates that the signal from the CMP sensor is too low.
- Possible Causes: Short to ground in the wiring, a faulty sensor, or a loose connection.
- P0343: Camshaft Position Sensor A Circuit High Input
- Description: This code indicates that the signal from the CMP sensor is too high.
- Possible Causes: Short to voltage in the wiring, a faulty sensor, or a defective ECU.
- P0344: Camshaft Position Sensor A Circuit Intermittent
- Description: This code indicates that the signal from the CMP sensor is intermittent or unreliable.
- Possible Causes: Loose connections, damaged wiring, or a failing sensor.
7.2. Using DTCs for Diagnosis
- Read the Codes: Use an OBD-II scanner to read the DTCs stored in your car’s computer.
- Research the Codes: Look up the codes in a repair manual or online database to understand their meaning and possible causes.
- Inspect the Sensor: Visually inspect the CMP sensor, wiring, and connector for any signs of damage.
- Test the Sensor: Use a multimeter to test the sensor’s electrical connections and signal output.
- Clear the Codes: After repairing the problem, clear the DTCs and monitor the system to ensure the problem is resolved.
8. The Role of Car Coding and Diagnostic Software in Modern Automotive Repair
Modern automotive repair goes beyond just replacing parts. Car coding and diagnostic software like DTS-Monaco play a crucial role in ensuring that new components are properly integrated and that the vehicle’s systems are functioning optimally.
8.1. Understanding Car Coding
- Definition: Car coding involves reprogramming the vehicle’s electronic control units (ECUs) to enable or disable certain features, adjust settings, or adapt to new components.
- Importance: When replacing a component like the CMP sensor, coding may be necessary to ensure that the new sensor is properly recognized by the ECU and that the engine management system functions correctly.
- Examples: Coding can be used to adjust fuel injection parameters, ignition timing, and other engine settings to optimize performance and efficiency.
8.2. Introduction to DTS-Monaco
- Overview: DTS-Monaco is a powerful diagnostic and coding software used by automotive professionals to diagnose and repair complex vehicle systems.
- Features: DTS-Monaco offers a wide range of features, including ECU flashing, diagnostic testing, parameter adjustments, and variant coding.
- Benefits: Using DTS-Monaco can help you diagnose problems quickly and accurately, perform advanced coding functions, and ensure that your vehicle is running at its best.
8.3. How DTS-Monaco Enhances CMP Sensor Replacement
- Sensor Adaptation: DTS-Monaco can be used to adapt the new CMP sensor to the ECU, ensuring that it is properly recognized and that the engine management system functions correctly.
- Parameter Adjustments: The software allows you to adjust parameters related to the CMP sensor, such as signal thresholds and timing settings, to optimize engine performance.
- Diagnostic Testing: DTS-Monaco can perform diagnostic tests on the CMP sensor circuit to identify any wiring issues or other problems that may be affecting its performance.
- Fault Code Analysis: The software provides detailed information about any fault codes related to the CMP sensor, helping you to diagnose the problem accurately.
8.4. Benefits of Learning Car Coding and Using DTS-Monaco
- Enhanced Diagnostic Skills: Learning car coding and using DTS-Monaco can significantly enhance your diagnostic skills, allowing you to troubleshoot complex vehicle problems more effectively.
- Improved Repair Quality: By properly coding and adapting new components, you can ensure that repairs are performed to the highest standards, resulting in improved vehicle performance and reliability.
- Increased Earning Potential: Professionals with car coding skills and experience using DTS-Monaco are in high demand in the automotive industry, leading to increased earning potential.
9. Advanced Car Coding Techniques with DTS-Monaco
For those looking to delve deeper into automotive diagnostics and repair, mastering advanced car coding techniques with DTS-Monaco can be incredibly beneficial. This section provides an overview of some advanced techniques and how they can be applied.
9.1. ECU Flashing
- Definition: ECU flashing, also known as reprogramming, involves overwriting the existing software in the ECU with a new version.
- Purpose: ECU flashing can be used to update the ECU with the latest software, fix bugs, improve performance, or add new features.
- DTS-Monaco Support: DTS-Monaco provides comprehensive support for ECU flashing, allowing you to download and install new software versions from the manufacturer.
9.2. Variant Coding
- Definition: Variant coding involves changing the configuration settings of the ECU to match the specific options and features of the vehicle.
- Purpose: Variant coding is necessary when adding or removing options from the vehicle, such as installing new headlights, adding a navigation system, or enabling new driver assistance features.
- DTS-Monaco Support: DTS-Monaco provides a user-friendly interface for performing variant coding, allowing you to easily change the configuration settings of the ECU.
9.3. Parameter Adjustments
- Definition: Parameter adjustments involve changing the values of certain parameters in the ECU to optimize performance or address specific issues.
- Purpose: Parameter adjustments can be used to fine-tune the engine management system, adjust fuel injection parameters, or modify ignition timing.
- DTS-Monaco Support: DTS-Monaco provides access to a wide range of parameters in the ECU, allowing you to make precise adjustments to optimize performance.
9.4. Diagnostic Testing
- Definition: Diagnostic testing involves using diagnostic tools to identify problems and troubleshoot issues in the vehicle’s systems.
- Purpose: Diagnostic testing can help you identify faulty sensors, wiring issues, and other problems that may be affecting the performance of the vehicle.
- DTS-Monaco Support: DTS-Monaco provides a comprehensive suite of diagnostic tools, including fault code analysis, live data monitoring, and component testing.
10. Finding Training and Resources for DTS-Monaco and Car Coding in the USA
To master car coding and the use of DTS-Monaco, it’s important to find the right training and resources. Here are some options available in the USA:
10.1. Online Courses
- Benefits: Online courses offer flexibility and convenience, allowing you to learn at your own pace and on your own schedule.
- Platforms: Look for online courses on platforms such as Udemy, Coursera, and Skillshare.
- Course Content: Choose courses that cover the fundamentals of car coding, the use of DTS-Monaco, and advanced diagnostic techniques.
10.2. Hands-On Training Programs
- Benefits: Hands-on training programs provide practical experience and allow you to work with real vehicles and equipment.
- Vocational Schools: Check with local vocational schools and technical colleges for automotive technology programs that include car coding and diagnostic training.
- Industry Certifications: Look for training programs that lead to industry certifications, such as those offered by the National Institute for Automotive Service Excellence (ASE).
10.3. Manufacturer Training
- Benefits: Some automotive manufacturers offer training programs for technicians who work on their vehicles.
- Content: These programs often cover advanced diagnostic techniques and car coding using manufacturer-specific software and tools.
- Access: Check with your local dealer or manufacturer representative for information on available training programs.
10.4. Online Communities and Forums
- Benefits: Online communities and forums provide a valuable resource for sharing knowledge, asking questions, and connecting with other automotive professionals.
- Platforms: Look for online communities on platforms such as Reddit, automotive forums, and social media groups.
- Participation: Participate in discussions, ask questions, and share your own experiences to learn from others and stay up-to-date on the latest trends in car coding and diagnostic technology.
10.5. Resources from DTS-MONACO.EDU.VN
- Comprehensive Information: DTS-MONACO.EDU.VN offers detailed information about DTS-Monaco software, its features, and applications in car coding.
- Step-by-Step Guides: Access step-by-step guides for using DTS-Monaco, from basic functions to advanced coding techniques.
- Training Programs: Learn about specialized training programs designed to help you master car coding and diagnostics.
- Technical Support: Get access to technical support to help you troubleshoot issues and optimize your use of DTS-Monaco.
- Community Forum: Join a community of automotive professionals to share knowledge, ask questions, and collaborate on projects.
11. Cost of Camshaft Position Sensor Replacement
Understanding the costs associated with replacing a camshaft position sensor can help you budget for the repair and decide whether to tackle the job yourself or hire a professional.
11.1. Cost Factors
- Sensor Price: The cost of a new camshaft position sensor can range from $20 to $150, depending on the make and model of your vehicle and the quality of the sensor.
- Labor Costs: If you choose to have a professional mechanic replace the sensor, labor costs can range from $50 to $200, depending on the complexity of the job and the hourly rate of the mechanic.
- Diagnostic Fees: Some mechanics may charge a diagnostic fee to identify the problem, which can range from $50 to $100.
- Additional Repairs: In some cases, additional repairs may be necessary, such as replacing damaged wiring or connectors, which can add to the overall cost.
11.2. DIY vs. Professional Replacement
- DIY Benefits: Replacing the CMP sensor yourself can save you money on labor costs and allow you to gain valuable experience working on your vehicle.
- DIY Considerations: DIY replacement requires basic mechanical skills, the right tools, and a good understanding of your vehicle’s systems.
- Professional Benefits: Hiring a professional mechanic ensures that the job is done correctly and that any potential problems are identified and addressed.
- Professional Considerations: Professional replacement can be more expensive, but it can provide peace of mind and ensure that your vehicle is running at its best.
11.3. Saving Money on CMP Sensor Replacement
- Shop Around: Compare prices from different auto parts stores and mechanics to find the best deal.
- Use Coupons: Look for coupons and discounts on auto parts and labor.
- DIY Replacement: If you have the skills and tools, consider replacing the CMP sensor yourself to save on labor costs.
- Regular Maintenance: Keep your engine bay clean and free of debris to prevent contamination and extend the life of the CMP sensor.
12. Maintaining Your Vehicle After Replacing the Camshaft Position Sensor
After replacing the camshaft position sensor, it’s important to take steps to maintain your vehicle and prevent future problems.
12.1. Regular Maintenance
- Oil Changes: Follow the manufacturer’s recommended oil change schedule to keep the engine running smoothly.
- Fluid Checks: Regularly check and top off all fluids, including coolant, brake fluid, and power steering fluid.
- Air Filter Replacement: Replace the air filter regularly to ensure that the engine is getting clean air.
- Spark Plug Replacement: Replace the spark plugs according to the manufacturer’s recommended schedule to maintain optimal ignition performance.
12.2. Monitoring Engine Performance
- Listen for Unusual Noises: Pay attention to any unusual noises coming from the engine, such as knocking, ticking, or hissing.
- Watch for Warning Lights: Be alert for any warning lights on the dashboard, such as the check engine light, oil pressure light, or temperature light.
- Check Fuel Economy: Monitor your fuel economy to ensure that it is within the expected range.
- Scan for Codes: Regularly scan your vehicle’s computer for diagnostic trouble codes (DTCs) to identify any potential problems early.
12.3. Addressing Issues Promptly
- Repair Oil Leaks: Repair any oil leaks promptly to prevent oil from contaminating the CMP sensor and other engine components.
- Fix Wiring Issues: Address any wiring issues, such as damaged or corroded wires, to ensure proper electrical connections.
- Replace Faulty Sensors: Replace any faulty sensors promptly to prevent them from causing further damage to the engine.
12.4. Continued Learning with DTS-MONACO.EDU.VN
- Stay Updated: Keep abreast of the latest automotive technologies, diagnostic techniques, and car coding methods through DTS-MONACO.EDU.VN.
- Engage with the Community: Participate in forums and online communities to share knowledge, ask questions, and learn from other automotive professionals.
- Utilize Resources: Take advantage of the resources offered by DTS-MONACO.EDU.VN, such as step-by-step guides, training programs, and technical support, to enhance your skills and knowledge.
Replacing your camshaft position sensor is a manageable task that can significantly improve your vehicle’s performance. By following this comprehensive guide and utilizing resources like DTS-MONACO.EDU.VN, you can ensure a successful replacement and maintain your vehicle’s optimal condition.
FAQ: Camshaft Position Sensor (CMP) Replacement
1. What is the primary function of the Camshaft Position Sensor (CMP)?
The camshaft position sensor monitors the position and speed of the camshaft, providing crucial data to the engine control unit (ECU) for accurate fuel injection and ignition timing.
2. What are the most common symptoms of a failing CMP sensor?
Common symptoms include engine misfires, rough idling, poor fuel economy, stalling, and the check engine light illuminating with codes like P0340.
3. What tools do I need to replace a camshaft position sensor?
You’ll need a new CMP sensor, socket set, wrench set, screwdrivers, an OBD-II scanner, a torque wrench, penetrating oil, clean rags, safety glasses, and gloves.
4. Is it necessary to disconnect the battery before replacing the CMP sensor?
Yes, always disconnect the negative battery cable to prevent electrical shorts and ensure safety.
5. How do I locate the CMP sensor in my vehicle?
Refer to your vehicle’s repair manual for the exact location, but it’s typically found on the cylinder head, engine block, or timing cover.
6. What should I do after replacing the CMP sensor?
Clear the diagnostic trouble codes (DTCs) using an OBD-II scanner and test drive the vehicle to ensure it runs smoothly.
7. What is car coding, and why is it important?
Car coding involves reprogramming the vehicle’s ECUs to adapt to new components or enable/disable features, ensuring proper system integration and optimal performance.
8. How can DTS-Monaco software assist with CMP sensor replacement?
DTS-Monaco can adapt the new sensor to the ECU, adjust parameters, perform diagnostic tests, and analyze fault codes for accurate troubleshooting.
9. Where can I find training and resources for using DTS-Monaco in the USA?
You can find online courses, hands-on training programs at vocational schools, manufacturer training, and online communities. Additionally, DTS-MONACO.EDU.VN offers comprehensive resources.
10. What is the typical cost range for replacing a camshaft position sensor?
The cost can range from $20 to $150 for the sensor itself, with additional labor costs of $50 to $200 if you hire a professional mechanic.
Ready to enhance your automotive repair skills and master car coding? Visit DTS-MONACO.EDU.VN today to explore our comprehensive resources, training programs, and expert support. Learn how DTS-Monaco can revolutionize your diagnostic and coding capabilities. Contact us now to discover the future of automotive technology! Address: 275 N Harrison St, Chandler, AZ 85225, United States. Whatsapp: +1 (641) 206-8880. Website: DTS-MONACO.EDU.VN.