Replacing your engine coolant temperature sensor is crucial for maintaining optimal engine performance, and at DTS-MONACO.EDU.VN, we’re here to guide you through the process with expertise. Understanding how to replace this sensor can prevent overheating and ensure your engine runs efficiently. Our detailed guide, coupled with insights into car coding, will empower you to tackle this task effectively. By learning these essential skills, you can enhance your vehicle’s performance and save on costly repairs with effective vehicle maintenance.
Contents
- 1. What is the Engine Coolant Temperature Sensor?
- 1.1 Why is the Engine Coolant Temperature Sensor Important?
- 1.2 How Does the Engine Coolant Temperature Sensor Work?
- 2. Where is the Engine Coolant Temperature Sensor Located?
- 2.1 Common Locations of the Engine Coolant Temperature Sensor
- 2.2 Why Does the Location Matter?
- 3. What are the Symptoms of a Bad Engine Coolant Temperature Sensor?
- 3.1 Common Symptoms of a Faulty Sensor
- 3.2 Expert Insights on Symptom Diagnosis
- 3.3 Using Diagnostic Tools to Confirm Sensor Failure
- 4. How to Test an Engine Coolant Temperature Sensor?
- 4.1 What You Will Need
- 4.2 Safety Precautions
- 4.3 Step-by-Step Testing Procedure
- 4.4 Interpreting the Results
- 4.5 Additional Tips
- 4.6 Example Readings and What They Mean
- 5. What is the Cost to Replace the Engine Coolant Temperature Sensor?
- 5.1 Cost of the Sensor
- 5.2 Labor Costs
- 5.3 Additional Costs
- 5.4 Total Cost Estimate
- 5.5 Cost-Saving Tips
- 5.6 Example Cost Breakdown
- 6. Step-by-Step Guide: How To Replace the Engine Coolant Temperature Sensor Yourself
- 6.1 Tools and Materials Needed
- 6.2 Safety Precautions
- 6.3 Step-by-Step Instructions
- 6.4 Common Mistakes to Avoid
- 7. Common Mistakes to Avoid During Engine Coolant Temperature Sensor Replacement
- 7.1 Over-Torquing the Sensor
- 7.2 Cross-Threading the Sensor
- 7.3 Forgetting to Apply Sealant
- 7.4 Using the Incorrect Sensor
- 7.5 Using the Wrong Coolant
- 7.6 Installing Dissimilar Metals
- 7.7 Additional Tips to Avoid Mistakes
- 8. Benefits of Replacing the Engine Coolant Temperature Sensor
- 8.1 Improved Engine Performance
- 8.2 Better Fuel Efficiency
- 8.3 Prevention of Overheating
- 8.4 Accurate Temperature Readings
- 8.5 Reduction of Emissions
- 8.6 Prevention of Engine Damage
- 8.7 Smooth Starting
- 8.8 Why Choose DTS-MONACO.EDU.VN for Your Car Coding Needs?
- 9. FAQs About Engine Coolant Temperature Sensor Replacement
- 9.1 Is it okay to drive with a bad coolant temperature sensor?
- 9.2 Can a bad coolant temperature sensor cause other problems?
- 9.3 How often should I replace the coolant temperature sensor?
- 9.4 Can I replace the coolant temperature sensor myself, or should I take it to a mechanic?
- 9.5 What tools do I need to replace the coolant temperature sensor?
- 9.6 How do I know if I’m using the correct coolant?
- 9.7 What should I do with the old coolant after draining it?
- 9.8 How can I prevent air pockets from forming in the cooling system after replacing the sensor?
- 9.9 Can car coding help diagnose coolant temperature sensor issues?
- 9.10 Where can I get reliable training in car coding and automotive diagnostics in the USA?
- 10. Advanced Diagnostics and Car Coding: Leveraging DTS-Monaco for Engine Coolant Temperature Sensor Issues
- 10.1 Understanding DTS-Monaco
- 10.2 Reading Sensor Data
- 10.3 Performing Diagnostic Tests
- 10.4 Identifying Fault Codes
- 10.5 Recoding and Reprogramming
- 10.6 Step-by-Step Guide: Using DTS-Monaco for Coolant Temperature Sensor Diagnostics
- 10.7 Benefits of Using DTS-Monaco
- 10.8 Why Learn DTS-Monaco with DTS-MONACO.EDU.VN?
- 10.9 Contact Information
- Call to Action
1. What is the Engine Coolant Temperature Sensor?
The engine coolant temperature (ECT) sensor is a vital component in your vehicle that monitors the temperature of the engine coolant. This sensor sends data to the engine control module (ECM) or powertrain control module (PCM), enabling the computer to regulate cooling fan operation, air-to-fuel ratio, and spark timing for optimal engine performance. Think of it as your engine’s personal weather forecaster, ensuring everything runs smoothly.
1.1 Why is the Engine Coolant Temperature Sensor Important?
According to a study by the National Institute for Automotive Service Excellence (ASE), accurate temperature readings are crucial for modern vehicles to operate efficiently. A faulty sensor can lead to:
- Poor Fuel Economy: The ECM relies on accurate temperature data to adjust the air-to-fuel ratio.
- Engine Overheating: Inaccurate readings can prevent the cooling fan from activating, leading to potential engine damage.
- Rough Engine Performance: Incorrect spark timing can cause the engine to run unevenly.
1.2 How Does the Engine Coolant Temperature Sensor Work?
The ECT sensor typically uses a thermistor, a type of resistor whose resistance varies significantly with temperature. When the coolant temperature changes, the thermistor’s resistance also changes. The ECM reads this change in resistance as a change in temperature. This information is then used to adjust various engine parameters.
2. Where is the Engine Coolant Temperature Sensor Located?
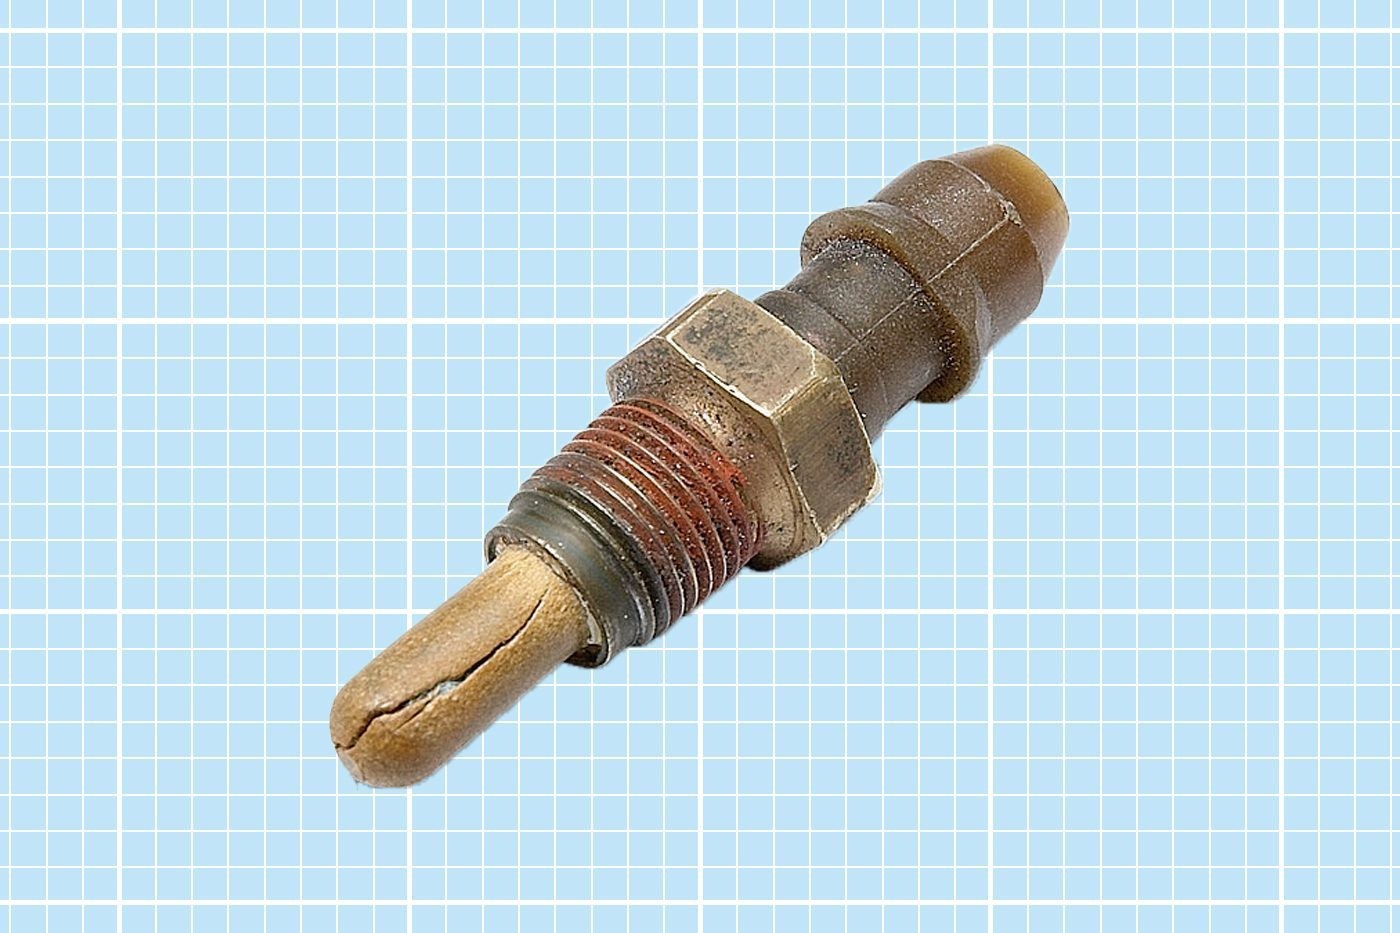 Close-up of an engine coolant temperature sensor located near the thermostat housing of an engine.
The location of the engine coolant temperature sensor varies depending on your vehicle’s make and model. However, it is commonly found near the thermostat housing.
2.1 Common Locations of the Engine Coolant Temperature Sensor
- Near the Thermostat Housing: Often located toward the top of the engine by the intake manifold and cylinder heads.
- Integrated into the Thermostat Housing: In some models, the sensor is integrated directly into the thermostat housing.
- On or Near the Water Pump Housing: Occasionally, the sensor can be found mounted on or very near the water pump housing.
2.2 Why Does the Location Matter?
Knowing the exact location can save you time and prevent unnecessary disassembly when you need to replace the sensor. Consulting your vehicle’s service manual or using online resources can help pinpoint the sensor’s location. At DTS-MONACO.EDU.VN, we emphasize the importance of detailed knowledge like this, particularly when it comes to car coding and advanced diagnostics.
3. What are the Symptoms of a Bad Engine Coolant Temperature Sensor?
Recognizing the signs of a failing engine coolant temperature sensor can prevent significant engine damage. Here are some common symptoms:
3.1 Common Symptoms of a Faulty Sensor
- Engine Overheating or Running Too Cool: The temperature gauge may fluctuate erratically or show consistently high or low readings.
- Erratic Temperature Gauge Readings: The temperature gauge may fluctuate erratically or show consistently high or low readings.
- Illuminated Check Engine Light: The check engine light may turn on, indicating a problem with the sensor.
- Cooling Fan Issues: The electric cooling fan may run constantly or not run at all.
- Poor Fuel Efficiency: The engine may consume more fuel than usual due to incorrect air-to-fuel mixture adjustments.
- Roughly Running Engine: The engine may run rough or misfire, especially when idling or at low speeds.
- Black Smoke from Tailpipe: Excessive fuel in the mixture can cause black smoke.
- Smell of Fuel: A rich fuel mixture can lead to a noticeable fuel smell.
- Hard Starting: Difficulty starting the engine, especially in cold weather.
3.2 Expert Insights on Symptom Diagnosis
Duane “Doc” Watson, a technical trainer at Bosch Mobility Aftermarket, notes that a failing sensor can cause the computer to think the engine is running too cold, leading to excessive fuel injection. This can result in a fuel smell, black smoke, and a rough-running engine.
3.3 Using Diagnostic Tools to Confirm Sensor Failure
To accurately diagnose a faulty sensor, you can use a voltmeter or tools like Bosch’s VET 100 Circuit Analysis Tool 3920. These tools help validate wiring connections and sensor accuracy. Additionally, comparing the temperature signal from a scan tool to a laser temperature gun aimed at the sensor can provide valuable insights. Chris “Moose” Pyle, a master certified technician with JustAnswer, recommends this comparative approach for reliable diagnostics.
4. How to Test an Engine Coolant Temperature Sensor?
Testing the engine coolant temperature sensor is essential to confirm whether it is functioning correctly before opting for a replacement. Here’s how you can test it using a multimeter.
4.1 What You Will Need
- Multimeter (digital is preferred)
- Vehicle service manual for your specific make and model
- Basic tools to access the sensor (e.g., wrenches, screwdrivers)
4.2 Safety Precautions
- Ensure the engine is cool to avoid burns.
- Disconnect the negative battery terminal to prevent electrical shock.
4.3 Step-by-Step Testing Procedure
Step 1: Locate the Coolant Temperature Sensor
- Refer to your vehicle’s service manual to find the exact location of the sensor. It is typically near the thermostat housing.
Step 2: Disconnect the Sensor
- Carefully disconnect the electrical connector from the coolant temperature sensor.
Step 3: Set Up the Multimeter
- Turn on your multimeter and set it to measure resistance (Ohms Ω).
- Ensure the multimeter is calibrated correctly by touching the two probes together; it should read close to 0 Ohms.
Step 4: Measure Resistance
- Place the multimeter probes on the sensor’s terminals.
- Note the resistance reading.
Step 5: Compare the Reading to Specifications
- Refer to your vehicle’s service manual for the specified resistance range at different temperatures.
- For example, a typical specification might be 2,000-3,000 Ohms at 68°F (20°C).
Step 6: Test at Different Temperatures (Optional)
- For a more thorough test, measure the resistance at different temperatures.
- You can do this by placing the sensor in a container of water with a thermometer and heating the water gradually.
- Record the resistance at different temperatures and compare them to the specifications in the service manual.
4.4 Interpreting the Results
- Correct Reading: If the resistance reading matches the specified range for the current temperature, the sensor is likely functioning correctly.
- Incorrect Reading: If the resistance reading is significantly higher, lower, or shows no continuity (infinite resistance), the sensor is likely faulty and needs replacement.
- No Reading: If the multimeter shows no reading or an open circuit, the sensor is likely damaged internally.
4.5 Additional Tips
- Check the Wiring: Inspect the wiring and connector for any signs of damage, corrosion, or loose connections. Clean or repair as necessary before testing the sensor.
- Use a Scan Tool: A diagnostic scan tool can read the temperature value reported by the sensor to the ECU. Compare this value to the actual engine temperature for further verification.
- Consult a Professional: If you are unsure about any step of the testing procedure, consult a professional mechanic to avoid damaging the sensor or your vehicle.
4.6 Example Readings and What They Mean
- Reading: 2,500 Ohms at 68°F (20°C)
- Interpretation: This reading is within the typical specified range, indicating the sensor is likely good.
- Reading: 5,000 Ohms at 68°F (20°C)
- Interpretation: This reading is significantly higher than the specified range, suggesting the sensor is faulty.
- Reading: 0 Ohms
- Interpretation: This reading indicates a short circuit within the sensor, meaning it is likely bad.
- Reading: Infinite Ohms (no continuity)
- Interpretation: This indicates an open circuit within the sensor, meaning it is faulty.
5. What is the Cost to Replace the Engine Coolant Temperature Sensor?
The cost to replace the engine coolant temperature sensor can vary based on several factors, including the vehicle’s make and model, the type of sensor, and whether you choose to replace it yourself or hire a professional mechanic.
5.1 Cost of the Sensor
The engine coolant temperature sensor itself typically costs between $15 and $50. Prices can vary depending on the brand, quality, and specific requirements of your vehicle. Opting for an OEM (Original Equipment Manufacturer) sensor may cost more than aftermarket options but often ensures better compatibility and reliability.
5.2 Labor Costs
If you decide to hire a mechanic, labor costs can significantly increase the total expense. Replacing the sensor usually takes between 1 to 2.5 hours of labor. Mechanic labor rates vary widely depending on location and the shop’s hourly rate, typically ranging from $75 to $150 per hour. Therefore, labor costs could range from $75 to $375.
5.3 Additional Costs
- Coolant: During the replacement, some coolant is typically lost, so you may need to purchase additional coolant to refill the system. A gallon of coolant usually costs around $15 to $30.
- Diagnostic Fees: Some mechanics may charge a diagnostic fee to identify the issue, which can range from $50 to $100. However, this fee is often waived if you proceed with the repair at their shop.
5.4 Total Cost Estimate
Combining the costs of the sensor, labor, and additional materials, the total cost to replace the engine coolant temperature sensor can range from $150 to $400 when hiring a mechanic. If you choose to do it yourself, the cost will be significantly lower, limited to the price of the sensor and coolant.
5.5 Cost-Saving Tips
- DIY Replacement: If you have basic mechanical skills, replacing the sensor yourself can save on labor costs.
- Compare Quotes: Get quotes from multiple mechanics to ensure you’re getting a fair price.
- Use Aftermarket Parts: Consider using high-quality aftermarket sensors to save on the cost of OEM parts, but ensure they are compatible with your vehicle.
- Check for Discounts: Some auto parts stores and repair shops offer discounts or promotions on parts and services.
5.6 Example Cost Breakdown
| Item | Cost |
|---|---|
| Coolant Temperature Sensor | $15 – $50 |
| Labor (1-2.5 hours) | $75 – $375 |
| Coolant (1 gallon) | $15 – $30 |
| Total (Mechanic) | $150 – $400 |
| Total (DIY) | $30 – $80 |
6. Step-by-Step Guide: How To Replace the Engine Coolant Temperature Sensor Yourself
Replacing the engine coolant temperature sensor is a straightforward task that can be accomplished with basic mechanical skills. Here’s a step-by-step guide to help you through the process:
6.1 Tools and Materials Needed
- New Engine Coolant Temperature Sensor
- Socket Wrench Set
- Open-End Wrench Set
- Pliers
- Screwdriver
- New Coolant
- RTV Sealant or O-Rings
- Dielectric Grease
- Compressed Air
- Clean Container to Save Coolant (if reusable)
6.2 Safety Precautions
- Ensure the engine is completely cool before starting to avoid burns.
- Disconnect the negative battery terminal to prevent electrical shock.
6.3 Step-by-Step Instructions
Step 1: Locate the Sensor and Prepare the Area
- Refer to your vehicle’s service manual to find the exact location of the coolant temperature sensor.
- Use compressed air to remove any debris or dirt around the sensor.
- If other vehicle parts are blocking access to the sensor, carefully remove them.
Step 2: Drain Coolant
- Place a clean container under the radiator drain valve to catch the coolant.
- Open the drain valve and allow coolant to drain as necessary. If the coolant is in good condition, save it for reuse.
Step 3: Disconnect the Electrical Connection
- Carefully unplug the electrical connector from the coolant temperature sensor.
Step 4: Remove the Old Sensor
- Use the appropriate socket wrench or open-end wrench to loosen and remove the old sensor. Be careful not to damage the surrounding components.
Step 5: Install the New Sensor
- If the new sensor does not come with sealant already on the threads, apply a thin coat of RTV sealant or add or replace the O-rings.
- Thread the new sensor into the designated hole and tighten it to the torque specifications for your model and engine, as per the owner’s manual recommendations (typically around 15 to 18 inch-pounds).
Step 6: Reconnect the Electrical Connector
- Reconnect the electrical connector to the new sensor.
- You may use a small amount of dielectric grease on the connector terminals to help keep water off the pins and prevent electrical resistance.
Step 7: Add Coolant
- Pour the saved coolant (if reusable) or new coolant into the radiator until it reaches the proper level.
Step 8: Check for Leaks
- Start the engine and check for coolant leaks around the sensor.
- Run the engine with the coolant cap off for a little while to work out any air pockets in the cooling system.
Step 9: Final Checks
- Ensure the temperature gauge is functioning correctly and that the engine is not overheating.
- Monitor the coolant level for the next few days and add more as needed.
6.4 Common Mistakes to Avoid
- Over-Torquing: Avoid over-tightening the new sensor, as this can damage the threads and the intake manifold.
- Cross-Threading: Ensure the sensor is properly aligned to avoid cross-threading, which can cause coolant leaks.
- Forgetting Sealant: Always apply sealant to the threads to prevent leaks.
- Using the Wrong Sensor: Verify you have the correct sensor for your vehicle make and model.
- Using the Wrong Coolant: Use the coolant specified in your owner’s manual to avoid chemical incompatibilities.
- Installing Dissimilar Metals: Avoid installing a sensor made of dissimilar metal into the intake manifold to prevent electrolysis and corrosion.
7. Common Mistakes to Avoid During Engine Coolant Temperature Sensor Replacement
Replacing the engine coolant temperature sensor can be a straightforward process, but several common mistakes can lead to complications. Avoiding these pitfalls ensures a successful and long-lasting repair.
7.1 Over-Torquing the Sensor
One of the most common mistakes is over-tightening the new sensor. Coolant temperature sensors are designed with a tapered thread, which means they tighten more as you screw them in, especially on plastic intakes. Over-torquing can damage the threads, the sensor itself, and even the intake manifold. Always use a torque wrench and adhere to the torque specifications in your vehicle’s manual, typically around 15 to 18 inch-pounds.
7.2 Cross-Threading the Sensor
Cross-threading occurs when the sensor is not properly aligned when being installed, causing the threads to be damaged. This can lead to coolant leaks and necessitate further repairs. Ensure the sensor is correctly aligned before tightening it. If you encounter resistance, stop and realign the sensor to prevent damage.
7.3 Forgetting to Apply Sealant
Sealant is crucial to prevent coolant leaks. If the new sensor does not come with sealant pre-applied, apply a thin coat of RTV sealant to the threads before installation. This ensures a watertight seal and prevents future leaks.
7.4 Using the Incorrect Sensor
Using the wrong sensor can lead to inaccurate readings and poor engine performance. Always verify that the new sensor is the correct part for your vehicle’s make and model. Consulting your vehicle’s service manual or an auto parts professional can help ensure you get the right sensor.
7.5 Using the Wrong Coolant
Coolants with different chemical compositions do not mix well and can cause corrosion and other engine problems. Always use the coolant specified in your owner’s manual. If you’re unsure, consult a mechanic or refer to your vehicle’s service manual.
7.6 Installing Dissimilar Metals
Installing a sensor made of a different metal than the intake manifold (e.g., a brass sensor in an aluminum manifold) can create electrolysis, leading to corrosion. This can cause the sensor to become stuck and potentially break off inside the manifold during removal, resulting in a costly repair.
7.7 Additional Tips to Avoid Mistakes
- Read the Instructions: Always read and follow the instructions provided with the new sensor.
- Use Quality Parts: Opt for OEM (Original Equipment Manufacturer) parts or reputable aftermarket brands to ensure reliability and compatibility.
- Inspect the Wiring: Check the wiring and connector for any signs of damage, corrosion, or loose connections before installing the new sensor.
- Take Your Time: Avoid rushing the process. Take your time to ensure each step is completed correctly.
- Consult a Professional: If you’re unsure about any part of the process, consult a professional mechanic to avoid potential damage to your vehicle.
8. Benefits of Replacing the Engine Coolant Temperature Sensor
Replacing the engine coolant temperature sensor offers numerous benefits for your vehicle’s performance and longevity. Here’s why it’s important to address a faulty sensor promptly:
8.1 Improved Engine Performance
A functioning coolant temperature sensor ensures the engine control module (ECM) receives accurate temperature data. This data is crucial for adjusting the air-to-fuel ratio, ignition timing, and other engine parameters, leading to smoother and more efficient engine performance.
8.2 Better Fuel Efficiency
When the coolant temperature sensor is working correctly, the ECM can optimize the air-to-fuel ratio. This optimization prevents the engine from running too rich (too much fuel) or too lean (not enough fuel), which can significantly improve fuel efficiency and save you money at the gas pump.
8.3 Prevention of Overheating
An accurate coolant temperature sensor allows the cooling fan to operate correctly. If the sensor is faulty, the cooling fan may not activate when needed, leading to overheating. Replacing the sensor ensures the cooling system works as intended, preventing costly engine damage from overheating.
8.4 Accurate Temperature Readings
A properly functioning sensor provides accurate temperature readings on the dashboard gauge. This allows you to monitor your engine’s temperature and identify potential issues before they escalate. Consistent and accurate readings give you peace of mind and help maintain your vehicle’s health.
8.5 Reduction of Emissions
An optimized air-to-fuel ratio, thanks to a functioning sensor, reduces harmful emissions. This not only helps you pass emissions tests but also contributes to a cleaner environment.
8.6 Prevention of Engine Damage
Overheating and improper fuel mixtures can cause significant engine damage over time. Replacing a faulty coolant temperature sensor helps prevent these issues, extending the life of your engine and avoiding costly repairs.
8.7 Smooth Starting
A faulty coolant temperature sensor can cause hard starting, especially in cold weather. Replacing the sensor ensures the ECM provides the correct fuel mixture for easy and reliable starting, regardless of the weather conditions.
8.8 Why Choose DTS-MONACO.EDU.VN for Your Car Coding Needs?
At DTS-MONACO.EDU.VN, we understand the intricacies of modern automotive systems. Our expertise in car coding and advanced diagnostics equips you with the knowledge and tools to maintain your vehicle effectively. By learning to diagnose and replace components like the coolant temperature sensor, you ensure optimal engine performance and longevity.
We offer comprehensive training programs designed to elevate your skills in automotive technology. Whether you’re a seasoned technician or just starting, our courses provide valuable insights into car coding, module programming, and advanced diagnostics. With DTS-MONACO.EDU.VN, you’re not just fixing cars; you’re mastering the art of automotive excellence.
9. FAQs About Engine Coolant Temperature Sensor Replacement
Here are some frequently asked questions about replacing the engine coolant temperature sensor, along with detailed answers to help you better understand the process and its importance.
9.1 Is it okay to drive with a bad coolant temperature sensor?
Not usually. Driving with a faulty coolant temperature sensor can lead to your engine overheating. If you see a red warning light or your car is overheating, do not continue to drive. As Chris “Moose” Pyle notes, ignoring this can turn a $50 part into a possible $5,000 repair. If the engine is not overheating, it is probably safe to keep driving for a day or two, but try to get it into a shop as soon as possible.
9.2 Can a bad coolant temperature sensor cause other problems?
Yes, a bad coolant temperature sensor can cause a variety of problems. These include poor fuel efficiency, rough engine performance, difficulty starting, and increased emissions. Additionally, if the sensor provides incorrect data, it can lead to the cooling fan not functioning correctly, potentially causing the engine to overheat.
9.3 How often should I replace the coolant temperature sensor?
There is no specific replacement interval for the coolant temperature sensor. However, it is recommended to inspect it periodically, especially if you notice any of the symptoms of a faulty sensor. Replace it as soon as you suspect it is failing to prevent further issues.
9.4 Can I replace the coolant temperature sensor myself, or should I take it to a mechanic?
Replacing the coolant temperature sensor is generally considered a relatively straightforward job for someone with basic mechanical skills and the right tools, according to Paul Knoll. If you are comfortable working on your car and have the necessary tools, you can likely replace it yourself. However, if you are not mechanically inclined or are unsure about any step of the process, it is best to take it to a professional mechanic.
9.5 What tools do I need to replace the coolant temperature sensor?
The tools you need to replace the coolant temperature sensor typically include a socket wrench set, an open-end wrench set, pliers, a screwdriver, a new coolant temperature sensor, new coolant, RTV sealant or O-rings, dielectric grease, and compressed air.
9.6 How do I know if I’m using the correct coolant?
Refer to your vehicle’s owner’s manual for the specific type of coolant recommended for your car. Using the wrong coolant can lead to corrosion and other engine problems. If you are unsure, consult a mechanic or refer to your vehicle’s service manual.
9.7 What should I do with the old coolant after draining it?
Old coolant should be disposed of properly at a recycling center or auto parts store. Coolant is toxic and can be harmful to the environment, so it should never be poured down the drain or onto the ground.
9.8 How can I prevent air pockets from forming in the cooling system after replacing the sensor?
After replacing the sensor and adding coolant, run the engine with the coolant cap off for a little while to allow any air pockets to escape. You can also gently squeeze the radiator hoses to help work out any trapped air. Monitor the coolant level for the next few days and add more as needed.
9.9 Can car coding help diagnose coolant temperature sensor issues?
Yes, car coding and advanced diagnostics can help identify issues with the coolant temperature sensor. By using diagnostic tools and software like DTS-Monaco, technicians can read sensor data, identify discrepancies, and perform advanced tests to pinpoint the problem. At DTS-MONACO.EDU.VN, we provide training and resources to help you master these diagnostic techniques.
9.10 Where can I get reliable training in car coding and automotive diagnostics in the USA?
For reliable training in car coding and automotive diagnostics in the USA, DTS-MONACO.EDU.VN offers comprehensive courses designed to enhance your skills and knowledge. Our programs cover a wide range of topics, including module programming, advanced diagnostics, and car coding techniques. Visit our website or contact us at Address: 275 N Harrison St, Chandler, AZ 85225, United States. Whatsapp: +1 (641) 206-8880. Website: DTS-MONACO.EDU.VN to learn more.
10. Advanced Diagnostics and Car Coding: Leveraging DTS-Monaco for Engine Coolant Temperature Sensor Issues
In modern automotive repair, advanced diagnostic tools and car coding play a crucial role in identifying and resolving complex issues. One such tool is the DTS-Monaco software, a powerful platform used for module programming, diagnostics, and car coding. Here’s how you can leverage DTS-Monaco to address engine coolant temperature sensor issues:
10.1 Understanding DTS-Monaco
DTS-Monaco is a diagnostic and programming tool used by automotive technicians and engineers. It allows users to communicate with the various electronic control units (ECUs) in a vehicle, read diagnostic trouble codes (DTCs), perform module programming, and customize vehicle settings through car coding. This software is essential for advanced diagnostics and repairs in modern vehicles.
10.2 Reading Sensor Data
One of the primary uses of DTS-Monaco is to read live sensor data from the vehicle’s ECUs. You can connect to the engine control module (ECM) and view the coolant temperature sensor readings in real-time. This allows you to monitor the sensor’s performance and identify any discrepancies or inconsistencies.
10.3 Performing Diagnostic Tests
DTS-Monaco can perform various diagnostic tests to assess the functionality of the coolant temperature sensor. These tests may include:
- Actuator Tests: Activate the cooling fan and monitor the sensor’s response.
- Data Logging: Record sensor data over a period of time to identify intermittent issues.
- Freeze Frame Data: Analyze the data captured when a DTC was triggered to understand the conditions that led to the fault.
10.4 Identifying Fault Codes
DTS-Monaco can read diagnostic trouble codes (DTCs) related to the coolant temperature sensor. These codes provide valuable information about the nature of the fault, such as short circuits, open circuits, or implausible signal values. By interpreting these codes, you can pinpoint the exact cause of the issue.
10.5 Recoding and Reprogramming
In some cases, replacing the coolant temperature sensor may require recoding or reprogramming the ECM. DTS-Monaco allows you to perform these tasks, ensuring that the new sensor is properly integrated into the vehicle’s system. This is particularly important for vehicles with advanced electronic systems.
10.6 Step-by-Step Guide: Using DTS-Monaco for Coolant Temperature Sensor Diagnostics
- Connect to the Vehicle: Connect the DTS-Monaco interface to the vehicle’s OBD-II port and establish a connection to the ECM.
- Read DTCs: Use DTS-Monaco to read any diagnostic trouble codes (DTCs) related to the coolant temperature sensor.
- View Live Data: Access the live data stream and monitor the coolant temperature sensor readings in real-time.
- Perform Actuator Tests: Activate the cooling fan and monitor the sensor’s response.
- Analyze Freeze Frame Data: Examine the data captured when a DTC was triggered to understand the conditions that led to the fault.
- Recode or Reprogram (if necessary): If required, use DTS-Monaco to recode or reprogram the ECM to ensure proper sensor integration.
- Clear DTCs: After completing the repair, clear any stored DTCs to reset the system.
10.7 Benefits of Using DTS-Monaco
- Accurate Diagnostics: Provides precise sensor data and diagnostic tests for accurate fault identification.
- Efficient Repairs: Streamlines the repair process by providing clear and concise information about the issue.
- Advanced Functionality: Offers advanced features such as recoding and reprogramming for complex repairs.
- Comprehensive Data Analysis: Allows for comprehensive data analysis to identify intermittent or hidden issues.
10.8 Why Learn DTS-Monaco with DTS-MONACO.EDU.VN?
At DTS-MONACO.EDU.VN, we offer specialized training programs that equip you with the skills and knowledge to effectively use DTS-Monaco for advanced automotive diagnostics and car coding. Our courses cover a wide range of topics, including:
- DTS-Monaco Software Operation: Learn how to navigate the DTS-Monaco interface and use its various features.
- Module Programming: Master the techniques for programming and configuring vehicle ECUs.
- Advanced Diagnostics: Develop expertise in diagnosing complex automotive issues using advanced diagnostic tools and techniques.
- Car Coding: Learn how to customize vehicle settings and enable new features through car coding.
10.9 Contact Information
For more information about our training programs and services, please visit our website or contact us at:
- Address: 275 N Harrison St, Chandler, AZ 85225, United States
- WhatsApp: +1 (641) 206-8880
- Website: DTS-MONACO.EDU.VN
Call to Action
Ready to take your automotive repair skills to the next level? Visit DTS-MONACO.EDU.VN today to discover our comprehensive training programs, cutting-edge software, and expert support. Whether you’re looking to master car coding, advanced diagnostics, or module programming, we have the resources you need to succeed. Contact us now and unlock the full potential of your automotive career!