Replacing your Variable Valve Timing (VVT) solenoid can resolve issues like poor fuel economy and loss of power; DTS-MONACO.EDU.VN offers expert insights and training in car coding, which can assist in this process. By understanding the function and replacement procedure of VVT solenoids, you can restore your vehicle’s performance and efficiency. Explore our resources to master car coding and diagnostics for modern vehicles, enhancing your automotive repair skills with the knowledge from the car coding leader, improving engine management and diagnostic software proficiency.
Contents
- 1. Understanding Variable Valve Timing (VVT) Solenoids
- 1.1. Functionality of VVT Systems
- 1.2. Symptoms of a Failing VVT Solenoid
- 1.3. Tools and Materials Needed
- 2. Step-by-Step Guide to Replacing a VVT Solenoid
- 2.1. Preparation
- 2.2. Locating and Accessing the VVT Solenoid
- 2.3. Removing the Old Solenoid
- 2.4. Preparing for the New Solenoid
- 2.5. Installing the New Solenoid
- 2.6. Final Steps
- 3. Advanced Diagnostics and Car Coding with DTS-Monaco
- 3.1. Introduction to DTS-Monaco
- 3.2. How DTS-Monaco Can Aid in VVT Solenoid Replacement
- 3.3. Car Coding for Optimal Performance
- 3.4. Common Coding Adjustments
- 3.5. Ensuring Proper Installation and Functionality
- 3.6. Benefits of Using DTS-Monaco
- 4. Common Issues and Troubleshooting
- 4.1. Engine Misfires
- 4.2. Check Engine Light Remains On
- 4.3. Poor Engine Performance
- 4.4. VVT Solenoid Failure
- 5. The Importance of Regular Maintenance
- 5.1. Oil Changes
- 5.2. Filter Replacements
- 5.3. System Inspections
- 5.4. Software Updates
- 6. Benefits of Professional Training with DTS-MONACO.EDU.VN
- 6.1. Comprehensive Curriculum
- 6.2. Expert Instructors
- 6.3. Hands-On Experience
- 6.4. Certification
- 6.5. Career Advancement
- 7. Staying Updated with the Latest Technologies
- 7.1. Industry Publications
- 7.2. Online Forums and Communities
- 7.3. Trade Shows and Conferences
- 7.4. Continuous Learning
- 8. How to Choose the Right VVT Solenoid
- 8.1. OEM vs. Aftermarket
- 8.2. Compatibility
- 8.3. Quality and Reliability
- 8.4. Warranty
- 8.5. Installation
- 9. Safety Precautions
- 9.1. Disconnect the Battery
- 9.2. Use Proper Tools
- 9.3. Wear Safety Gear
- 9.4. Work in a Well-Ventilated Area
- 9.5. Follow Service Manual Guidelines
- 10. Frequently Asked Questions (FAQ)
- 10.1. What is a VVT solenoid and what does it do?
- 10.2. How do I know if my VVT solenoid is bad?
- 10.3. Can I drive with a bad VVT solenoid?
- 10.4. How much does it cost to replace a VVT solenoid?
- 10.5. Is it difficult to replace a VVT solenoid myself?
- 10.6. How often should I replace my VVT solenoid?
- 10.7. Can a bad VVT solenoid cause other engine problems?
- 10.8. How can DTS-Monaco help with VVT solenoid replacement?
- 10.9. Where can I get training on using DTS-Monaco for car coding and diagnostics?
- 10.10. What are the benefits of using OEM VVT solenoids compared to aftermarket?
1. Understanding Variable Valve Timing (VVT) Solenoids
What exactly is a VVT solenoid and what does it do? The VVT solenoid automatically adjusts valve timing depending on the engine’s operation and load. For example, cruising on a flat road will cause the solenoid to retard timing, improving fuel economy, while driving uphill with a loaded car will advance timing, increasing power. This optimization is crucial for balancing performance and efficiency.
1.1. Functionality of VVT Systems
VVT systems enhance engine efficiency and performance. According to a study by the U.S. Department of Energy, VVT systems can improve fuel economy by up to 7% and increase engine power by up to 10%. These systems work by adjusting the timing of the intake and exhaust valves, optimizing them for different driving conditions.
1.2. Symptoms of a Failing VVT Solenoid
Recognizing the signs of a failing VVT solenoid is crucial for timely replacement. Common symptoms include:
- Illuminated Check Engine Light
- Loss of Power
- Poor Fuel Economy
- Rough Idle
1.3. Tools and Materials Needed
Before starting the replacement, ensure you have the necessary tools and materials. This preparation will streamline the process and minimize potential delays. The required items typically include:
| Tool/Material | Purpose |
|---|---|
| ¼” Ratchet | Tightening and loosening small fasteners |
| ¼” Extensions (3”, 6”) | Providing additional reach for fasteners |
| ¼” Sockets (Metric/Std) | Fitting various sizes of bolts and nuts |
| ⅜” Ratchet | For larger fasteners requiring more torque |
| ⅜” Extensions (3”, 6”) | Extending reach for larger fasteners |
| ⅜” Sockets (Metric/Std) | Fitting larger sizes of bolts and nuts |
| Rags | Cleaning parts and wiping spills |
| Bungee Cords (12”) | Securing hoses and wires out of the way |
| Channel Lock Pliers | Gripping and twisting parts |
| Dielectric Grease | Protecting electrical connections from corrosion |
| Flash Light | Providing visibility in dark areas |
| Lithium Grease | Lubricating parts during assembly |
| Needle Nose Pliers | Grabbing and manipulating small parts |
| Pry Bar (18”) | Levering and prying parts |
| Pick Set | Removing O-rings and seals |
| Service Manual | Providing torque specifications |
| Telescoping Magnet | Retrieving dropped parts |
| VVT Solenoid(s) | Replacement part(s) |
2. Step-by-Step Guide to Replacing a VVT Solenoid
Here’s a detailed, step-by-step guide to replacing your VVT solenoid.
2.1. Preparation
Begin by preparing your vehicle for the replacement process.
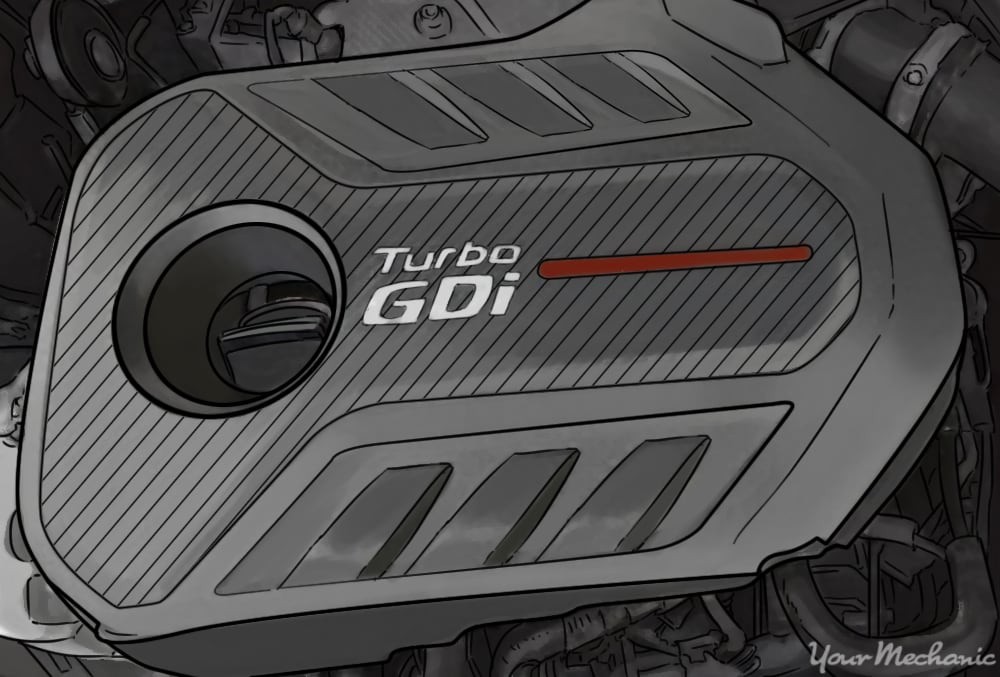
Step 1: Raise and Secure the Hood. If there is an engine cover, remove it.
Engine covers are cosmetic and typically attached by nuts, bolts, or snap into place.
 engine cover
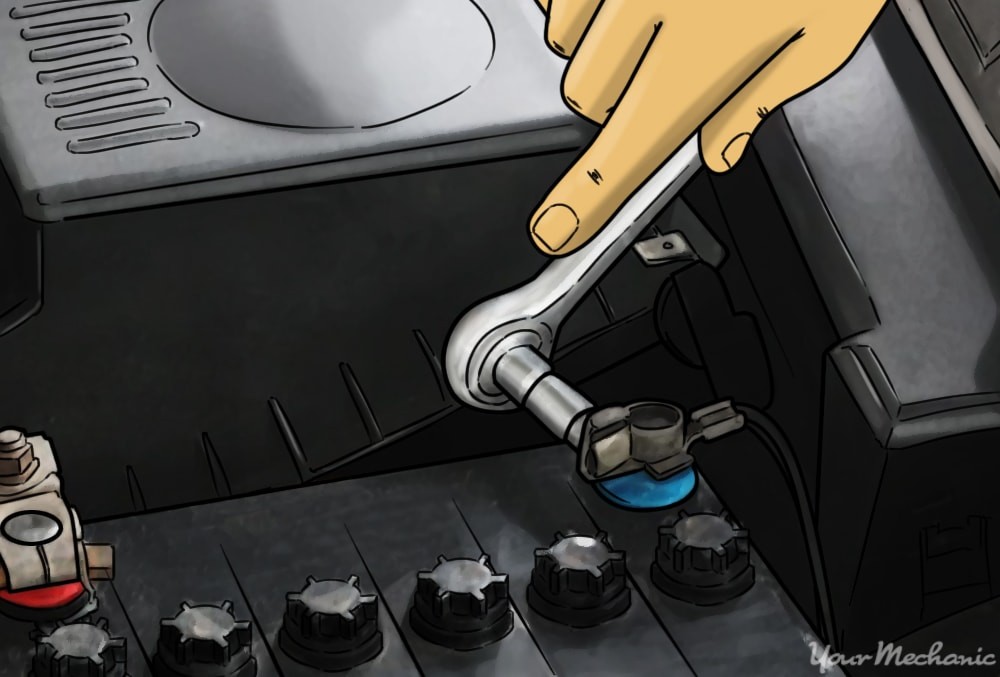
Step 2: Disconnect the Battery. Use an 8mm, 10mm, or 13mm wrench to loosen the positive and negative battery terminals.
Twist and pull the terminals to remove them, then secure the cables to prevent contact.
 removing the battery terminal
2.2. Locating and Accessing the VVT Solenoid
The next steps involve locating and accessing the VVT solenoid.
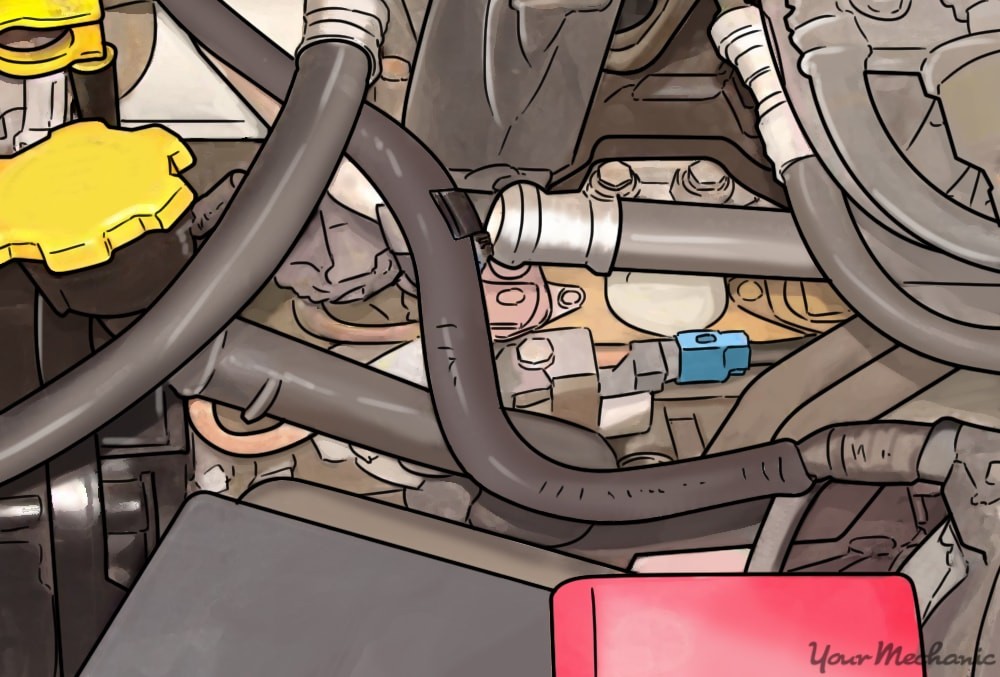
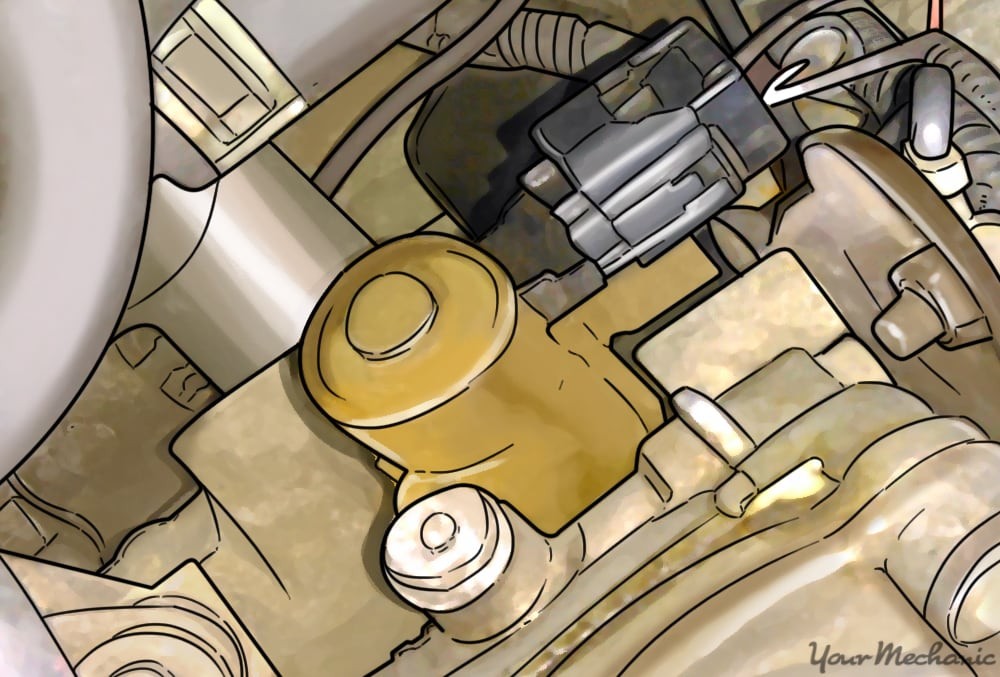
Step 3: Locate the VVT Solenoid. The solenoid is typically at the front of the engine, near the valve cover.
Match the shape to the new solenoid to help locate it. The connector is the exposed end. Look for the connector, silver body, and mounting bolt, as shown in the image.
 variable valve timing solenoid circled
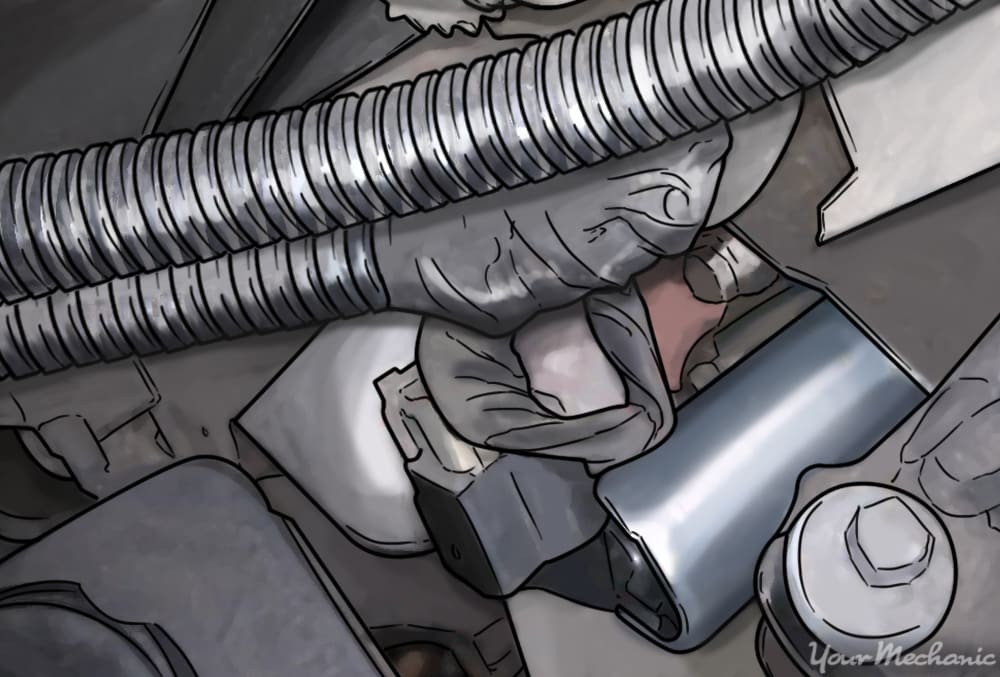
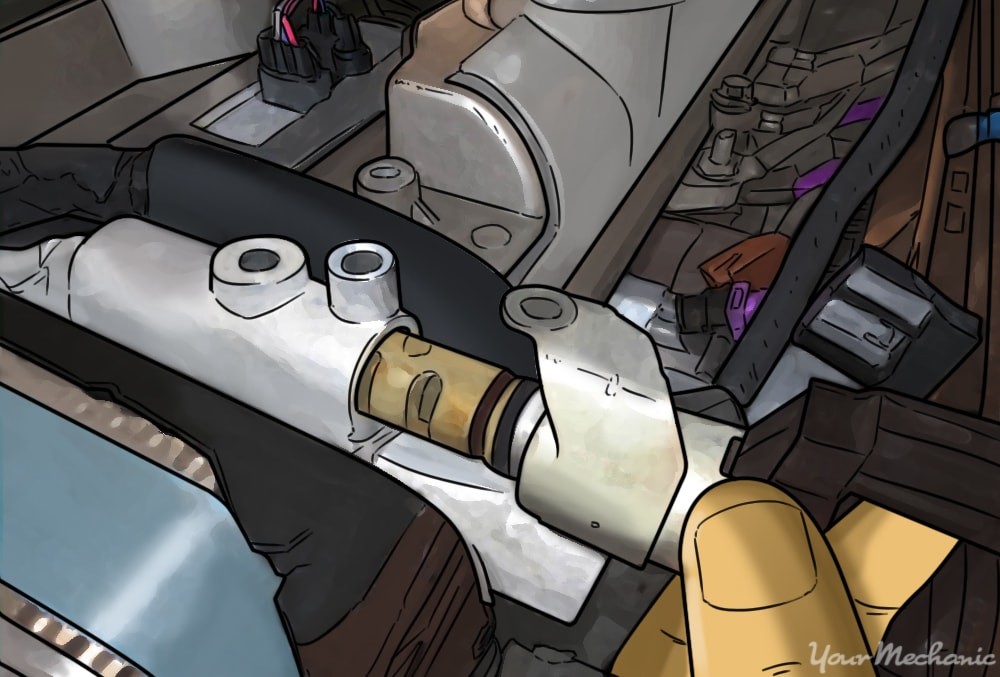
Step 4: Clear the Area. Secure any vacuum lines or wiring harnesses out of the way with bungee cords.
Avoid disconnecting or pulling to prevent damage or confusion.
 shows how some lines and hoses can make it a little hard to work around
2.3. Removing the Old Solenoid
Now, remove the old solenoid carefully.
Step 5: Locate the Mounting Bolts. Most solenoids have one mounting bolt, but some may have two.
Verify the mounting flange on the solenoid to be sure.
 shows the one mounting bolt on the side of the solenoid
Step 6: Remove the Mounting Bolts. Remove the mounting bolts, being careful not to drop them.
Step 7: Disconnect the Solenoid. Disconnect the connector by applying pressure to the tab to release the lock.
Pull only on the connector, not the wire.
Step 8: Remove the Solenoid. If the solenoid is stuck, grip the strongest metal part with channel locks.
Twist the solenoid side to side while lifting. It may require some effort, but it should pop out.
 removing the solenoid
2.4. Preparing for the New Solenoid
Before installing the new solenoid, inspect the area and prepare the new part.
Step 9: Inspect the Variable Valve. Check the old solenoid to ensure it is in one piece.
Look for any damaged or missing pieces of the O-ring or screen. Also, inspect the solenoid valve mounting surface.
Step 10: Remove Any Debris Found. Carefully remove any debris from the mounting surface hole with a long curved pick or needle nose pliers.
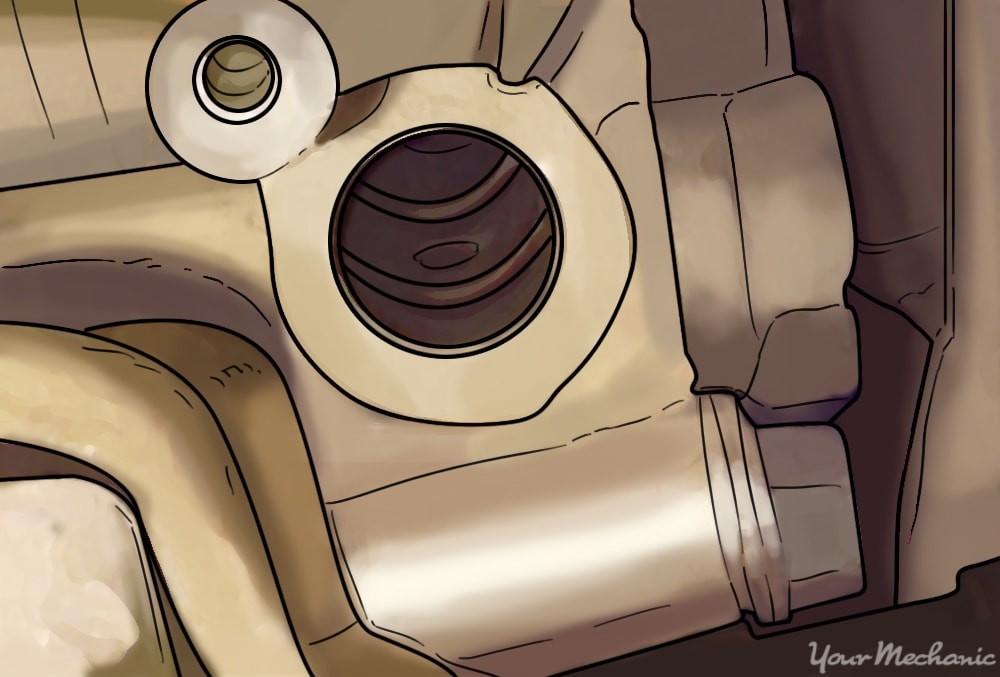 vvt port
Step 11: Lube the Solenoid. Apply lithium grease to the seals on the solenoid spool (the part that inserts into the port).
2.5. Installing the New Solenoid
Install the new solenoid and ensure everything is correctly connected.
Step 12: Insert the Solenoid. Insert the new solenoid into the mounting surface hole.
There should be slight resistance, indicating a proper seal. Twist slightly back and forth while pushing down to get it flush with the mounting surface.
Step 13: Insert the Mounting Screws. Start the mounting screws and tighten them snugly.
Do not overtighten.
Step 14: Install the Electrical Connector. Apply a small amount of dielectric grease to the connector face and seal.
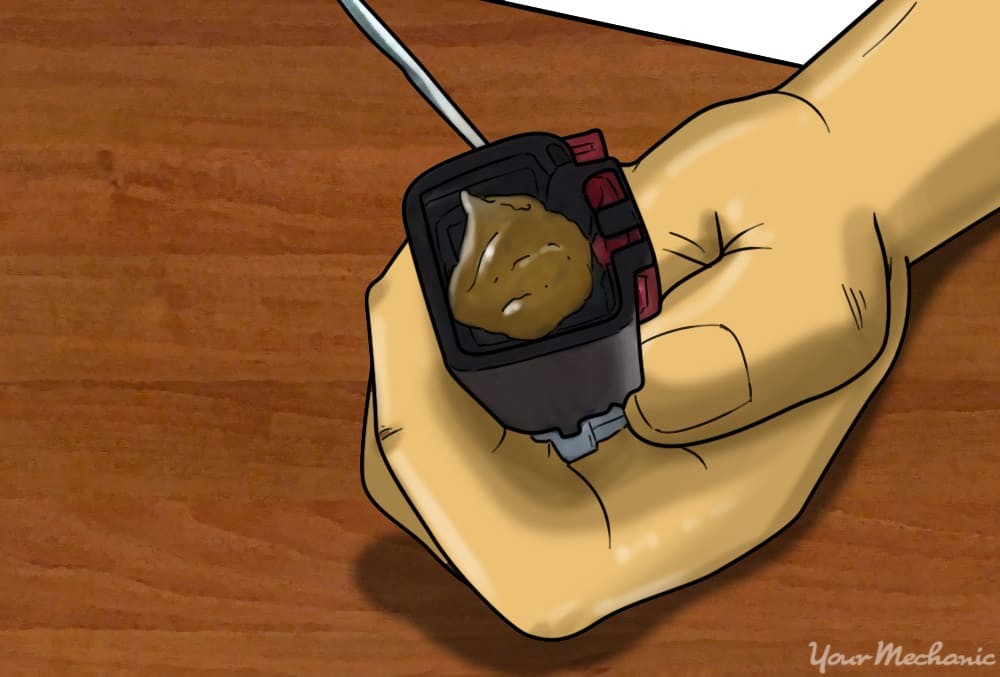 applying dielectric grease to the connector
Dielectric grease protects the connection from corrosion and eases installation.
Step 15: Re-route Anything Moved Aside. Return anything secured with a bungee cord to its original position.
Step 16: Install the Engine Cover. Re-install the engine cover and fasten it back into place.
2.6. Final Steps
Complete the process by reconnecting the battery and verifying the installation.
Step 17: Reconnect the Battery. Install the negative terminal onto the battery and tighten it.
Reconnect the positive battery terminal and tighten.
3. Advanced Diagnostics and Car Coding with DTS-Monaco
For advanced diagnostics and car coding, tools like DTS-Monaco are essential. These tools provide in-depth access to your vehicle’s electronic control units (ECUs), allowing for precise adjustments and troubleshooting.
3.1. Introduction to DTS-Monaco
DTS-Monaco is a powerful diagnostic and car coding software used by automotive professionals. It allows for comprehensive vehicle diagnostics, ECU flashing, and parameter adjustments. With DTS-Monaco, you can perform advanced functions such as:
- ECU Programming
- Variant Coding
- Diagnostic Trouble Code (DTC) Analysis
- Data Logging
3.2. How DTS-Monaco Can Aid in VVT Solenoid Replacement
DTS-Monaco can be used to diagnose VVT solenoid issues and verify the correct operation after replacement. It can read live data from the engine control unit (ECU) to monitor VVT system performance. This includes:
- VVT Solenoid Activation Percentage
- Camshaft Angle
- Engine Speed
- Engine Temperature
By monitoring these parameters, you can ensure the new VVT solenoid is functioning correctly and that the VVT system is operating within specified parameters.
3.3. Car Coding for Optimal Performance
Car coding involves modifying the software in a vehicle’s ECUs to enable or disable certain features, or to optimize performance. After replacing the VVT solenoid, car coding can be used to fine-tune the engine’s performance for optimal fuel efficiency and power.
3.4. Common Coding Adjustments
Here are some coding adjustments that can be made using DTS-Monaco:
| Adjustment | Description |
|---|---|
| Idle Speed Adjustment | Fine-tune the engine’s idle speed to prevent rough idling. |
| Fuel Injection Timing | Adjust the fuel injection timing to optimize fuel efficiency and power. |
| Ignition Timing | Modify the ignition timing to improve engine response and reduce emissions. |
| VVT System Calibration | Calibrate the VVT system to ensure it is operating within the manufacturer’s specifications. |
| Torque Management | Modify the torque management settings to improve throttle response and overall driving experience. |
3.5. Ensuring Proper Installation and Functionality
After replacing the VVT solenoid, use DTS-Monaco to ensure proper installation and functionality. Follow these steps:
- Connect DTS-Monaco to the Vehicle: Establish a connection between your computer and the vehicle’s OBD-II port using a compatible interface.
- Read Fault Codes: Check for any diagnostic trouble codes (DTCs) related to the VVT system. Clear any old codes and monitor for new ones after the replacement.
- Monitor Live Data: Use DTS-Monaco to monitor live data from the ECU, including VVT solenoid activation percentage, camshaft angle, and engine speed.
- Perform Actuator Tests: Run actuator tests to verify the VVT solenoid is responding correctly to commands from the ECU.
- Recalibrate the System: If necessary, recalibrate the VVT system using DTS-Monaco to ensure it is operating within the manufacturer’s specifications.
3.6. Benefits of Using DTS-Monaco
Using DTS-Monaco offers several benefits:
- Comprehensive Diagnostics: Access to detailed diagnostic information.
- Precise Adjustments: Fine-tune engine parameters for optimal performance.
- Real-time Monitoring: Monitor system performance in real-time.
- Efficient Troubleshooting: Quickly identify and resolve issues.
- Enhanced Performance: Optimize engine performance and fuel efficiency.
4. Common Issues and Troubleshooting
Even with careful installation, issues can arise. This section addresses common problems and how to troubleshoot them effectively.
4.1. Engine Misfires
Causes: Incorrect installation, faulty VVT solenoid, or wiring issues.
Troubleshooting Steps:
- Check Connections: Ensure the electrical connector is properly connected and the wiring is intact.
- Verify Installation: Double-check that the VVT solenoid is correctly installed and the mounting bolts are tightened to the correct torque specification.
- Use DTS-Monaco: Monitor live data to see if the VVT solenoid is activating correctly.
- Inspect for Damage: Look for any visible damage to the VVT solenoid or the surrounding components.
4.2. Check Engine Light Remains On
Causes: Diagnostic Trouble Codes (DTCs) not cleared, or new issues detected.
Troubleshooting Steps:
- Read DTCs: Use DTS-Monaco to read the DTCs and identify the specific issue.
- Clear DTCs: Clear the DTCs and see if they reappear after a test drive.
- Address Issues: Address any new DTCs according to the diagnostic information provided by DTS-Monaco.
4.3. Poor Engine Performance
Causes: Incorrect VVT system calibration, vacuum leaks, or other engine issues.
Troubleshooting Steps:
- Check VVT Calibration: Use DTS-Monaco to verify the VVT system is correctly calibrated.
- Inspect Vacuum Lines: Check for any vacuum leaks that could be affecting engine performance.
- Monitor Engine Parameters: Monitor engine parameters such as fuel trim, ignition timing, and air-fuel ratio using DTS-Monaco.
4.4. VVT Solenoid Failure
Causes: Low-quality replacement parts, contaminated oil, or electrical issues.
Troubleshooting Steps:
- Inspect Oil Quality: Check the engine oil for contamination or debris.
- Verify Electrical Supply: Ensure the VVT solenoid is receiving the correct voltage and current.
- Replace VVT Solenoid: Replace the VVT solenoid with a high-quality part from a reputable supplier.
5. The Importance of Regular Maintenance
Regular maintenance is vital for the longevity and performance of your vehicle’s VVT system. Consistent maintenance prevents issues and ensures your vehicle runs smoothly.
5.1. Oil Changes
Frequency: Follow the manufacturer’s recommended oil change intervals.
Benefits: Clean oil ensures the VVT solenoid operates correctly by preventing clogging and maintaining proper lubrication.
5.2. Filter Replacements
Frequency: Replace oil filters and air filters at recommended intervals.
Benefits: Clean filters prevent contaminants from entering the engine, protecting the VVT system.
5.3. System Inspections
Frequency: Inspect the VVT system during routine maintenance checks.
Benefits: Early detection of potential issues can prevent costly repairs.
5.4. Software Updates
Importance: Keep your vehicle’s software updated.
Benefits: Software updates can improve engine management and VVT system performance.
6. Benefits of Professional Training with DTS-MONACO.EDU.VN
For those looking to deepen their understanding and skills in car coding and diagnostics, DTS-MONACO.EDU.VN offers comprehensive training programs. These programs provide hands-on experience and expert instruction, ensuring you are well-equipped to handle complex automotive repairs and enhancements.
6.1. Comprehensive Curriculum
Our training programs cover a wide range of topics, including:
- Basic and Advanced Car Coding Techniques
- DTS-Monaco Software Operation
- ECU Programming and Flashing
- Diagnostic Trouble Code (DTC) Analysis
- Live Data Monitoring and Interpretation
- Vehicle Network Communication Protocols
6.2. Expert Instructors
Learn from experienced automotive professionals who are experts in car coding and diagnostics. Our instructors provide personalized attention and guidance, ensuring you master the necessary skills.
6.3. Hands-On Experience
Gain practical experience through hands-on training sessions using real vehicles and the latest diagnostic tools. Practice coding, diagnosing, and troubleshooting various automotive systems under the supervision of our expert instructors.
6.4. Certification
Upon completion of our training programs, receive a certification that validates your skills and knowledge in car coding and diagnostics. This certification can enhance your career prospects and demonstrate your expertise to potential employers.
6.5. Career Advancement
Enhance your career prospects with advanced training in car coding and diagnostics. Our programs equip you with the skills and knowledge needed to excel in the automotive industry.
7. Staying Updated with the Latest Technologies
The automotive industry is constantly evolving, with new technologies and systems being introduced regularly. Staying updated with the latest advancements is essential for automotive professionals.
7.1. Industry Publications
Subscribe to industry publications and journals to stay informed about the latest technologies and trends. These resources provide valuable insights into new systems and diagnostic techniques.
7.2. Online Forums and Communities
Participate in online forums and communities to connect with other automotive professionals and share knowledge. These platforms provide a valuable resource for troubleshooting issues and learning about new technologies.
7.3. Trade Shows and Conferences
Attend trade shows and conferences to see the latest products and technologies firsthand. These events offer opportunities to network with industry professionals and attend educational seminars.
7.4. Continuous Learning
Commit to continuous learning and professional development to stay ahead of the curve. Take advantage of online courses, workshops, and training programs to enhance your skills and knowledge.
8. How to Choose the Right VVT Solenoid
Selecting the correct VVT solenoid is critical for ensuring optimal engine performance and reliability. Here’s what to consider when making your choice:
8.1. OEM vs. Aftermarket
OEM (Original Equipment Manufacturer):
- Pros: Guaranteed compatibility and quality, designed specifically for your vehicle.
- Cons: Higher cost.
Aftermarket:
- Pros: Lower cost, potential for improved performance.
- Cons: Quality and compatibility can vary.
8.2. Compatibility
Check Vehicle Specifications:
Ensure the VVT solenoid is compatible with your vehicle’s make, model, and year.
Verify Part Numbers:
Match the part number of the old solenoid with the new one to ensure correct fitment.
8.3. Quality and Reliability
Read Reviews:
Check online reviews and forums to see what other users say about the VVT solenoid.
Choose Reputable Brands:
Select VVT solenoids from well-known and trusted brands to ensure quality and reliability.
8.4. Warranty
Check Warranty Terms:
Ensure the VVT solenoid comes with a warranty to protect against defects and premature failure.
8.5. Installation
Consider Professional Installation:
If you’re not comfortable installing the VVT solenoid yourself, consider having a professional do it to ensure proper installation and function.
9. Safety Precautions
Working on your vehicle can be dangerous if proper safety precautions are not followed. Always prioritize safety to protect yourself and prevent damage to your vehicle.
9.1. Disconnect the Battery
Why: Prevents electrical shocks and damage to the vehicle’s electrical system.
How: Disconnect the negative terminal first, followed by the positive terminal.
9.2. Use Proper Tools
Why: Prevents injury and damage to components.
How: Use the correct size and type of tools for the job. Avoid using worn or damaged tools.
9.3. Wear Safety Gear
Why: Protects your eyes and hands from injury.
How: Wear safety glasses and gloves when working on your vehicle.
9.4. Work in a Well-Ventilated Area
Why: Prevents inhalation of harmful fumes.
How: Work in an open area or use a ventilation system to remove fumes.
9.5. Follow Service Manual Guidelines
Why: Ensures correct procedures are followed and prevents damage to the vehicle.
How: Refer to the service manual for your vehicle and follow the recommended procedures.
10. Frequently Asked Questions (FAQ)
Still have questions about VVT solenoids? Here are some frequently asked questions to help clarify any remaining doubts.
10.1. What is a VVT solenoid and what does it do?
The VVT (Variable Valve Timing) solenoid is an electromechanical component that controls the oil flow to the VVT actuator, which adjusts the timing of the engine’s valves. This adjustment optimizes engine performance and fuel efficiency based on driving conditions.
10.2. How do I know if my VVT solenoid is bad?
Common symptoms of a failing VVT solenoid include a check engine light, loss of power, poor fuel economy, and rough idling. Diagnostic tools like DTS-Monaco can help confirm the issue by reading fault codes and monitoring live data.
10.3. Can I drive with a bad VVT solenoid?
While it’s possible to drive with a failing VVT solenoid, it’s not recommended. Driving with a bad solenoid can cause reduced engine performance, poor fuel economy, and potential damage to other engine components.
10.4. How much does it cost to replace a VVT solenoid?
The cost to replace a VVT solenoid can vary depending on the vehicle’s make and model, as well as labor costs. On average, the cost ranges from $150 to $400, including parts and labor.
10.5. Is it difficult to replace a VVT solenoid myself?
Replacing a VVT solenoid is a relatively straightforward task that can be done with basic tools and mechanical knowledge. However, if you’re not comfortable working on your vehicle, it’s best to have a professional do it.
10.6. How often should I replace my VVT solenoid?
There’s no set replacement interval for VVT solenoids. They should be replaced when they fail or show signs of wear. Regular maintenance, such as oil changes and system inspections, can help extend the life of your VVT solenoid.
10.7. Can a bad VVT solenoid cause other engine problems?
Yes, a failing VVT solenoid can cause other engine problems, such as engine misfires, poor performance, and potential damage to the engine’s valves and pistons.
10.8. How can DTS-Monaco help with VVT solenoid replacement?
DTS-Monaco can help diagnose VVT solenoid issues, verify the correct operation of the new solenoid after replacement, and fine-tune the engine’s performance for optimal fuel efficiency and power through car coding.
10.9. Where can I get training on using DTS-Monaco for car coding and diagnostics?
DTS-MONACO.EDU.VN offers comprehensive training programs on car coding and diagnostics using DTS-Monaco. Our programs provide hands-on experience and expert instruction to help you master the necessary skills.
10.10. What are the benefits of using OEM VVT solenoids compared to aftermarket?
OEM VVT solenoids offer guaranteed compatibility and quality, as they are designed specifically for your vehicle. Aftermarket VVT solenoids may be more affordable but can vary in quality and compatibility.
Replacing the variable valve timing (VVT) solenoid is essential for maintaining your vehicle’s engine performance and fuel efficiency; a comprehensive understanding of the process and the right tools are critical for success. With resources and training from DTS-MONACO.EDU.VN, you can master car coding and diagnostics, ensuring optimal results. By utilizing software like DTS-Monaco and following expert guidance, you can enhance your skills and keep your vehicle running smoothly with car coding solutions, software tutorials, and automotive electronics.
Ready to take your automotive diagnostic and car coding skills to the next level? Visit DTS-MONACO.EDU.VN today to explore our comprehensive training programs and unlock the full potential of DTS-MONACO software. Call us at +1 (641) 206-8880 or visit our location at 275 N Harrison St, Chandler, AZ 85225, United States. Your journey to becoming an automotive expert starts here.